As a software developer, your success depends on your ability to efficiently manage your code base and collaborate with your team. In today's fast-paced development environment, it's crucial to have a reliable version control system that can handle the complexities of your projects. By implementing an intuitive and robust version control system, you can streamline your development process, improve collaboration, and ensure the integrity of your code.
One popular option that has gained significant traction in the developer community is the use of GitLab. This powerful platform offers an all-in-one solution for hosting code repositories, managing issues, and facilitating continuous integration and deployment. Whether you are a seasoned developer or just starting your coding journey, setting up GitLab on your Linux system can greatly enhance your development workflow.
In this comprehensive tutorial, we will walk you through the process of setting up GitLab on your Linux system, step by step. We will cover everything from the initial setup and configuration to creating and managing repositories, setting up CI/CD pipelines, and integrating with other development tools. By the end of this guide, you will have a fully functional GitLab instance running on your Linux system, ready to revolutionize your development process.
Why GitLab is a Vital Tool for Developers

In the realm of software development and collaborative project management, having a reliable and efficient tool is crucial for success. GitLab emerges as a central platform that provides developers with an innovative and comprehensive solution to streamline their workflow, enhance team collaboration, and ensure code integrity.
GitLab offers a robust version control system that allows developers to track changes and manage different iterations of their codebase effortlessly. With its advanced branching and merging capabilities, developers can work concurrently on multiple features, ensuring a smooth and organized development process.
One of the key advantages of GitLab is its integrated issue tracking and project management features. Developers can seamlessly create and assign tasks, set due dates, and monitor progress, all within the same platform. This functionality significantly simplifies project coordination and enhances team productivity.
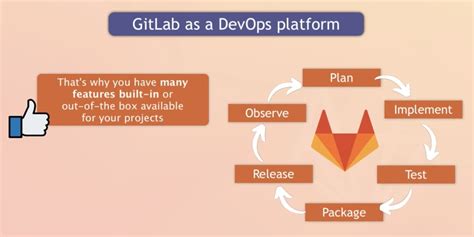
Moreover, GitLab provides a comprehensive continuous integration and deployment pipeline, enabling developers to automate their build and release processes. This not only saves time and effort but also reduces the likelihood of human error, ensuring that high-quality code is consistently delivered to users.
With its user-friendly interface and intuitive design, GitLab caters to developers at all skill levels, making it accessible for both beginners and experienced professionals. The platform also supports extensive customization options, allowing developers to adapt GitLab to their specific needs and workflows.
Overall, GitLab is an indispensable tool for developers, offering a wide range of features that streamline development processes, enhance team collaboration, and ensure code integrity. By utilizing GitLab, developers can significantly improve their productivity, efficiency, and code quality, ultimately leading to successful and timely project deliveries.
Setting up the Linux Environment for GitLab Configuration
In order to successfully install and configure GitLab on your Linux system, it is essential to ensure that the necessary prerequisites are met and the environment is properly set up. This section will guide you through the installation and configuration steps required to prepare your Linux system for GitLab setup.
- Choose a suitable Linux distribution: Select a Linux operating system that is compatible with GitLab and meets the system requirements.
- Install the Linux distribution: Follow the installation instructions provided by the chosen Linux distribution to set up the operating system on your machine.
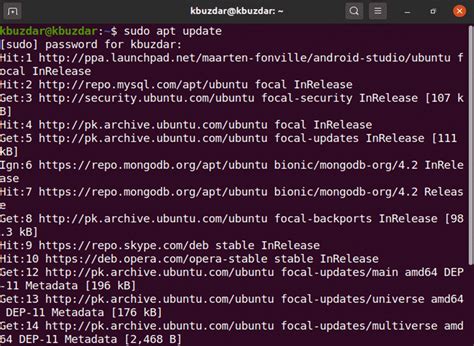
- Update the system packages: Use the package manager of your Linux distribution to update all system packages to their latest versions. This will ensure that you have the most up-to-date software and security patches.
- Configure the network settings: Set up the network configuration on your Linux system, including IP addresses, DNS settings, and network interfaces, to ensure proper connectivity.
- Create a dedicated user account: Create a non-root user account with appropriate privileges to run the GitLab application and perform administrative tasks.
- Install and configure prerequisite software: Install the required software dependencies, such as Git, Ruby, and PostgreSQL, and configure them according to the specified guidelines.
- Manage firewall settings: Adjust the firewall settings on your Linux system to allow incoming and outgoing network connections for GitLab.
By following these steps, you will establish a well-prepared Linux environment that meets the necessary requirements for installing and configuring GitLab.
Installation of Linux and Dependencies

In this section, we will walk you through the step-by-step process of installing a Linux operating system and the necessary dependencies required for setting up a stable environment. By following these instructions, you'll be able to create the foundation for a robust and efficient system.
Firstly, we need to install the Linux operating system on your machine. Choose a suitable distribution from a wide range of options available, such as Ubuntu, Fedora, or CentOS. It is crucial to select the distribution that best fits your requirements in terms of stability, user-friendliness, and compatibility with your hardware.
Once you've selected your desired Linux distribution, you can proceed with the installation process. Begin by downloading the ISO image of the distribution from the official website. Next, create a bootable USB drive or DVD using tools like Rufus or Etcher. Insert the bootable media into your system and reboot, ensuring that the installation media is set as the primary boot device.
Follow the on-screen prompts to start the installation process. This typically involves selecting your language preferences, partitioning your hard drive, and choosing additional software packages to install. It is recommended to allocate sufficient disk space for the Linux system, as well as consider creating separate partitions for the root directory, home directory, and swap space.
Once the installation is complete, you will have a basic Linux system up and running. However, to ensure the smooth functioning of GitLab and other applications, it is necessary to install the required dependencies. These dependencies may vary depending on the specific distribution you have chosen, but commonly include packages like Git, Ruby, PostgresSQL, and Nginx.
To install these dependencies, open the terminal and update the package repository by running the appropriate command for your Linux distribution. Then, use the package manager to install the necessary software packages. The package manager will automatically handle any additional dependencies required.
After the installation of the dependencies is finished, you will have a Linux system fully equipped with the necessary software to proceed with the GitLab setup. You can now move on to the next section, which will guide you through the installation and configuration of GitLab on your Linux system.
Installation and Configuration of GitLab on a Linux Environment
Setting up and configuring GitLab on a Linux operating system involves a series of steps to ensure a smooth and efficient installation process. This section focuses on the installation and initial configuration of GitLab on your Linux system.
Installation:
Before diving into the installation process, it is recommended to ensure that your Linux system meets the necessary prerequisites and dependencies required for GitLab. Once you have verified the requirements, you can proceed with the installation process.
First, you need to obtain the GitLab package repository for your specific Linux distribution. This can be achieved by adding the package repository to your system's package manager. After adding the repository, update your package lists and install the GitLab package.
After successfully installing GitLab, you can start the GitLab service and access the web interface via your preferred web browser.
Initial Configuration:
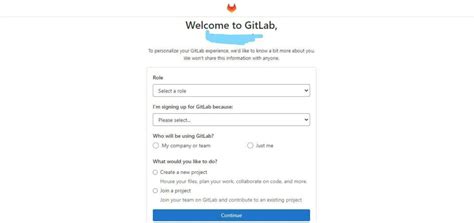
Once GitLab is installed, it is essential to perform the initial configuration to set it up according to your requirements.
During the initial configuration, you will be prompted to set the administrator password, configure the hostname and port, and specify other settings such as email notifications and TLS certificates.
Additionally, you can customize various features, such as enabling LDAP or OAuth authentication, configuring external services for CI/CD, and managing user permissions and roles.
After completing the initial configuration, you can start utilizing GitLab for your version control and collaboration needs in a Linux environment.
Remember to regularly update GitLab to access the latest features, bug fixes, and security patches.
Downloading, Installing, and Configuring GitLab on a Linux Environment

In this section, we will explore the process of acquiring, setting up, and customizing GitLab, a powerful version control system, on a Linux-based operating system. By following these steps, you will be able to effortlessly integrate GitLab into your workflow, enabling efficient collaboration and streamlined project management.
To begin, it is essential to obtain the necessary files for GitLab. This can be achieved by downloading the installation package directly from the official GitLab website. Once downloaded, the package can then be installed on your Linux system using the appropriate commands or package manager, ensuring a seamless and secure installation process.
After successful installation, the next step involves configuring GitLab to suit your specific requirements. This encompasses setting up administrative privileges, customizing user permissions, establishing access controls, and defining repository settings. By tailoring GitLab to your needs, you can optimize its functionality and define the rules and guidelines for collaborative software development within your organization.
As part of the configuration process, it is highly recommended to explore the various authentication options available in GitLab. This allows you to choose between different authentication methods such as LDAP, OAuth, or two-factor authentication (2FA), adding an additional layer of security to your GitLab instance. By implementing rigorous authentication measures, you can ensure that only authorized individuals can access and contribute to your repositories.
- Download the GitLab installation package from the official website.
- Install GitLab on your Linux system using appropriate commands or package manager.
- Configure GitLab by setting up administrative privileges, user permissions, access controls, and repository settings.
- Explore authentication options, including LDAP, OAuth, or two-factor authentication, to enhance security.
By following these steps and tailoring GitLab to your specific needs, you are well on your way to efficiently managing your projects, facilitating collaboration, and ensuring the security of your version control system in a Linux environment.
Creating and Managing Users in Your GitLab Environment
In order to effectively utilize GitLab, it's essential to understand how to create and manage users within your environment. Users are the backbone of your GitLab instance, as they are responsible for contributing code, managing projects, and collaborating with other team members. This section will walk you through the process of creating new users, assigning them appropriate permissions, and managing their access within your GitLab system.
- Understanding User Roles: GitLab offers various user roles, each with different levels of access and permissions. It's important to familiarize yourself with these roles and assign them accordingly to ensure the right users have the appropriate access to perform their tasks.
- Creating New Users: Whether you need to onboard new team members or provide access to external contractors, GitLab enables you to easily create new users within the platform. This section will guide you through the step-by-step process of creating new user accounts and setting up their initial credentials.
- Assigning User Permissions: Once you have created a user, it's crucial to assign them the necessary permissions to access specific repositories, projects, and functionalities within GitLab. This portion of the guide will outline how to manage user permissions effectively, ensuring that users have the appropriate access levels required for their roles.
- Managing User Access: As your GitLab environment grows, it becomes essential to manage user access to maintain security and control. This section will provide you with techniques to add or remove access for users, adjust their permissions, and monitor user activity to ensure the integrity of your codebase.
- Best Practices for User Management: To optimize user management within GitLab, it's important to follow best practices. This part of the guide will offer valuable tips and strategies for smooth user onboarding, user offboarding, and overall user account management to maintain a healthy and secure GitLab environment.
By understanding how to efficiently create and manage users in your GitLab environment, you can ensure smooth collaboration, streamline access control, and maximize the potential of your team's code contributions.
Creating and Managing User Accounts in GitLab: A Step-by-Step Walkthrough

In this section, we will explore the process of establishing and overseeing user accounts within the GitLab platform. By following these detailed instructions, you will gain the necessary knowledge and skills to effortlessly create, modify, and oversee user accounts in GitLab, thereby empowering you to efficiently manage access to your projects.
The first step in creating user accounts on GitLab involves accessing the platform's administrative panel. From here, you can navigate to the User section, where you will find a range of options for managing user accounts. Within this section, you will discover the capability to add new users, edit existing accounts, assign user permissions, and implement various security measures.
When adding a new user, it is imperative to gather the required information, such as a unique username, email address, and password. Once you have collected these details, you can proceed to the user creation page within GitLab. Here, you will find an intuitive form where you can enter the user's information and configure their initial settings.
Moving forward, GitLab offers a comprehensive array of options for fine-tuning user accounts. By utilizing the account editing feature, you can modify a user's username, email, and password. Additionally, GitLab allows you to manage user permissions and group associations, granting you control over their ability to access and interact with specific projects.
To ensure the security and integrity of your GitLab environment, it is essential to implement necessary precautions, such as two-factor authentication and password policies. GitLab provides straightforward steps for enabling these security measures, thereby bolstering the protection of user accounts and reducing the risk of unauthorized access.
In conclusion, this section has provided a step-by-step guide on creating and managing user accounts within GitLab. By following these instructions, you will be equipped to seamlessly establish new user accounts, modify existing ones, assign permissions, and implement security measures. With this knowledge, you will possess the necessary skills to efficiently administer user access within your GitLab environment.
Organizing Your Projects and Repositories in GitLab
One of the key features of GitLab is its powerful project and repository management capabilities. In this section, we will explore how to set up and organize your projects and repositories in GitLab, allowing for efficient collaboration and version control.
To begin, it is important to understand the difference between projects and repositories. A project in GitLab is a container that holds all the necessary files, code, and documentation related to a specific software development effort. It provides a centralized location for collaboration, issue tracking, and continuous integration. On the other hand, a repository is a location where the actual code and files are stored, along with the history of changes made to them.
When setting up your projects in GitLab, it is crucial to carefully plan the structure and naming conventions in order to ensure clarity and ease of navigation for your team. Consider organizing your projects based on different teams, departments, or specific functionalities to enhance the overall organization and accessibility.
Within each project, you can create multiple repositories to represent different components, modules, or versions of your software. This allows you to manage and track changes separately for each repository, providing a granular level of control and flexibility.
To create a new project in GitLab, navigate to the project creation page and provide a meaningful name, description, and visibility level for your project. You can also choose to initialize the repository with a README file, which serves as a starting point for documentation and collaboration.
Once your project is created, you can start adding repositories to it. GitLab provides a simple interface to create repositories within a project, allowing you to specify the name, description, and visibility level for each repository. Additionally, you can import existing repositories from other platforms or create a blank repository to begin with.
Managing your projects and repositories in GitLab not only helps to streamline your development process but also promotes efficient collaboration and version control among team members. By structuring your projects and repositories in an organized and systematic manner, you can easily navigate and manage your codebase, making it easier for everyone involved to contribute and work together effectively.
Creating and Managing Repositories and Projects in GitLab

In this section, we will explore the process of creating and managing repositories and projects in GitLab. We will delve into the steps involved in setting up repositories, creating projects, and organizing them effectively. By following these guidelines, you'll be able to maintain a well-structured and organized workflow in your GitLab environment that facilitates collaboration and version control.
- Getting started with repositories
- Understanding the purpose of repositories
- Creating a new repository
- Choosing repository visibility
- Configuring repository settings
- Defining project scope and goals
- Creating a new project
- Customizing project settings
- Adding collaborators and defining access levels
- Implementing a logical folder structure
- Utilizing labels and tags
- Grouping related projects
- Implementing a branch management strategy
- Cloning repositories locally
- Pushing and pulling changes
- Merging and resolving conflicts
- Implementing code reviews and pull requests
By following these essential steps and practices, you'll be able to effectively create and manage repositories and projects in GitLab, ensuring a streamlined and collaborative development process for your team. Take the time to familiarize yourself with the features and settings offered by GitLab to optimize your workflow and achieve successful project outcomes.
CS407 - How To Setup a GitLab Server
CS407 - How To Setup a GitLab Server by Ball Of Knives 2,922 views 3 years ago 25 minutes
FAQ
What is GitLab?
GitLab is a web-based open-source platform that provides version control for source code management and collaboration on projects.
Why would I want to set up GitLab on my Linux system?
Setting up GitLab on your Linux system allows you to have your own self-hosted Git repository, which gives you full control over your code and eliminates the need to rely on external services for version control.
What are the system requirements for installing GitLab on Linux?
The recommended system requirements for installing GitLab on Linux are a machine with at least 4 CPU cores, 4GB of RAM, 25GB of free disk space, and a high-performance solid-state drive (SSD) for the Git repositories.


