Are you tired of dealing with irritating buzzing sounds during your audio recordings or calls? Whether you are a podcaster, gamer, or professional using a microphone and headphones, this persistent problem can be frustrating to say the least. But fear not, because we have compiled a comprehensive troubleshooting guide to help you rid yourself of this pesky issue once and for all.
Enhancing the Clarity of Your Audio Recordings:
In today's fast-paced digital world, clear and high-quality audio has become indispensable. However, achieving crystal-clear sound can sometimes feel like an insurmountable challenge. One of the most common nuisances is the buzzing interference that can plague your microphone and headphones. This problematic background noise can detract from the overall quality of your recordings, leaving you feeling less than satisfied with the results.
Discovering the Source of the Disruption:
The first step in resolving this issue is to identify the source of the buzzing interference. This could stem from a variety of factors, such as electrical grounding issues, faulty cables, or even electromagnetic interference from nearby devices. Pinpointing the exact cause is crucial in order to implement the appropriate solutions that will quell the disruption and restore the pristine audio experience you desire.
Mastering the Art of Troubleshooting:
Now that you understand the importance of addressing buzzing interference, it's time to roll up your sleeves and delve into the world of troubleshooting. In the following sections, we will explore a range of effective strategies and techniques to help you eliminate this bothersome background noise. From checking your cable connections to adjusting your microphone's settings, each step is designed to guide you towards audio clarity and serenity.
Common Causes of Distorted Sound in Headset Microphones
When you experience a distorted or buzzing sound in your headset microphone, it can be frustrating and hinder communication. Understanding the common causes behind this issue can help you troubleshoot and resolve the problem effectively.
1. Environmental Interference: External factors such as electrical appliances, fluorescent lighting, or nearby electronic devices can cause interference, leading to buzzing or distortion in your microphone.
2. Loose Connections: Improperly connected cables or a loose headset connector can disrupt the audio signal, resulting in a buzzing sound. Ensure that all connections are secure and properly fitted.
3. Faulty Audio Cables: Damaged or faulty audio cables can introduce noise into the audio signal, leading to buzzing or distortion. Check for any signs of damage or wear on the cables and replace if necessary.
4. Ground Loop Issues: Ground loop occurs when there are multiple devices connected to different power sources, creating a loop of electrical current. This can result in interference and buzzing in your microphone. Using ground loop isolators or ensuring all devices are connected to the same power source can help resolve this issue.
5. Mic Placement: The position of your microphone can also contribute to buzzing or distortion. Placing the microphone too close to speakers or other sources of noise can lead to feedback or interference, causing unwanted buzzing sound.
6. Software Settings: Incorrect or misconfigured microphone settings on your computer or recording software can also cause buzzing or distorted sound. Ensure that the microphone settings are properly adjusted, and any software enhancements or effects are disabled to eliminate unwanted noise.
By identifying the common causes behind a buzzing microphone in headphones, you can troubleshoot and address the issue effectively. Remember to check for environmental interference, ensure proper connections, inspect audio cables, address ground loop issues, consider microphone placement, and review software settings to resolve any buzzing or distorted sound in your headset microphone.
Potential reasons for buzzing interference and effective troubleshooting
In the context of headphone microphones, a buzzing noise can arise from various factors that disrupt the sound quality. By identifying the potential reasons behind this interference, users can take appropriate troubleshooting steps to rectify the issue. Here are some common causes and methods to help identify and resolve buzzing problems:
- Electromagnetic Interference (EMI): EMI caused by nearby electronic devices or power sources can lead to buzzing in microphones. To identify this, try moving away from such devices or turning them off temporarily to check if the buzzing noise disappears.
- Poor Cable Connections: Faulty or loose cable connections can result in buzzing. Ensure that all connections are secure and undamaged, and consider using alternative cables to see if the buzzing persists.
- Ground Loops: Ground loops occur when multiple interconnected devices have different grounding potentials, leading to buzzing interference. Try disconnecting unnecessary devices or using ground loop isolators to eliminate this issue.
- Inadequate Power Supply: Insufficient power supply can introduce buzzing in microphones. Verify that your microphone is receiving the correct voltage and consider using a power conditioner or different power source if necessary.
- Microphone Placement: Improper microphone placement can cause buzzing due to proximity to sources of electromagnetic interference. Adjusting the microphone's position or using a shielded microphone can help mitigate this problem.
- Faulty Components: Defective or faulty microphone components can also be a potential cause of buzzing. Check for any visible damage or contact the manufacturer for further assistance in resolving the issue.
By considering these potential reasons and performing the corresponding troubleshooting steps, users can effectively identify and address buzzing problems in headphone microphones, ultimately restoring optimal sound quality for their audio recordings or communication needs.
Inspecting and Cleaning Your Headphone Jack
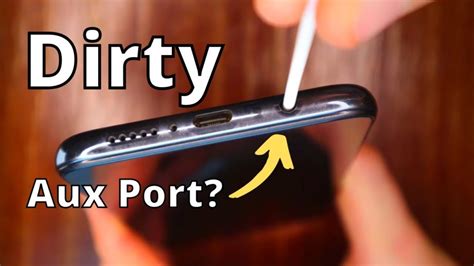
Ensuring optimal performance: One of the crucial components of your headphones is the headphone jack. It acts as a connector between your headphones and the device you are using. Over time, dust, dirt, or other debris can accumulate in the headphone jack, leading to a decrease in audio quality or even causing a buzzing sound. Therefore, it is essential to periodically inspect and clean your headphone jack to maintain its functionality.
Examining your headphone jack: To begin, gently inspect the headphone jack of your device for any visible signs of dirt or damage. Look for particles that may have become lodged inside the jack. You may use a flashlight to get a clearer view of the internal components. It is important to be cautious and avoid inserting sharp objects into the jack, as this may cause further damage.
Cleaning the headphone jack: If you notice any debris, you can carefully clean the headphone jack to eliminate the potential cause of the buzzing sound. Start by turning off your device and disconnecting the headphones. Next, you can use a small brush, such as a soft-bristled toothbrush or a specialized headphone cleaning brush, to gently sweep away any visible dirt or dust from the jack. Be sure to avoid applying excessive pressure or using any liquids that may damage the internal components.
Preventing future issues: Once you have cleaned the headphone jack, it is advisable to establish a regular cleaning routine to prevent future build-up. Store your headphones in a clean and dust-free environment when not in use. Additionally, consider using protective covers or dust plugs to minimize the accumulation of debris in the jack. By taking these precautions, you can prolong the life of your headphones and maintain optimal audio quality.
Step-by-Step Guide to Maintaining a Clear Microphone Sound by Cleaning the Audio Jack
In this section, we will provide you with a comprehensive guide on how to clean the audio jack of your device to eliminate any unwanted buzzing or interference in your microphone sound. Proper maintenance of the audio jack is crucial to ensure a seamless audio experience without any disturbances.
To begin with, it is important to gather the necessary tools and materials for cleaning the audio jack. You will need a soft brush or toothbrush, rubbing alcohol, a cotton swab, and a can of compressed air. These tools will aid in removing any dirt, dust, or debris that may be causing the buzzing or interference.
- Step 1: Start by turning off your device and unplugging the headphones from the audio jack.
- Step 2: Take the soft brush or toothbrush and gently brush the audio jack to remove any visible dirt or debris. Be careful not to apply too much pressure to avoid damaging the jack.
- Step 3: Moisten a cotton swab with rubbing alcohol, ensuring it is not dripping wet. Gently insert the cotton swab into the audio jack and carefully rotate it to remove any stubborn dirt or residue. Avoid using excessive force to prevent any potential damage.
- Step 4: Once you have cleaned the audio jack with the cotton swab, use a can of compressed air to blow away any remaining dirt or dust. Hold the can upright and direct short bursts of air into the audio jack to ensure a thorough cleaning.
- Step 5: After cleaning, allow the audio jack to dry completely before plugging in your headphones again.
Regularly cleaning the audio jack of your device will help maintain a clear and buzzing-free microphone sound. It is recommended to perform this cleaning routine periodically, especially if you frequently use your headphones in dusty or dirty environments. By following these simple steps, you can ensure optimal audio quality and an enjoyable listening experience.
Checking and Adjusting the Microphone Settings on Your Device
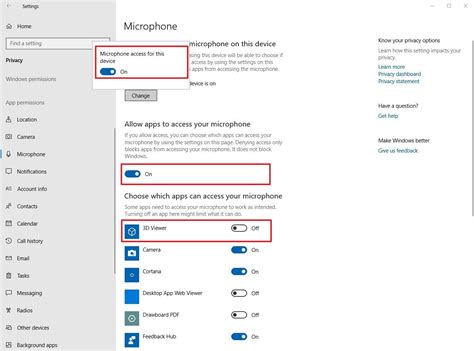
Ensuring optimal microphone performance on your device involves checking and adjusting certain settings. By carefully reviewing these settings, you can troubleshoot and address any potential issues that may cause buzzing or other disturbances during microphone use.
1. Start by accessing the audio settings on your device. Typically, you can find these settings by navigating through the system preferences or control panel. Look for options that are related to audio, sound, or microphone settings.
- Commonly, you will find options to adjust the microphone volume or gain. It's important to strike a balance between a loud enough signal and avoiding distortion.
- Check if there are any noise reduction or cancellation features available. Enabling these features can help reduce unwanted buzzing or background noise.
- Look for any microphone boost options. This feature can amplify the microphone's input, but be cautious as it may also amplify background noises.
2. Next, confirm that the correct microphone is selected as the input device. Some devices have multiple microphones, so it's essential to choose the right one. Review the available options and select the microphone that corresponds to your headphones or external microphone.
- If you're using external headphones with a built-in microphone, ensure that the correct audio input/output is selected for both the headphones and microphone.
- For wired microphones, verify that the connector is securely plugged into the correct port on your device.
3. Additionally, inspect the physical condition of your microphone and headphone connections. Dust, dirt, or loose connections can cause buzzing or poor audio quality. Clean the connectors and ensure they are snugly inserted.
4. Finally, test the microphone after adjusting the settings. Use a voice recording or communication application to verify if the buzzing issue is resolved. If the problem persists, revisit the settings and consider trying alternative headphones or microphones to determine if there are hardware-related concerns.
Remember, each device and operating system may have slightly different options and interfaces for adjusting microphone settings. You may need to refer to the user manual or online resources specific to your device for more detailed instructions.
Tweaking microphone settings to troubleshoot the buzzing issue
In this section, we will explore various methods of addressing the buzzing problem in your headphones by making adjustments to the microphone settings. By manipulating different settings, you can potentially eliminate or minimize the buzzing sound that occurs during audio recordings or communication.
1. Microphone sensitivity: Adjusting the sensitivity level of your microphone can have a significant impact on the buzzing issue. Lowering the sensitivity may help reduce background noise and minimize buzzing. However, it is crucial to find the right balance to avoid compromising the quality of your recordings or voice clarity.
- Open the audio settings on your device or application.
- Locate the microphone sensitivity or gain control.
- Gradually decrease the sensitivity until you notice a decrease in buzzing noise.
- Test the microphone to ensure your voice is still clear and audible.
2. Microphone positioning: Sometimes, the buzzing issue can be caused by the microphone's physical placement. By repositioning the microphone, you may be able to minimize interference and reduce buzzing. Try the following tips:
- Keep the microphone away from electronic devices that emit electromagnetic fields, such as power adapters or routers.
- Avoid placing the microphone too close to your mouth or any other source of unwanted noise.
- Experiment with adjusting the distance and angle of the microphone to find the optimal position for reducing buzzing.
3. Audio enhancements: Some audio settings or enhancements can contribute to the buzzing issue. Consider disabling or adjusting the following options:
- Noise suppression: While noise suppression can be useful in certain scenarios, it may also interfere with the microphone signal and cause buzzing. Disable or adjust this feature if available.
- Acoustic echo cancellation: This feature is designed to eliminate echo during calls, but it can sometimes introduce buzzing. Try disabling or adjusting it.
4. Update drivers and software: Outdated or incompatible drivers and software can cause various audio issues, including buzzing. Make sure your microphone drivers and any relevant software are up to date. Visit the manufacturer's website or use automatic tools to check for updates and install them if necessary.
By tweaking microphone settings and considering external factors, you can troubleshoot the buzzing issue in your headphones effectively. Remember to test the changes after each adjustment to ensure that the buzzing is minimized without compromising the overall audio quality.
Improving Microphone Performance by Updating Audio Drivers
In order to enhance the functionality and performance of your microphone, it is important to regularly update your audio drivers. These drivers serve as a vital communication link between your microphone and the operating system of your computer, ensuring proper compatibility and optimal performance.
Updating your audio drivers can bring numerous benefits to your microphone performance. It can resolve any compatibility issues that may be causing buzzing or other unwanted sounds during audio recordings or calls. Additionally, updated drivers often come with bug fixes and optimizations that can significantly improve the overall quality of your microphone audio.
There are a few different methods you can use to update your audio drivers:
| Method | Description |
| 1. Manual Update | This method involves manually searching for the latest drivers on the manufacturer's website and downloading them to your computer. Once downloaded, you can then install the drivers by following the provided instructions. |
| 2. Automatic Update | Using driver update software or built-in update tools in your operating system, you can automate the process of finding and installing the latest audio drivers. This method saves time and ensures that you have the most up-to-date drivers for your microphone. |
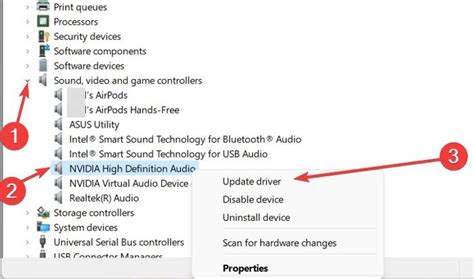
| 3. Windows Device Manager | The Device Manager in Windows allows you to easily update your audio drivers. Simply navigate to the Device Manager, locate the audio device, right-click on it, and select "Update driver". Windows will then search for the latest drivers and install them for you. |
Regardless of the method you choose, it is important to regularly check for audio driver updates to ensure optimal microphone performance. By keeping your drivers up to date, you can address any potential issues and enjoy improved audio quality during your microphone usage.
Exploring the Significance of Updated Drivers and How to Keep Them Up-to-Date
In this section, we will delve into the crucial role that up-to-date drivers play in ensuring optimal performance and stability of your audio system. Keeping your drivers updated is an important aspect of maintaining the functionality of your microphone and headphones.
Firstly, it is essential to understand what drivers are and how they function. Drivers are software programs that facilitate communication between your hardware devices and the operating system of your computer. They act as intermediaries, translating commands from the operating system into a language that the hardware can understand and vice versa.
Now, you might wonder why keeping drivers up-to-date is significant. Updated drivers often come with bug fixes, performance improvements, and compatibility enhancements. They can address various issues that may cause buzzing or other audio problems in your headphones, such as outdated or incompatible drivers that struggle to handle the demands of modern applications or hardware.
Fortunately, updating drivers can be done quite easily. Typically, you can obtain the latest drivers from the manufacturer's website or the official support page of the hardware device. These websites usually provide a dedicated section for driver downloads, allowing users to search for and download the appropriate drivers for their specific model.
If you are unsure about the exact model or version of your hardware device, you can check the device manager on your computer. The device manager provides a list of all the hardware devices connected to your system, along with their corresponding driver information. From there, you can identify the device and find the relevant drivers on the manufacturer's website.
Once you have determined the correct drivers for your audio system, it is crucial to follow the manufacturer's instructions to ensure a smooth installation process. This may involve downloading an installation file, running a setup program, or manually updating drivers through the device manager.
In conclusion, regularly updating your drivers is vital for avoiding buzzing or other audio issues in your headphones. By keeping your drivers up-to-date, you can enhance performance, stability, and compatibility while ensuring the optimal functioning of your microphone and headphones.
Isolating the Buzzing Issue: Testing with Different Headphones
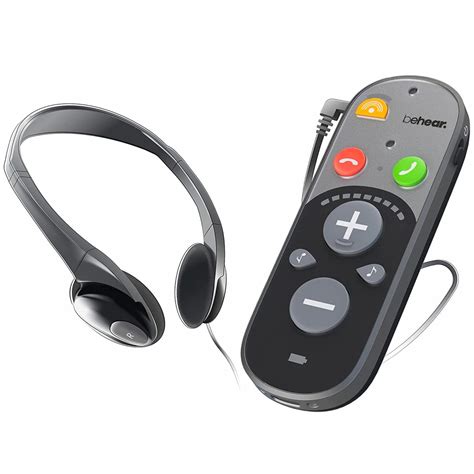
Exploring various headphones to identify and address the buzzing problem is an essential step in troubleshooting microphone issues. By using a variety of headphones, we can ascertain whether the buzzing noise originates from the microphone itself or is related to the specific set of headphones being used.
By conducting systematic tests with different types of headphones such as in-ear, over-ear, or wireless, we can isolate the issue and determine if the buzzing persists across various devices. This process allows us to narrow down potential causes and explore specific solutions accordingly.
| Headphone Type | Results |
|---|---|
| In-ear Headphones | While testing with in-ear headphones, note any buzzing or interference. If the buzzing persists across multiple devices and does not vary significantly, the issue may lie with the microphone or its settings. |
| Over-ear Headphones | When testing with over-ear headphones, pay attention to any buzzing or static noise. If the buzzing sound occurs consistently across different devices and settings, it indicates a potential issue with the microphone itself. |
| Wireless Headphones | Testing with wireless headphones helps determine if the buzzing is caused by interference or signal issues. If the buzzing noise occurs only while using wireless headphones, it might be necessary to adjust the Bluetooth settings or consider using a wired connection for better audio quality. |
Once we have isolated the buzzing issue to either the microphone or the specific set of headphones being used, we can proceed with the appropriate troubleshooting steps to resolve the problem effectively.
Identifying the Source of Buzzing: A Headphone Change Can Make a Difference
When troubleshooting microphone buzzing issues in headphones, it can be difficult to determine whether the problem lies in the headphones themselves or in the microphone. To help narrow down the cause, one effective method is to change the headphones you are using.
By swapping out your current headphones with a different pair, you can test whether the buzzing persists or if it goes away. If the buzzing disappears when using a different set of headphones, it is likely that the issue lies with your original pair of headphones. On the other hand, if the buzzing remains, it indicates that the problem lies with the microphone or its connection.
Changing headphones can provide valuable insight into the source of the buzzing issue. It helps determine if the problem is isolated to the headphones themselves, such as a loose wire or faulty drivers, or if it is related to the microphone or its settings. Additionally, it can rule out environmental factors or interference from other devices that may be affecting the audio quality.
To further narrow down the cause, you can also try using the original headphones on a different device. If the buzzing persists when using the headphones with another device, it further confirms that the issue lies with the headphones rather than the microphone.
Once you have identified whether the problem lies in your headphones or the microphone, you can then proceed with the appropriate troubleshooting steps to address the issue. This may involve repairing or replacing the headphones if they are at fault or adjusting settings and checking connections if the microphone is the source of the buzzing.
| Pros of Changing Headphones: | Cons of Changing Headphones: |
|---|---|
| - Helps determine the source of buzzing - Rules out headphone-related issues - Provides insights into environmental factors | - Requires access to additional headphones - May not entirely solve the buzzing issue - Additional cost if purchasing new headphones |
Eliminating Buzzing with a Ground Loop Isolator
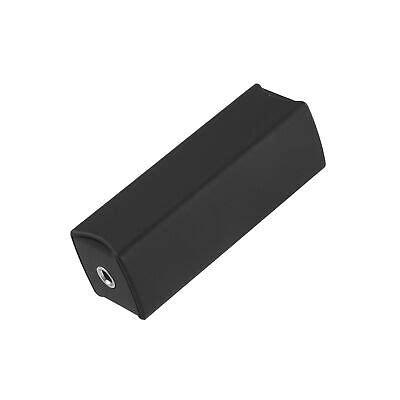
When facing the issue of unwanted buzzing in your headphones, one effective solution you can utilize is a ground loop isolator. This device helps eliminate electrical interference and provides a clean audio signal for a pleasant listening experience.
Often caused by a difference in electrical grounding between components, ground loops can introduce buzzing or humming noises into your audio. A ground loop isolator acts as a mediator, breaking the loop and reducing or eliminating the buzzing sound.
Installing a ground loop isolator is a straightforward process. Start by identifying the audio source that is causing the issue. This could be your computer, audio interface, or any other device connected to your headphones. Locate the audio output on the problematic device and connect the ground loop isolator inline with the audio cable.
Make sure to use a ground loop isolator that matches the type of audio connections you have. They come in various forms, including 3.5mm, RCA, and XLR connectors. Simply insert the isolator between the audio output and the input of your headphones, and you should notice a significant reduction in buzzing noises.
If you are using multiple audio devices, it may be necessary to install a ground loop isolator for each connection to ensure complete elimination of buzzing. Additionally, keep in mind that while a ground loop isolator is effective in most cases, it may not be a solution for all types of buzzing issues.
Remember, the purpose of a ground loop isolator is to break the electrical loop causing interference, thus providing a clean audio signal to your headphones. By utilizing this tool, you can enjoy a buzz-free listening experience and immerse yourself in your favorite music or audio content without any distractions.
[MOVIES] [/MOVIES] [/MOVIES_ENABLED]FAQ
Why is my microphone buzzing when I use headphones?
The buzzing sound in your microphone when using headphones can be caused by various factors. It could be due to a faulty cable connection, electromagnetic interference, outdated drivers, or even faulty headphones.
How can I fix the buzzing sound in my microphone headphones?
There are a few troubleshooting steps you can try to fix the buzzing sound in your microphone headphones. First, check the cable connections and ensure they are secure. Next, try using a different pair of headphones to see if the issue persists. Updating your audio drivers and isolating your microphone from any potential sources of electromagnetic interference can also help resolve the problem.
What should I do if the buzzing sound only occurs with specific applications?
If the buzzing sound is only present when using certain applications, there might be compatibility issues or settings that need adjustment. Make sure you have the latest version of the application installed and check its audio settings. You can also try using different audio settings, such as changing the sample rate or disabling any audio enhancements.
Why does the buzzing sound in my microphone headphones get worse when I move around?
If the buzzing sound in your microphone headphones worsens when you move around, it could indicate a loose or faulty connection. Check your cable connections and make sure they are securely plugged in. If the issue persists, you may want to try using a different cable or contact the manufacturer for further assistance.
Is there a way to prevent the buzzing sound in microphone headphones?
While it's not always possible to completely eliminate the buzzing sound, there are some steps you can take to minimize it. Using high-quality headphones with good shielding, keeping your cables away from potential sources of electromagnetic interference, and regularly updating your drivers can help reduce the occurrence of buzzing in your microphone headphones.
Why is my microphone making a buzzing sound in my headphones?
This buzzing sound can be caused by a few different issues. It could be due to a faulty or damaged microphone cable, interference from other electronic devices, or a problem with the audio settings on your computer or device.


