Whether you consider yourself a true audiophile seeking an immersive sonic experience or simply rely on your trusty pair of earbuds to get through the day, we've all experienced the frustration that comes with technical malfunctions. In an increasingly wireless world, it can be disheartening when your wired personal audio devices refuse to cooperate. However, fret not, as there are a variety of troubleshooting techniques that can help restore your listening pleasure.
Imagine this: you're trying to enjoy your favorite playlist during a long commute or losing yourself in the captivating storyline of an audiobook, when suddenly, silence takes over. The symphony of sounds that once reverberated in your ears has been replaced by an eerie absence. It's in these moments that you realize the importance of a smoothly functioning pair of headphones or earphones.
Fortunately, there are some simple steps you can take to overcome these exasperating issues and get back to enjoying your audio content uninterrupted. From testing alternative devices and ensuring proper connectivity to the more advanced techniques of cleaning and repairing, it's vital to arm yourself with knowledge and a willingness to troubleshoot.
Discovering alternative devices:
When faced with malfunctioning wired personal audio devices, the first step is to assess the possibility of hardware or software problems. Start by verifying if other audio devices are functional when connected to the same audio source. This will help eliminate the chance of any broader issues with your audio player or device. Connecting your headphones or earphones to alternative devices can also shed light on whether the problem lies in the audio port or the device itself.
Ensuring proper connectivity:
One of the most common culprits behind faulty wired audio devices is loose or improper connections. A simple yet crucial step is to ensure that all connectors are fully inserted into their respective ports. Gently give each plug a firm push to guarantee a secure connection. You may also want to ensure that any inline volume controls or other buttons on the cable are not causing interference.
Remember, a stable and secure connection is the key to resolving any audio woes.
Check the Connection

When facing issues with your wired headphones, the first step towards troubleshooting is checking the connection. This entails examining the link between your headphones and the device they are connected to.
Begin by ensuring that the connection between the headphone jack and the audio port is secure. Sometimes, firm pressure or accidental tugs can loosen the connection, resulting in audio problems. Give a gentle twist to the headphone plug to ensure it is fully inserted into the audio port.
Additionally, inspect the cable of the headphones for any visible signs of damage, such as frayed wires or bends. These physical defects can cause interruptions in the audio signal. If any issues are found, consider replacing the cable or seeking repair services.
It is also worth determining if the problem lies with the device itself. Try plugging the headphones into a different audio port, such as a different device or a different audio input on your computer. If the audio works correctly on other devices, the issue may be specific to the original device or its audio settings.
Furthermore, test the headphones with a different audio source, such as another pair of headphones or speakers. This test can help discern if the issue is with the headphones or with the audio source itself. If other audio devices work properly with the same audio source, the problem likely lies with the headphones.
By thoroughly checking the connection between the headphones and the device, as well as performing additional tests, you can effectively narrow down the cause of the audio issues and take appropriate steps towards resolving them.
Clean the Headphone Jack
In this section, we will discuss a crucial step in troubleshooting headphone connectivity issues – cleaning the audio port through which the headphones are plugged in. Over time, debris, dust, or lint can accumulate in the headphone jack, causing a poor connection or even complete failure in audio output. By following the steps below, you can effectively clean the headphone jack and improve its performance.
Step 1: Power off the device.
Before attempting to clean the headphone jack, it is essential to turn off the device to prevent any possible damage. This step will ensure the safety of both the device and the headphone jack during the cleaning process.
Step 2: Inspect the headphone jack.
Take a careful look at the headphone jack and examine if there is any visible debris, dust, or lint. This could be causing the connectivity issues. Use a flashlight if needed to check for any blockage in the port.
Step 3: Remove debris with a soft bristle brush.
Gently brush the inside of the headphone jack using a soft-bristled brush, such as a clean toothbrush or a specialized electronics cleaning brush. Ensure that the bristles reach the bottom of the port to remove any accumulated debris. Be cautious not to apply excessive force to avoid damaging the jack.
Step 4: Use compressed air to blow away loose particles.
If there is still visible debris after brushing, you can use compressed air to blow away any loose particles that might be stuck in the headphone jack. Hold the canister upright and use short bursts of air to prevent any moisture from entering the port.
Step 5: Verify the cleanliness and test the headphones.
After completing the cleaning process, visually check if the headphone jack is now clean and free from any debris. Insert the headphones into the jack and test the audio output. If the headphones are functioning properly, congratulations! If not, consider seeking further assistance or exploring alternative solutions.
By regularly cleaning the headphone jack, you can maintain optimal connectivity and ensure a seamless audio experience with your wired headphones.
Test the Earphones on a Different Device

One possible troubleshooting step when experiencing issues with your connected earphones is to test them on a separate device. By connecting your earphones to another device, you can determine whether the problem lies with the headphones themselves or with the original device they were connected to. This process involves connecting the earphones to a different device and checking whether they function properly.
- Select a different device to use for testing, such as a smartphone, tablet, or another audio device.
- Ensure that the earphone connector is compatible with the selected device's audio jack.
- Connect the earphones to the device's audio jack firmly.
- Play audio on the device and listen for any sound through the earphones.
- Check the sound quality, volume level, and if any strange noises or distortions are present.
If the earphones work correctly on the different device, this indicates that the issue might be with the original device or its settings. In this case, you can try troubleshooting the original device to resolve the problem. However, if the earphones still do not function properly on the different device, this suggests that the issue lies with the earphones themselves.
Testing the earphones on another device can help identify the source of the problem and narrow down the troubleshooting options. It provides valuable information for determining whether the issue is with the earphones or the device they were originally connected to. By isolating the problem, you can take appropriate steps to resolve the issue and get your earphones working again.
Update or Reinstall the Audio Driver
In case you encounter a problem with your wired headphones not functioning properly, it could be related to the audio driver on your device. The audio driver serves as the communication link between your headphones and the operating system, facilitating the transmission of sound signals. If the audio driver is outdated, incompatible, or corrupted, it might cause issues with your headphones.
One recommended solution is to update or reinstall the audio driver. By updating the driver, you can ensure that you have the latest version, which often includes bug fixes and improvements. This can potentially resolve any compatibility issues and provide better overall performance for your wired headphones.
To update the audio driver, you can start by checking the manufacturer's website for your device. They usually have a support section where you can find the latest driver versions for download. If available, download and install the updated driver following the provided instructions.
If updating the driver doesn't solve the problem, you can try reinstalling it. This involves uninstalling the current driver and then installing it again. To do this, you can access the Device Manager on your computer, locate the audio driver, right-click on it, and select the option to uninstall. Once uninstalled, restart your computer and the operating system will automatically reinstall the driver. Alternatively, you can also download the driver from the manufacturer's website and manually install it.
Reinstalling the audio driver can help fix any corrupted files or settings that may be causing the issues with your wired headphones. It essentially provides a clean installation of the driver, allowing for a fresh start and a higher chance of resolving the problem.
Remember to restart your device after updating or reinstalling the audio driver to ensure the changes take effect. If the wired headphones still do not work after these steps, you may need to consider other troubleshooting options or consult a professional for further assistance.
Replace the Headphone Cable

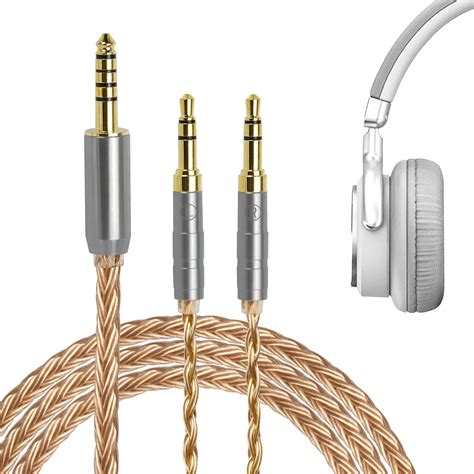
One possible solution to address issues with your wired headphones involves replacing the cable connecting them to your device. This step can help resolve problems related to sound quality, audio cutting out, or intermittent connections.
When faced with difficulties such as distorted sound or unreliable audio playback, it can be frustrating to wonder what might be causing the issue. A potential culprit could be a faulty or worn-out headphone cable. By replacing the cable, you can eliminate this possibility and improve the overall performance of your headphones.
| Steps to Replace the Headphone Cable: |
| 1. Start by identifying the type of connector on your headphones. Common types include a 3.5mm audio jack or a proprietary connector. |
| 2. Purchase a new cable that matches the connector type and is compatible with your headphones. |
| 3. Power off any connected devices and unplug the headphones from the audio source. |
| 4. Locate the connection point of the existing cable to the headphones. This could be at the ear cups or on the inline remote control if present. |
| 5. Gently detach the old cable from the headphones, taking care not to damage any delicate components. |
| 6. Connect the new cable to the headphone's connection point, ensuring a secure fit. |
| 7. Plug the other end of the new cable into the audio source. |
| 8. Power on the devices and test the headphones to ensure they are functioning properly. |
By following these steps, you can replace the headphone cable and increase the lifespan and performance of your wired headphones. Remember to choose a high-quality replacement cable to ensure optimal audio transmission and durability.
Contact Customer Support or Seek Professional Help
If you have exhausted all troubleshooting options and your wired headphones are still experiencing difficulties, it may be time to seek further assistance. Whether it is a hardware issue or a problem with your audio device, reaching out to customer support or consulting a professional can provide you with the necessary expertise and guidance to resolve the problem.
Customer support is a valuable resource that many headphone manufacturers and retailers offer. By contacting their support team, you can receive personalized assistance tailored to your specific issue. They can provide step-by-step instructions, troubleshooting tips, or even arrange for a repair or replacement if necessary.
Seeking professional help is another option worth considering. If you are unable to resolve the problem on your own or the issue seems more complex, consulting a professional technician can provide you with an in-depth diagnosis and effective solution. They have the expertise and tools required to identify and fix hardware or software issues that may be affecting your headphones.
It is important to keep in mind that contacting customer support or seeking professional help may involve additional costs, depending on your warranty coverage and the specific circumstances. However, the cost is often justified by the expert advice and assistance you will receive, potentially saving you time and frustration in the long run.
In conclusion, if your wired headphones are still not working despite your best efforts, reaching out to customer support or seeking professional help can be a wise decision. These resources can provide you with the necessary expertise and guidance to resolve the issue effectively, ensuring you can continue enjoying your audio experience.
Why Doesn't My Headset Mic Work & How to Fix it (3.5mm audio cable)
Why Doesn't My Headset Mic Work & How to Fix it (3.5mm audio cable) by Maraksot78 5,833,764 views 4 years ago 7 minutes, 7 seconds
FAQ
My wired headphones are not producing any sound. What should I do?
If your wired headphones are not producing any sound, there are a few things you can try. First, make sure the headphones are properly connected to the device. Check if the headphone jack is fully inserted into the audio output port. You can also try using the headphones with a different device to see if the issue is with the headphones or the original device. If the headphones still don't work, the problem could be with the headphones themselves, and you may need to consider getting them repaired or replaced.
Why is there distorted sound coming from my wired headphones?
If you are experiencing distorted sound from your wired headphones, there could be a few reasons for this. First, check if the audio source is the problem. Try playing different types of audio files or streams to see if the distortion persists. If the distortion only occurs with a specific audio source, the issue may lie with the file or the streaming service. However, if the distortion is present across different audio sources, it could be a problem with the headphones themselves. In this case, you can try cleaning the headphone jack and the audio connectors to remove any dirt or debris that may be causing the issue. If the problem persists, it may be necessary to get the headphones checked or replaced.
My wired headphones keep disconnecting and reconnecting. How can I fix this issue?
If your wired headphones keep disconnecting and reconnecting, there are a few troubleshooting steps you can try. Firstly, check if the headphone jack is loose or damaged. If it is loose, try inserting it firmly into the audio output port. You can also try using the headphones with a different device to see if the disconnection issue persists. If the problem occurs with multiple devices, it could indicate a problem with the headphones themselves. In such cases, you can try replacing the audio cable or getting the headphones repaired. Additionally, ensure that the headphone cable is not tangled or twisted, as this can sometimes cause intermittent disconnection issues.


