Are you experiencing difficulties when trying to connect your favorite headphones to your Realtek sound system? We understand how frustrating it can be when your headphones go undetected, preventing you from enjoying your favorite music or engaging in immersive gaming experiences. Fear not, as we have some troubleshooting tips and solutions to help you get your headphones up and running again.
Unveiling Hidden Audio Potential
When it comes to technology, there might be times when your Realtek sound system fails to recognize your headphones, leaving you puzzled. Fortunately, we're here to give you a comprehensive guide to overcoming this hurdle and unleashing the full audio potential of your headphones. By following some simple steps, you can troubleshoot the issue and resolve it without the need for extensive technical knowledge. So, let's dive in and explore the possible solutions together.
Unleash the Ultimate Sound Experience
If your Realtek sound system is unable to detect your headphones, it may be helpful to understand the underlying factors that could be causing this inconvenience. From software misconfigurations to outdated drivers, several factors can contribute to the problem. However, armed with the right knowledge and a little patience, you can overcome these obstacles and restore the seamless sound experience you deserve. Let's explore some of the potential causes and the corresponding troubleshooting steps to resolve them.
Troubleshooting Steps for Realtek Headphone Detection Issues

Encountering issues with headphone detection on your Realtek sound system can be frustrating, but there are several steps you can take to troubleshoot and resolve the problem. By following these troubleshooting steps, you can ensure that your Realtek system properly recognizes and detects headphones.
- Check the headphone connection: First and foremost, make sure that your headphones are properly connected to your device. Ensure that the headphone jack is securely plugged into the appropriate port and that there are no loose connections.
- Verify headphone compatibility: It is important to ensure that your headphones are compatible with your Realtek sound system. Check the specifications of your headphones and make sure they are supported by the Realtek audio drivers.
- Update Realtek audio drivers: Outdated or incompatible audio drivers can often cause headphone detection issues. Visit the official Realtek website or your device manufacturer's website to download and install the latest audio drivers for your system.
- Restart the system: Sometimes, a simple system restart can resolve headphone detection problems. Restart your device and check if the headphones are now being detected by the Realtek system.
- Disable audio enhancements: Some audio enhancements or virtual surround sound settings may interfere with headphone detection. Access the sound settings on your device and disable any audio enhancements, virtual sound options, or special effects that may be enabled.
- Check audio settings and control panel: Ensure that the audio settings on your device are properly configured to recognize headphones. Open the sound control panel or audio settings and ensure that the headphone option is selected as the default playback device.
- Try different headphones: If possible, try using a different pair of headphones to rule out any issues with the specific headphones you are currently using. If the alternative headphones are detected by Realtek, the problem may lie with the original pair.
- Consider hardware issues: If none of the above steps resolve the headphone detection problem, it is possible that there might be a hardware issue. In such cases, contacting the manufacturer's customer support or seeking assistance from a professional technician is recommended.
By following these troubleshooting steps, you can increase the chances of resolving headphone detection issues with your Realtek sound system. Remember to check each step carefully and ensure that you are following the instructions accurately.
Check Hardware Connections
Ensuring proper hardware connections is essential when troubleshooting issues related to headphone detection on devices using Realtek audio drivers. Properly connecting the headphones to the audio port and verifying that all cables are secure is the first step in resolving any potential connectivity problems.
A good starting point is to inspect the audio cable connecting the headphones to the audio port. Check for any signs of damage or wear and make sure it is securely plugged into both the headphone jack and the audio port on the device. If using wireless headphones, verify that the Bluetooth or wireless connection is functioning correctly and paired with the device.
Additionally, inspect the audio port itself to ensure there is no debris or obstructions causing a poor connection. Use a flashlight if necessary to check for any dirt, lint, or foreign objects that may be obstructing the port. If any impurities are found, carefully clean the audio port using a can of compressed air or a soft, lint-free cloth.
| Checklist for Hardware Connections: |
|---|
| Inspect the audio cable for damage and secure connections |
| Verify Bluetooth or wireless connection for wireless headphones |
| Check the audio port for debris or obstructions |
| Clean the audio port using compressed air or a soft cloth if necessary |
By ensuring all hardware connections are properly established and free from any obstructions, the chances of Realtek detecting headphones accurately can be significantly improved. If after checking the hardware connections the issue persists, further troubleshooting steps may be necessary to resolve the problem.
Updating the Drivers for Your Audio Device

In order to resolve issues with your audio device not detecting headphones, it may be necessary to update the drivers for your Realtek audio device. Updating the drivers can help ensure compatibility with the latest hardware and software, as well as resolve any bugs or conflicts that may be causing the issue.
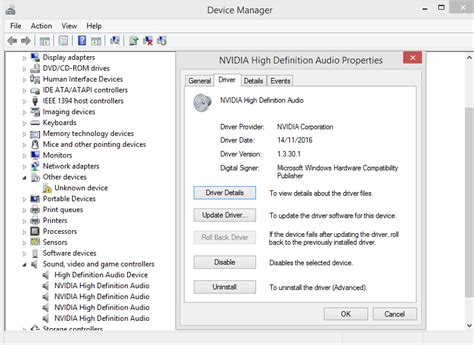
Before updating the drivers, it is important to first identify the exact model of your Realtek audio device. This information can typically be found in the Device Manager on your computer. Once you have identified the model, you can then proceed with finding and downloading the latest drivers from the official Realtek website or through your computer manufacturer's support page.
When downloading the drivers, it is recommended to choose the version that is specifically designed for your operating system. This will help ensure maximum compatibility and performance. Once the drivers have been downloaded, you can then proceed with the installation process.
Before installing the new drivers, it is important to first uninstall the existing drivers for your Realtek audio device. This can be done by accessing the Device Manager, locating the audio device, right-clicking on it, and selecting "Uninstall". After the drivers have been uninstalled, you can then proceed with the installation of the new drivers.
The installation process may vary depending on the specific drivers and operating system, but generally involves running the installer and following the on-screen instructions. It is important to carefully read and follow the instructions provided during the installation process to ensure a successful installation.
Once the new drivers have been installed, it is recommended to restart your computer to apply any necessary changes. After the restart, you can then test your audio device to see if it is now detecting headphones properly. If the issue persists, you may need to seek further assistance from technical support or consider alternative solutions.
| Benefits of Updating Realtek Audio Drivers | Instructions to Update Realtek Audio Drivers |
|---|---|
| Ensures compatibility with the latest hardware and software | Identify the model of your Realtek audio device |
| Resolves bugs and conflicts that could cause issues with headphone detection | Download the latest drivers from the official Realtek website or computer manufacturer's support page |
| Improves overall audio performance | Choose the appropriate version for your operating system |
| Provides access to new features and enhancements | Uninstall the existing drivers before installing the new ones |
Disabling Front Panel Jack Detection
When facing issues with headphone detection on your computer, one possible solution is to disable the front panel jack detection. This feature allows your computer to automatically detect when headphones are connected to the front panel audio jack, but sometimes it can malfunction or cause conflicts.
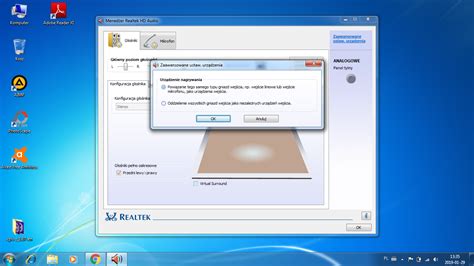
- Step 1: Open the Realtek HD Audio Manager software on your computer.
- Step 2: Locate the "Connector Settings" or "Device Advanced Settings" option in the software's interface.
- Step 3: Look for the setting related to front panel jack detection.
- Step 4: Disable the front panel jack detection by unchecking the corresponding box or selecting the "Disable" option.
- Step 5: Save the changes and exit the Realtek HD Audio Manager software.
By disabling the front panel jack detection, your computer will no longer automatically detect headphones connected to the front audio jack. This can help resolve issues related to headphone detection, such as when the headphones are not recognized or if sound is only playing through the speakers instead.
It's important to note that disabling the front panel jack detection may require you to manually switch the audio output device between speakers and headphones when connecting or disconnecting them. Additionally, the exact steps to disable this feature may vary depending on the version of the Realtek HD Audio Manager software installed on your computer.
If disabling front panel jack detection does not resolve your headphone detection issues, you may need to further troubleshoot your audio drivers, check your headphone connections, or consider seeking professional assistance.
Modifying Windows Sound Settings

In this section, we will explore how to make adjustments to the audio settings on your Windows operating system. By modifying these settings, you can potentially resolve issues related to the detection of headphones.
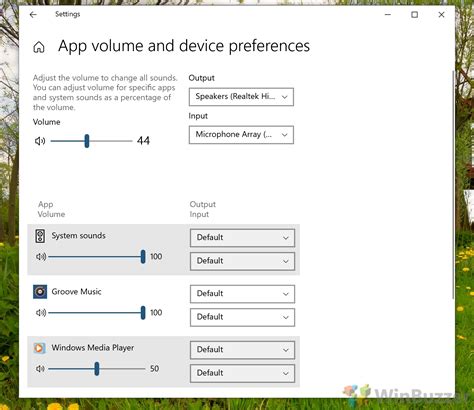
One of the first steps you can take in modifying the sound settings is to access the Sound Control Panel. From here, you can navigate through various tabs and options to tweak the audio configuration.
Device Properties: Within the Sound Control Panel, you can access the properties of your audio devices and make necessary adjustments. This includes enabling or disabling specific features and customizing settings to optimize the audio experience.
Playback Devices: Another important aspect of the Sound Control Panel is the ability to manage your playback devices. By setting your headphones as the default playback device, you ensure that the audio output is directed to the desired device.
Enhancements: Windows provides enhancements for audio devices that can be utilized to improve the sound quality. By exploring and enabling these enhancements, you may enhance the audio experience when using headphones.
Audio Troubleshooter: If you encounter any issues with sound settings or overall audio performance, Windows has a built-in audio troubleshooter. This tool can help identify and resolve problems related to the detection or playback of headphones.
Driver Updates: Keeping your audio drivers up to date can also be beneficial in resolving issues with headphone detection. By visiting the manufacturer's website or utilizing Windows Update, you can ensure that you have the latest audio drivers installed.
Remember, making adjustments to the Windows sound settings can potentially resolve issues with headphone detection, allowing you to enjoy your audio experience without any interruptions.
Why Doesn't My Headset Mic Work & How to Fix it (3.5mm audio cable)
Why Doesn't My Headset Mic Work & How to Fix it (3.5mm audio cable) by Maraksot78 5,833,554 views 4 years ago 7 minutes, 7 seconds
Fix- Wired Headphones Not Detecting When Plugged In Windows 11!
Fix- Wired Headphones Not Detecting When Plugged In Windows 11! by Fix369 28,240 views 8 months ago 1 minute, 26 seconds
FAQ
What should I do if my Realtek audio driver doesn't detect my headphones?
If your Realtek audio driver is not detecting your headphones, there are several steps you can try to troubleshoot the issue. First, make sure your headphones are properly connected to the audio jack. You can also try plugging them into a different audio jack. If that doesn't work, check if your headphones are working with other devices. If they are, then the issue might be with the driver itself. In that case, you can try reinstalling or updating the Realtek audio driver. You can download the latest driver from the Realtek website or use a driver update tool to automatically install the correct driver for your system. Restart your computer after installing the driver and check if your headphones are now being detected.
Why is my Realtek audio driver not recognizing my headphones?
There can be several reasons why your Realtek audio driver is not recognizing your headphones. It could be due to a faulty audio jack, incorrect audio settings, outdated or incompatible driver, or a hardware issue with your headphones. To troubleshoot the problem, start by checking the physical connection of your headphones. Ensure they are properly plugged into the audio jack and there are no loose connections. Next, verify the audio settings on your computer are configured correctly. Make sure the headphones are set as the default audio device. If the issue persists, it might be worth updating or reinstalling the Realtek audio driver. Additionally, try using a different pair of headphones to see if the problem is with the hardware itself.
How can I fix the problem of Realtek not detecting my headphones after updating Windows?
If your headphones are no longer being detected by Realtek after a Windows update, you can try a few solutions. Firstly, disconnect and reconnect your headphones to the audio jack. Sometimes, a simple reconnection can resolve the issue. If that doesn't work, navigate to the Device Manager, find the Realtek audio driver, right-click on it, and select "Update driver." Windows will then search for the latest driver and install it. Remember to restart your computer after the driver update. If the problem persists, you may need to uninstall the Realtek driver completely and then reinstall it from the manufacturer's website. This should help resolve any compatibility issues caused by the Windows update.
What should I do if my Realtek audio driver suddenly stops detecting my headphones?
If your Realtek audio driver suddenly stops detecting your headphones, there are a few steps you can take to troubleshoot the issue. Firstly, try unplugging and plugging in your headphones again to ensure a secure connection. If that doesn't work, check if your headphones are working properly on other devices to rule out any hardware problems. Next, open the Device Manager, locate the Realtek audio driver, and right-click on it. Choose "Uninstall device" and confirm the uninstallation. After that, restart your computer and let Windows automatically reinstall the driver. If the driver doesn't automatically reinstall, you can download the latest driver from the Realtek website and install it manually. Once the driver is installed, check if your headphones are now being detected.


