Have you ever found yourself in a situation where your favorite pair of headphones suddenly stops producing sound? It can be frustrating and disappointing, especially when you rely on them for daily activities such as listening to music, watching movies, or participating in virtual meetings. In today's digital world, headphones have become an essential accessory for many, providing us with a private and immersive audio experience. However, like any electronic device, they can encounter issues that hinder their performance. So, what steps can you take when one of your trusty wired headphones fails to function correctly?
When confronted with a malfunctioning set of headphones, the first thing to remember is not to panic. While it may be tempting to toss them out and invest in a new pair, there are often simple solutions to common headphone problems. In many cases, the issue lies within the headphone's wiring, connector, or audio source. By employing a logical and systematic troubleshooting approach, you can save both time and money by resolving the problem rather than replacing your headphones unnecessarily.
Step 1: Check the audio source and ensure that it is functioning correctly. Connect a different pair of headphones or earphones to the device and test if they produce sound. If the alternative headphones work fine, it indicates that the problem lies with your original pair. However, if the replacement headphones also fail to work, the issue might be with your device or audio source. Focus your troubleshooting efforts accordingly.
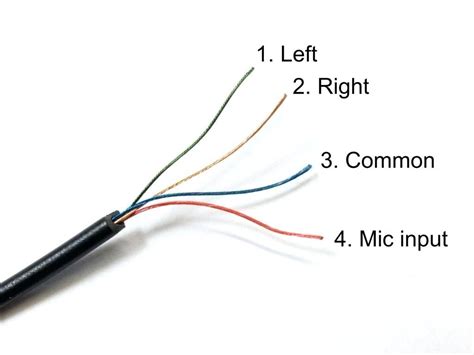
Step 2: Inspect the headphone plug and cable for any signs of damage or wear and tear. Gently examine the connector, looking for any bent pins, frayed wires, or loose connections. Sometimes, a simple physical issue like a loose connection can cause one earbud or speaker to stop working. If you identify any visible problems, you might be able to fix them yourself by carefully adjusting or re-soldering the wires, or you may need to seek professional repair services.
Step 3: Test your headphones on a different audio device. Connect them to another device such as a smartphone, laptop, or audio player to determine if the issue is specific to the previous audio source. By doing so, you can isolate the problem and conclude whether it is your headphones or the audio source that requires attention. If the headphones work fine on a different device, it is likely that the issue lies with the original audio source and not the headphones themselves.
By following these initial troubleshooting steps, you can often identify and resolve common headphone problems without much hassle. Remember, it is important to stay calm and patient throughout the process, as frustration can sometimes lead to hasty decisions that may not be necessary. With a bit of effort and attention to detail, you might just be able to revive your beloved wired headphones and continue enjoying their superior audio quality for many more hours to come.
Troubleshooting Tips for a Non-Functioning Wired Headphone
When faced with a non-working wired headphone, there are several steps you can take to troubleshoot and potentially resolve the issue. By following these simple guidelines, you may be able to identify and fix the problem, saving you the time and hassle of buying a new pair.
1. Check the connection: Ensure that the headphone jack is securely plugged into the audio source, such as a smartphone, laptop, or audio device. Sometimes, a loose or improperly inserted connection can cause audio problems.
2. Test with another device: Connect your headphones to a different audio source to determine if the issue lies with the headphone or the audio device. If the headphones work fine on another device, it suggests the problem lies with the original audio source.
3. Clean the headphone jack: Over time, dust, lint, or debris can accumulate in the headphone jack, leading to connectivity problems. Gently use a cotton swab or compressed air to clean the jack, making sure not to damage the delicate components.
4. Examine the cable: Inspect the entire length of the headphone cable for any visible damage, such as frayed wires or cuts. If any issues are found, it may be necessary to replace the cable or seek professional repair services.
5. Try a different cable or adapter: If you have access to another headphone cable or adapter, try using it with your headphones and audio source. This can help determine if the cable or adapter is the cause of the problem.
6. Update audio drivers: If you are using the headphones with a computer, ensure that the audio drivers are up to date. Outdated drivers can sometimes result in audio-related issues.
7. Test in different audio settings: Adjust the audio settings on your device, such as volume levels, equalizer settings, or audio effects, to see if the problem persists. Sometimes, incompatible or incorrect settings can impact headphone performance.
8. Contact customer support: If all else fails and the headphones are still not working, reach out to the manufacturer's customer support for further assistance. They may be able to provide specific troubleshooting steps or offer a warranty repair or replacement if applicable.
By following these troubleshooting tips, you can increase your chances of resolving the issue with your non-working wired headphone and enjoy uninterrupted audio listening once again.
Checking the Connection and Cables
Ensuring a reliable and intact connection is crucial for optimal performance of your audio devices. When facing issues with your wired headphones, troubleshooting the connection and cables should be your first step in troubleshooting.
Start by examining the connection point between the headphones and the audio source. Inspect the headphone jack and ensure it is securely plugged into the audio device. If the connection is loose or uncertain, try gently unplugging and reinserting the jack to establish a secure connection.
Next, inspect the cable for any visible signs of damage or wear. Check for frayed wires, kinks, or cuts, as these can interrupt the audio signal and cause issues. Carefully run your hands along the cable, feeling for any irregularities. If you notice any damage, consider replacing the cable or seeking professional repair.
Additionally, it is important to inspect any inline controls or volume adjusters on the cable. Ensure these are functioning correctly and not causing any interference with the audio output. Try adjusting them or gently pressing the buttons to see if it resolves the issue.
Furthermore, it is worth checking if the issue lies with the audio source itself. Plug your headphones into a different device to determine if the problem persists. If the headphones work fine with another device, the issue may be with the original audio source.
Remember, proper maintenance of the connection and cables can extend the longevity and performance of your wired headphones. Regularly inspecting and taking care of these components can help ensure uninterrupted and high-quality audio experience.
Clean the Headphone Jack and Earbuds
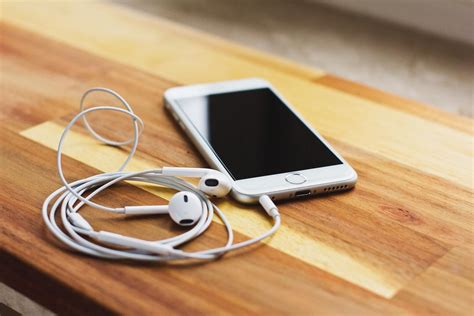
Ensuring the proper functionality of your headphones requires regular maintenance. One crucial aspect of this maintenance is keeping the headphone jack and earbuds clean and free of debris. Dust, dirt, and other particles can accumulate over time, causing connection issues and poor sound quality. By following these simple steps, you can effectively clean your headphone jack and earbuds, prolonging their lifespan and enhancing your listening experience.
1. Assess the condition of the headphone jack and earbuds
Before beginning the cleaning process, take a close look at the condition of your headphone jack and earbuds. Look out for any visible dirt, dust, or buildup. Also, check for any signs of damage, such as bent pins or broken components.
2. Gather the necessary cleaning tools
For a successful cleaning session, you will need a few basic cleaning tools. Start by grabbing a soft, lint-free cloth or cotton swab. You may also use a small brush with soft bristles to reach deeper areas. Additionally, consider using isopropyl alcohol or an electronic contact cleaner to remove stubborn grime.
3. Carefully clean the headphone jack
Begin by disconnecting your headphones from the audio device. Take the soft cloth or cotton swab and gently wipe the inside of the headphone jack. Ensure that you remove any visible debris without applying excessive pressure. If necessary, moisten the cloth or cotton swab with isopropyl alcohol or contact cleaner to eliminate stubborn dirt.
4. Clean the earbuds
Now, focus your attention on the earbuds themselves. Start by removing any rubber or silicone covers or tips. These can usually be detached for thorough cleaning. Use the soft cloth or cotton swab to wipe the surface of the earbuds, paying special attention to the areas where they connect to the main wires. If necessary, use the brush to gently remove dirt from hard-to-reach crevices.
5. Allow proper drying time
After completing the cleaning process, allow the headphone jack and earbuds to dry completely before reconnecting them. This ensures that no moisture is left behind, which could potentially damage the internal components or affect sound quality.
Note: It is crucial to avoid using excessive force or harsh cleaning agents, as these can cause permanent damage to the headphone jack and earbuds. Additionally, if you notice any significant damage or issues persist even after cleaning, it may be time to consider getting a replacement.
By regularly cleaning the headphone jack and earbuds, you can maintain optimal performance and enjoy your favorite music or podcasts without any interruptions. Incorporate this simple maintenance routine into your headphone care to ensure long-lasting functionality and superior sound quality.
Testing the Headphones on Different Devices
One way to troubleshoot a malfunctioning pair of headphones is to test them on a variety of devices. By connecting the headphones to different devices such as smartphones, tablets, laptops, or audio players, you can determine if the issue lies with the headphones themselves or with the particular device you were previously using.
A simple and effective method to test your headphones is by connecting them to a smartphone or tablet. Ensure that the volume is turned up and play an audio or video file to check if the sound is clear and balanced. If the headphones produce consistently poor sound quality or do not work at all on multiple devices, it suggests a problem with the headphones themselves.
If the headphones work fine on other devices but do not function properly on a specific audio device, it may indicate an issue with the device's audio jack or settings. In such cases, try adjusting the audio settings on the device or clean the audio jack to rule out any potential problems.
Another useful test is to connect the headphones to a different computer or laptop. This helps identify if the issue is specific to a particular device or if it persists across multiple devices. Ensure that the headphones are properly plugged into the audio jack and check for any loose connections that could affect the sound quality.
In some instances, it may be necessary to test the headphones with different types of audio files, such as music tracks, podcasts, or videos. This can help determine if the issue is related to a specific type of audio format or if it occurs across various file types.
| Steps to Test Headphones on Different Devices |
|---|
| 1. Connect the headphones to a smartphone or tablet. |
| 2. Play an audio or video file to check for sound quality. |
| 3. If the headphones work fine, try them on another device. |
| 4. If they don't work on other devices, the issue may be with the headphones. |
| 5. If they work on other devices, the problem may lie with the initial device or its settings. |
| 6. Clean the audio jack or adjust the audio settings on the device if necessary. |
| 7. Consider testing the headphones with various audio file types to pinpoint any potential compatibility issues. |
Update the Device's Audio Settings
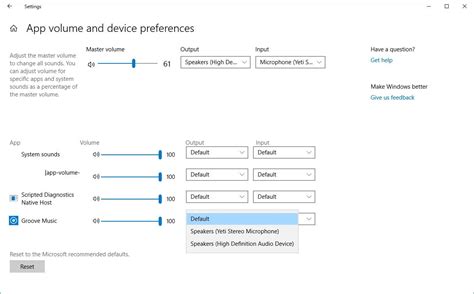
Optimizing the audio settings on your device can often resolve issues with malfunctioning wired headphones. By updating the audio settings, you can enhance the performance and ensure proper functionality of your headphones.
Firstly, check the audio output options on your device. Verify that the correct audio output device is selected, as sometimes it can default to a different device such as speakers or Bluetooth headphones. Ensure that the wired headphones are the active audio output device.
Once you have confirmed the correct audio output device, adjust the audio settings to improve compatibility with your wired headphones. Explore options such as the volume level, balance, equalizer settings, and audio presets. Fine-tuning these settings can enhance the audio experience and potentially resolve any issues you are facing.
If your device has a dedicated headphone jack, check for any debris or dirt that may be obstructing the connection. A clogged or dusty headphone jack can affect the audio output and cause connectivity problems. Use a small brush or cotton swab to gently clean the jack, ensuring it is free from any foreign particles.
Additionally, consider updating your device's audio drivers or firmware. Manufacturers sometimes release updates to enhance compatibility and resolve known issues. Visit the manufacturer's website or use the device's built-in update feature to check for any available updates for audio-related components.
Lastly, if none of the above steps resolve the problem, try connecting your wired headphones to a different device. This will help determine if the issue lies with the headphones or the original device. If the headphones work fine on another device, the problem might be with the audio settings or hardware on your initial device.
Updating the device's audio settings can be an effective solution to fix problems with wired headphones. By carefully adjusting audio options, cleaning the headphone jack, and checking for updates, you can troubleshoot and improve the functionality of your headphones for an optimal listening experience.
Resetting the Audio Preferences
Restoring the sound settings on your device to their default state can often resolve issues with your headphones not functioning properly. By resetting the audio preferences, you are essentially refreshing the settings that govern how audio is processed and outputted through your device.
Why reset?
Over time, audio settings can become misconfigured or corrupted due to various factors such as software updates, incompatible applications, or accidental changes made to the settings. Resetting the audio preferences erases any incorrect settings and reverts them back to the original configuration, allowing for a fresh start and potentially resolving the issue.
How to reset the audio preferences:
1. Navigate to the settings menu on your device.
2. Look for the "Sound" or "Audio" option.
3. Within the sound/audio settings, locate the option to reset or restore the audio preferences.
4. Follow the prompts or instructions provided to confirm and execute the reset.
Note: The exact location of the audio preference reset option may vary depending on the device and operating system you are using. If you are unsure, consult the user manual or the manufacturer's support website for specific instructions.
After performing the audio preference reset, reconnect your headphones and test if the issue persists. In many cases, this simple step can help restore the functionality of your wired headphones and get them working again.
Try a Different Pair of Headphones
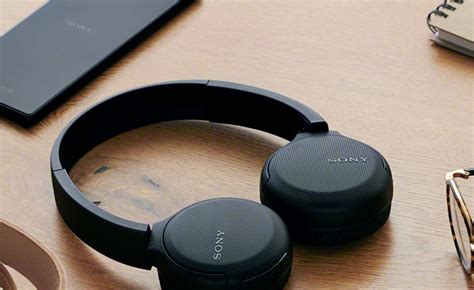
In case your current pair of wired headphones is not functioning properly, it might be worth considering trying a different set of headphones. Experimenting with an alternative option could help identify whether the problem lies with the headphones themselves or with the device they are connected to. By testing out a different pair, it is possible to determine if the issue persists across multiple headphones or if it is specific to the original pair.
| Benefits of Trying a Different Pair |
| - Identify headphone-specific issues |
| - Assess compatibility with devices |
| - Verify the source of the problem |
| - Explore different sound quality |
By trying out alternative headphones, it becomes possible to pinpoint whether the problem lies with the original pair or with the audio source or device. This troubleshooting step allows for a more accurate diagnosis and helps determine the appropriate solution. Additionally, trying different headphones can also offer an opportunity to experience different sound qualities, providing a chance to enhance the audio experience.
Contact Customer Support for Assistance
If you find yourself encountering difficulties with your wired headphones and you have exhausted all troubleshooting options, it may be time to seek assistance from the customer support team. When faced with technical issues, reaching out to the experts can often provide a swift resolution and ensure a satisfactory outcome.
Customer support is available to assist you with any concerns or questions you may have regarding your malfunctioning headphones. They possess the expertise and knowledge to guide you through troubleshooting steps specific to your situation, potentially uncovering a solution you may not have considered previously.
Whether it be a hardware-related problem or an issue with audio output, customer support can offer valuable insights and advice. They can provide instructions on performing diagnostic tests, adjusting settings, or even suggest alternative solutions or replacement options if required.
When reaching out to customer support, it is essential to provide them with all relevant information regarding your headphones and the specific problem you are facing. Clear communication and accurate details will enable them to understand your situation better and provide tailored assistance accordingly.
Remember to be patient and polite when engaging with customer support representatives. They are there to help and want to ensure your satisfaction. By maintaining open lines of communication and following their guidance, you are likely to find a resolution that will allow you to enjoy your wired headphones once again.
Consider Repairing or Replacing the Headphones
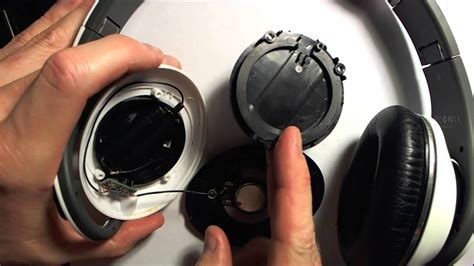
When faced with the issue of malfunctioning headphones, it is crucial to assess whether it is more reasonable to repair or replace the device. Repairing the headphones might offer a cost-effective solution, preserving both your time and money. On the other hand, replacing the headphones entirely could provide you with a more reliable and long-term option. This section will explore these two alternatives in more detail, allowing you to make an informed decision based on your specific needs and preferences.
Repairing the HeadphonesIf you prefer a more budget-friendly approach, repairing the headphones could be a viable option. Firstly, identify the specific issue with the device. This could range from a loose connection, damaged cable, or faulty audio jack. Once the problem is pinpointed, consider if you have the necessary skills and tools to conduct the repair yourself or if professional assistance is required. If you decide to repair the headphones independently, verify if the necessary replacement parts are readily available. Online marketplaces and electronics stores often offer a wide range of headphone components such as cables, audio jacks, or ear cushions. If you are uncertain about the repair process, consult online tutorials or seek guidance from headphone repair specialists. It is important to weigh the estimated cost of repair against the overall value of the headphones and the expected lifespan of the device post-repair. If the repair expenses exceed a reasonable threshold or the headphones have a history of frequent breakdowns, it may be more pragmatic to consider a replacement instead. |
Replacing the HeadphonesIf you prioritize convenience and reliability, replacing the headphones may be the preferable choice. Look for new headphones that match your preferred features and specifications, such as sound quality, comfort, durability, and compatibility. Consider your budget and research different options within your price range, reading customer reviews to assess the overall satisfaction and reliability of the models you are interested in. When replacing the headphones, it is also important to consider any additional accessories or features that may enhance your listening experience. This could include wireless connectivity, noise cancellation, or customizable sound settings. Prioritize the features that are essential to you and verify compatibility with your existing devices to ensure a seamless audio experience. Remember to properly dispose of your old headphones if you choose to replace them. Consider recycling or donating them to reduce electronic waste and contribute to a more sustainable environment. |
HOW TO FIX EARPHONE NOT WORKING IN ONE SIDE
HOW TO FIX EARPHONE NOT WORKING IN ONE SIDE by 122Pritam 543,411 views 4 years ago 2 minutes, 14 seconds
FAQ
What are some common reasons why one of my wired headphones may not be working?
There are several common reasons why one of your wired headphones may not be working. It could be due to a faulty audio jack, a damaged cable, loose connections, or a problem with your device's audio settings.
How can I identify if the problem lies with my wired headphones or my device?
To determine if the issue is with your wired headphones or your device, you can try plugging the headphones into another device or testing different headphones on your device. If the problem persists with different headphones on your device, then the issue likely lies with your device's audio settings or hardware.
What can I do if I notice a loose connection between my wired headphones and the audio jack?
If you notice a loose connection, you can try gently wiggling the headphone plug while it's connected to the audio jack. This may help establish a better connection. If this doesn't work, you can also try cleaning the audio jack with compressed air or a cotton swab to remove any debris that might be interfering with the connection.
Is it possible to fix a damaged cable on my wired headphones?
Fixing a damaged cable on your wired headphones can be challenging, but it's worth a try if you're comfortable with some DIY work. You can carefully strip the outer insulation of the cable, identify the damaged portion, and reconnect the wires. However, this requires some basic soldering skills and the right tools. If you're unsure, it's best to take your headphones to a professional.
What should I do if none of the troubleshooting steps work?
If none of the troubleshooting steps resolve the issue, it may be time to consider replacing your wired headphones. Sometimes, the problem lies beyond repair, and investing in a new pair is the most practical solution. Additionally, make sure to review the warranty for your headphones as it may cover repairs or replacements.
What can I do if one side of my wired headphones is not working?
If one side of your wired headphones is not working, there are a few troubleshooting steps you can try. First, check the headphone jack to make sure it is fully inserted into the audio device. If that doesn't work, try using a different audio device to see if the issue is with the headphones or the device. You can also try cleaning the headphone jack and the headphone connectors with a soft cloth to remove any debris. If none of these steps work, it is possible that there is a problem with the headphone's wiring or internal components, and you may need to get them repaired or replaced.


