As technology continues to evolve, our devices are becoming increasingly versatile, offering us endless possibilities to tailor our user experience. One such way to do so is by setting up a personalized input device, specifically a keyboard, on your iPad. By doing this, you can elevate your productivity, efficiency, and overall satisfaction with your device.
Imagine having the ability to seamlessly type emails, write documents, or even engage in creative pursuits on your iPad with the ease and familiarity of a physical keyboard. Whether you prefer the tactile feedback of mechanical keys or the sleekness of a wireless keyboard, there are numerous options available to suit your preferences and enhance your workflow.
Not only does setting up a keyboard on your iPad provide you with a more comfortable and efficient way of inputting information, but it also gives you the freedom to work on the go. With a compact and lightweight keyboard, you can transform your iPad into a portable workstation, making it easier than ever to stay connected and productive wherever you are.
Selecting the Language and Keyboard Layout

When it comes to using your portable device, whether it's an iPad, tablet, or a similar gadget, it's crucial to have the right language settings and keyboard layout for a seamless typing experience. In this section, we will explore the steps to select the preferred language and keyboard layout on your iPad.
Choosing the Language:
The language settings determine the display language for your iPad's interface and the default language used for auto-correction, spell check, and predictive text. To select the language that best suits your needs, follow these simple steps:
- Tap on the "Settings" icon on your iPad's home screen.
- In the settings menu, scroll down and tap on "General."
- Under the "General" settings, locate and tap on "Language & Region."
- From the "Language & Region" menu, tap on "iPad Language."
- Select the desired language from the list provided.
- Your iPad will prompt you to confirm the language change. Tap "Change to [selected language]" to proceed.
Configuring Keyboard Layout:
Once you have set the language, the next step is to choose the appropriate keyboard layout. This determines the arrangement of keys on the on-screen keyboard and ensures efficient typing. To configure the keyboard layout on your iPad, follow these steps:
- Head back to the "Language & Region" menu in the "Settings" app.
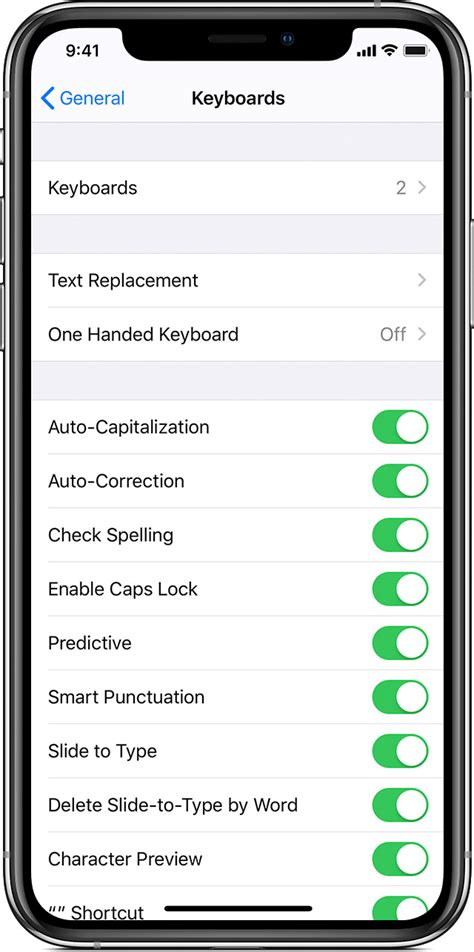
- Tap on "Keyboards" to access the keyboard settings.
- Under the "Keyboards" settings, you will find the list of currently enabled keyboards.
- To add a new keyboard layout, tap on "Add New Keyboard."
- Browse through the available options and select the desired layout from the list.
- Once you've selected the keyboard layout, it will appear in the list of enabled keyboards. You can rearrange the order by tapping and dragging the handles next to each layout.
By carefully selecting the language and keyboard layout on your iPad, you can personalize your typing experience and ensure efficient communication in any language.
Setting Up a Wireless Keyboard for Seamless Typing Experience on Your iPad
Enhance your productivity and typing experience on your iPad by seamlessly connecting a wireless keyboard. This guide will walk you through the simple steps to connect and set up a wireless keyboard with your iPad, allowing you to effortlessly type emails, documents, or messages.
1. Enable Bluetooth on your iPad
Before connecting your wireless keyboard, ensure that the Bluetooth feature on your iPad is enabled. You can do this by navigating to the "Settings" menu, selecting "Bluetooth," and toggling it on.
2. Turn on your Wireless Keyboard
Power on your wireless keyboard by pressing the designated power button or switch. Make sure it is within range and that the batteries are properly inserted and charged.
3. Put your Wireless Keyboard in Pairing Mode
Consult your keyboard's user manual to determine how to put it in pairing mode. Typically, this involves pressing and holding a specific button or combination of keys until an LED indicator starts flashing to indicate it is ready to pair.
4. Connect the Wireless Keyboard to your iPad
On your iPad, navigate to the Bluetooth settings and look for your wireless keyboard in the list of available devices. Once you find it, tap on its name to initiate the pairing process.
5. Enter the Passcode, if prompted
Some wireless keyboards may require you to enter a passcode on your iPad to establish a secure connection. If prompted, refer to your keyboard's manual for the default passcode or instructions on how to set a specific passcode.
6. Confirm the Successful Connection
After entering the passcode, your iPad should confirm the successful connection with your wireless keyboard. You may receive a notification or see the keyboard name appearing as "Connected" in the Bluetooth settings menu.
7. Start Typing Away
Now that your wireless keyboard is successfully connected, you can start using it to type on your iPad. Enjoy the convenience and precision that a physical keyboard offers, making your work or entertainment activities more efficient and enjoyable.
Remember that once your wireless keyboard is connected, it will automatically connect to your iPad whenever it is in range and both devices have their Bluetooth enabled. Also, make sure to periodically check the battery level of your keyboard to avoid any unexpected interruptions.
By connecting a wireless keyboard to your iPad, you can take advantage of a comfortable typing experience, maximize your productivity, and make the most out of your device.
Customizing Keyboard Settings on Your iPad

In this section, we will explore various ways to personalize and adjust the settings of the input device on your Apple tablet. By customizing your keyboard settings, you can enhance your typing experience and adapt it to your unique needs and preferences.
One way to tailor your keyboard to your liking is by adjusting the language and region settings. This allows you to choose the language for your keyboard and even enable multiple languages for multi-lingual typing. Additionally, you can select the region-specific keyboard layout that suits your typing style and familiarity.
Another aspect to consider is the keyboard shortcuts. These are pre-set combinations of keys that can be used to trigger certain actions or commands, making your workflow more efficient. By customizing keyboard shortcuts, you can assign specific functions or apps to certain key combinations, saving you time and effort in accessing frequently used features.
Furthermore, you can modify the autocorrect and spell check settings to suit your writing style and preferences. Adjusting the autocorrect sensitivity allows you to choose how aggressively the device corrects your typos and spelling errors, while enabling or disabling spell check based on your preference ensures a seamless and uninterrupted typing experience.
In addition to these settings, it is also possible to customize the appearance of your keyboard. You can choose from a variety of keyboard themes, colors, or even add a custom image as the background. This allows you to personalize your keyboard, making it not only functional but visually appealing as well.
Lastly, you can explore additional keyboard features such as predictive typing, emoji suggestions, or one-handed mode. These features can greatly improve your typing speed and convenience, allowing you to type effortlessly and express yourself more effectively.
| Key Points: |
|---|
| - Adjust language and region settings |
| - Customize keyboard shortcuts |
| - Modify autocorrect and spell check settings |
| - Personalize keyboard appearance |
| - Explore additional keyboard features |


