When it comes to crafting captivating and visually stunning videos, ensuring that your software and hardware work seamlessly together is paramount. Fine-tuning your Windows system's settings can significantly enhance the overall performance and efficiency of your video editing workflow. In this article, we delve into the crucial aspects of configuring your operating system for optimal video editing.
First and foremost, you need to pay special attention to your system's hardware. A powerful processor and a generous amount of RAM are essential for handling the resource-intensive demands of video editing applications. Additionally, investing in a reliable graphics card will expedite rendering and acceleration tasks, resulting in smoother playback and faster export times.
System stability and security are other critical factors that should not be undermined. Ensuring that your Windows operating system is protected against malware and regularly updated is crucial for uninterrupted editing sessions. Firewalls and antivirus software form the vanguard of safeguarding your valuable video projects, preventing potential data loss and system crashes.
Furthermore, streamlining your software environment can significantly enhance your video editing experience. Allocating specific system resources exclusively to video editing applications can prevent unnecessary interruptions caused by background processes. Additionally, optimizing your application preferences such as managing cache settings and enabling hardware acceleration will ensure real-time editing and smoother playback.
Optimize Your Windows Settings
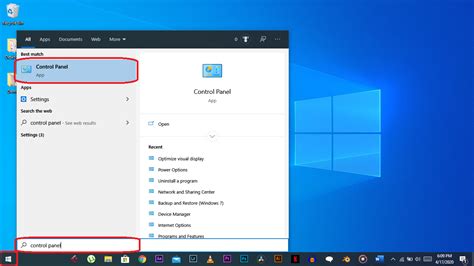
Enhancing the performance of your operating system for seamless video editing requires careful configuration of various settings. By optimizing specific Windows functions, you can ensure a smooth and efficient editing experience without compromising the quality of your work. In this section, we will explore essential steps to maximize your Windows settings and enhance your video editing capabilities.
1. Power Settings:
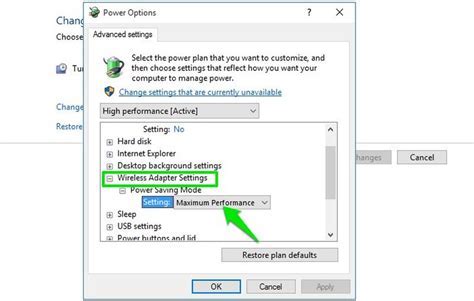
Adjusting your power settings can have a significant impact on the performance of your computer during video editing. Consider selecting the "High Performance" option to prioritize system resources for demanding tasks, ensuring smooth playback and rendering of video files.
2. Storage Optimization:
Proper organization and management of your storage is vital for efficient video editing. Regularly defragmenting your hard drive, using high-speed drives for video storage, and employing a reliable backup system are essential steps to optimize your Windows settings and safeguard your footage.
3. Graphics Card Configuration:
A powerful graphics card is crucial for seamless video editing. Make sure your graphics card drivers are up to date to leverage the latest performance enhancements. Additionally, adjust your graphics card settings to prioritize video editing applications, allocating maximum resources for real-time rendering and effects.
4. Memory Management:
Managing your system's memory effectively can significantly improve video editing efficiency. Close unnecessary background applications, optimize virtual memory settings, and consider adding more RAM to your computer if needed, allowing for smoother playback and faster rendering times.
5. System Updates:
Regularly updating your operating system is crucial for maintaining optimal performance. Install the latest Windows updates and patches to ensure compatibility with video editing software and take advantage of improved features and stability.
6. Security Considerations:
While prioritizing performance optimizations, do not overlook the importance of maintaining robust security measures. Install reliable antivirus software, regularly scan your system for malware, and keep your firewall and other security settings up to date to protect your valuable video editing projects.
By implementing these optimizations and fine-tuning your Windows settings, you can create an ideal environment for video editing, enabling you to unleash your creativity and achieve professional-quality results.
Choose the Appropriate Hardware for Video Editing
In this section, we will explore the crucial factors to consider when selecting hardware for video editing. Finding the ideal equipment is paramount to optimize your editing experience and achieve professional-quality results.
- Processor: The central processing unit (CPU) is the brain of your computer and plays a major role in video editing. Look for a processor with multiple cores and high clock speeds to handle the demanding tasks involved.
- Graphics Card: A powerful graphics processing unit (GPU) is vital for accelerating video rendering, effects, and visual enhancements. Opt for a GPU designed for intensive multimedia tasks and ensure compatibility with your editing software.
- RAM: Random access memory (RAM) is essential for seamless multitasking and smooth editing performance. Consider at least 16GB of RAM or more to handle large video files and complex editing projects.
- Storage: Choosing the right storage solution is crucial to avoid bottlenecks and ensure speedy access to your media files. Solid-state drives (SSDs) offer faster read/write speeds compared to traditional hard disk drives (HDDs) and are recommended for video editing.
- Monitor: A high-resolution and color-accurate monitor is essential for accurate video editing. Look for a display with a wide color gamut and consider investing in a hardware-calibration device to achieve precise color reproduction.
- Additional Considerations: Don't overlook other factors such as connectivity options (USB ports, Thunderbolt, etc.), cooling solutions (to prevent overheating during resource-intensive tasks), and a comfortable ergonomic setup to ensure long editing sessions without discomfort.
By carefully selecting the right hardware components and considering the specific requirements of your video editing workflow, you can create an efficient and effective system that meets your needs. Optimize your hardware choices to unlock the full potential of your video editing endeavors.
Enhance Performance with Graphics Card Driver Updates
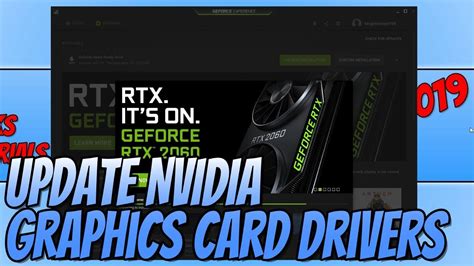
Boosting the capabilities of your computer's graphics card is vital for seamless video editing experiences. One way to achieve this is by regularly updating your graphics card driver. Keeping your graphics card driver up to date ensures that your system is equipped with the latest improvements, bug fixes, and performance enhancements provided by the manufacturer. This article will guide you through the process of updating your graphics card driver, enabling you to maximize the potential of your hardware and optimize your video editing workflow.
Why update your graphics card driver?
Updating your graphics card driver is essential as it helps your computer communicate effectively with the graphics card, resulting in improved performance, enhanced stability, and supports the latest features required for video editing. Manufacturers frequently release driver updates to address compatibility issues, fix software bugs, and introduce optimizations that can significantly enhance the performance of your graphics card specifically for video editing tasks.
How to check for driver updates
To update your graphics card driver, you can start by visiting the manufacturer's website. Look for the support or downloads section, where you can find the latest driver updates specific to your graphics card model and operating system. Alternatively, you can use driver update software that automates the process and scans your system for outdated drivers. These tools simplify the task by providing a one-click solution to download and install the latest driver updates for your graphics card.
Installation steps
Once you have downloaded the latest driver for your graphics card, follow these steps to install it:
- Close any running applications or programs.
- Locate the downloaded driver file and double-click on it.
- Follow the on-screen instructions provided by the installation wizard.
- Restart your computer to apply the changes.
Regularly updating your graphics card driver
Remember to periodically check for driver updates to ensure that your graphics card is always equipped with the latest enhancements. Set a schedule to visit the manufacturer's website or use driver update software to automate this process. By staying up to date, you can take full advantage of your graphics card's potential for video editing, minimizing compatibility issues and maximizing performance.
Updating your graphics card driver is a crucial step towards configuring your Windows system for efficient video editing. By following these guidelines and keeping your graphics card driver up to date, you can enjoy smooth playback, faster rendering speeds, and an overall improved video editing experience.
Optimize Power Management Settings for Efficient Video Editing
When it comes to enhancing your video editing experience, it's crucial to ensure that your computer's power settings are configured in a way that maximizes efficiency and minimizes disruptions. By optimizing power management settings specifically geared towards video editing, you can significantly improve performance and ultimately achieve a smoother and more productive workflow.
Customize Power Plan: Start by customizing the power plan on your Windows device, adjusting settings such as display brightness, sleep mode, and system performance to meet the demands of video editing. Tailoring your power plan allows you to strike a balance between energy efficiency and the computing power required for resource-intensive tasks.
Enable High-Performance Mode: Maximize the capabilities of your hardware by enabling the high-performance mode, which helps ensure that your computer's components, such as the processor and graphics card, run at their peak performance levels while video editing. This mode prevents your system from throttling down to conserve power and maintains consistent performance throughout your editing session.
Disable Power-Saving Features: To avoid interruptions and potential performance issues during video editing, it's important to disable power-saving features such as sleep mode, hibernation, or USB selective suspend. These features can interfere with your workflow, causing delays or unexpected system shutdowns. By keeping these features disabled, you can maintain a stable and uninterrupted editing session.
Manage Hard Drive Power: Configure your hard drive power settings to optimize data transfer rates and prevent automatic sleep mode activation. By ensuring that your hard drive remains active and accessible during video editing, you can minimize the risk of data loss, improve overall responsiveness, and prevent potential performance bottlenecks that may occur when accessing media files.
Monitor Temperature and Cooling: Video editing tasks can put a significant load on your computer's hardware, leading to increased temperatures. Monitor your system's temperature and ensure proper cooling to prevent overheating and potential performance throttling. Consider using additional cooling solutions such as cooling pads or improving airflow within your computer's case to maintain optimal temperatures during extended editing sessions.
Regular System Maintenance: Performing regular system maintenance can help keep your computer running smoothly and efficiently while video editing. Tasks such as cleaning dust from fans and vents, updating device drivers, and removing unnecessary software can improve performance, eliminate potential bottlenecks, and ensure that your system is always prepared to handle demanding video editing tasks.
By configuring your computer's power settings specifically for video editing, you can optimize performance, reduce interruptions, and create an environment conducive to efficient and productive editing. Implement these power management techniques to enhance your editing workflow and make the most out of your Windows device.
Optimize Your Display Settings for Enhanced Video Editing Experience
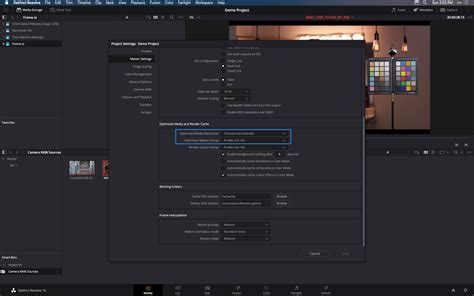
Personalizing your visual display is key to achieving the optimal video editing setup on your Windows device. By customizing your display settings, you can enhance the overall clarity, color accuracy, and viewing experience of your video projects.
1. Adjust Resolution and Scaling:
Start by finding the ideal resolution and scaling settings for your monitor. A higher resolution will provide more screen real estate, allowing you to view and work on your videos with greater detail. Adjusting the scaling settings can help ensure that the text, icons, and other elements remain sharp and appropriately sized.
2. Calibrate Color Accuracy:
Proper color calibration is crucial for accurately editing videos. Consider using a colorimeter or calibration software to adjust the brightness, contrast, gamma, and color temperature of your display. This will help you see the true colors of your videos and make accurate adjustments during the editing process.
3. Enable Dark Mode:
Dark mode not only provides a sleek and modern aesthetic, but it also reduces eye strain during long editing sessions. By enabling dark mode in your display settings, you can minimize the amount of bright light emitted from your screen, making it easier to focus on your video content.
4. Configure Multiple Monitors:
If you have multiple monitors, take advantage of the extended screen space by configuring them properly. Set your main editing workspace on the primary monitor and allocate secondary monitors for tasks like timeline management, previewing, or accessing reference materials. This will enhance your workflow and make multitasking more efficient.
5. Customize Display Themes:
Inject creativity into your video editing environment by customizing display themes. Choose visually pleasing wallpapers, arrange desktop icons in an organized manner, and set a suitable color scheme that complements your editing style. A personalized and inspiring workspace can boost your productivity and make video editing more enjoyable.
Remember, optimizing your display settings is essential for creating professional-looking videos. Experiment with different options, fine-tune the settings according to your preferences, and watch as your video editing experience becomes more streamlined and visually stunning.
Optimize your Storage Setup for Seamless Video Editing Experience
One of the key aspects of optimizing your Windows system for efficient video editing is setting up a dedicated storage drive. As a video editor, a dedicated storage drive allows you to separate your media files from your operating system and applications, ensuring faster access and smoother performance.
When it comes to selecting a dedicated storage drive, there are a few considerations to keep in mind. Firstly, you'll want to choose a drive with ample storage capacity to accommodate your video footage, project files, and other media assets. Additionally, it's essential to opt for a high-performance drive that can handle the hefty demands of video editing, such as solid-state drives (SSDs) or high-speed hard disk drives (HDDs).
- Choose a drive with a minimum capacity of 1TB or more, depending on your needs.
- Consider using SSDs for faster read and write speeds, enhancing your overall editing workflow.
- Alternatively, high-speed HDDs with a rotational speed of 7200 RPM or higher can provide decent performance.
Once you have selected the right storage drive, it's essential to properly configure it for optimal performance during video editing. One crucial step is to format the drive with an appropriate file system, such as NTFS or exFAT, which supports large file sizes and provides efficient data organization.
In addition, setting up a dedicated storage drive allows you to create a logical folder structure for your projects, media assets, and temporary files. This organization can significantly streamline your editing process and make it easier to locate and manage your files.
- Create separate folders for each project to keep your files organized and easily accessible.
- Within each project folder, further categorize media assets, such as videos, images, and audio files, for efficient management.
- Set up a dedicated folder for temporary files, such as cache files and render previews, to prevent cluttering your main storage drive.
By setting up a dedicated storage drive and optimizing its configuration for video editing purposes, you can ensure a seamless and efficient editing experience on your Windows system. This dedicated space for media files not only enhances performance but also helps maintain the integrity of your video editing projects.
Setting Up the Essential Software for Enhancing Videos

Being adequately equipped with the appropriate software is imperative for any video editing endeavor. In this section, we will explore the essential steps to install the requisite video editing tools that will enable you to unleash your creativity and transform ordinary footage into stunning masterpieces.
Step 1: Obtain a licensed copy of a reliable video editing software. Choose a program that caters to your specific requirements and budget.
Step 2: Download the installation file from the official website of the selected software. Ensure that the file is compatible with your operating system.
Step 3: Start the installation process by double-clicking on the downloaded file. Follow the on-screen prompts to proceed with the installation.
Step 4: Once the installation is complete, launch the video editing software. Familiarize yourself with its interface and features to maximize your editing potential.
Step 5: Register your software if required and configure any necessary settings, such as project file locations and default file formats.
Step 6: Optional: Install additional plugins or effects packs to enhance the capabilities of your video editing software.
Step 7: Keep your software up to date by regularly checking for updates or enabling automatic updates. This ensures you have access to the latest features, bug fixes, and security patches.
By carefully following these steps, you will successfully install the essential software for video editing and be one step closer to creating captivating visual content.
Optimize Your Sound Settings for Film Production
Enhancing the auditory experience is a crucial aspect of crafting professional video content. By tweaking your audio settings, you can ensure that the sound quality of your films matches the visual excellence.
1. Adjust Volume Levels: Consider calibrating the volume levels according to the type of video content you are editing. For instance, if you're working on a dialogue-heavy scene, prioritize clear speech by emphasizing vocal frequencies over background noise.
2. Equalize Audio: Utilize equalization techniques to balance and enhance sound frequencies. By experimenting with different frequency ranges, you can emphasize important audio elements, such as dialogue or background music, to match the desired mood or tone of your video.
3. Eliminate Noise: A noisy audio track can significantly reduce the overall quality of your film. Utilize noise reduction tools that are compatible with your video editing software to remove unwanted background noises, such as hums or static.
4. Implement Audio Effects: Adding audio effects can enhance the creativity and immersiveness of your videos. Experiment with effects like reverb, echo, or spatial audio to create a more dynamic and engaging audio experience for your viewers.
5. Monitor and Test: Regularly monitor and test your audio settings while editing to ensure consistent sound quality throughout your video. Listen to your video using different audio devices, such as speakers or headphones, to ensure optimal performance across various platforms and devices.
Remember, a well-adjusted sound is just as important as high-quality visuals to create a truly captivating cinematic experience for your audience.
Troubleshoot Common Problems encountered in the Windows Environment for Video Editing
When working with videos in the Windows system, users often face certain challenges that could impact their editing experience. This section aims to address some of the most common issues that arise during video editing on Windows, offering possible solutions and workarounds.
- Compatibility issues: One of the challenges encountered during video editing on Windows is compatibility problems with video editing software, codecs, or hardware. It is important to ensure that the chosen software and hardware components are compatible with the Windows system. Updating drivers, codecs, and ensuring software compatibility can help to resolve such issues.
- Performance slowdowns: Video editing requires significant system resources such as CPU and RAM. If the system is not optimized, performance slowdowns can occur, leading to lagging or freezing during editing. Adjusting system settings, closing unnecessary background processes, and allocating sufficient resources to the editing software can mitigate performance issues.
- Storage limitations: Large video files can consume a significant amount of storage space. Insufficient storage might lead to errors or hinder the editing process. Regularly cleaning up unnecessary files, utilizing external storage devices, or investing in additional internal storage can help address storage limitations.
- Software crashes: Video editing software may occasionally crash, resulting in loss of unsaved work and frustration. Updating the software to the latest version, clearing temporary files, and avoiding excessive multitasking can help prevent software crashes. Additionally, allocating more virtual memory to the software may also enhance stability.
- Audio/video synchronization: Poor synchronization between audio and video can significantly impact the quality of the final edited video. This issue can arise due to various factors such as incorrect frame rate settings or unsynchronized audio sources. Adjusting frame rates, validating audio source synchronization, and fine-tuning editing techniques can address audio/video synchronization issues.
By understanding and troubleshooting these common problems encountered during video editing on Windows, users can enhance their overall editing experience and create high-quality videos efficiently.
[MOVIES] [/MOVIES] [/MOVIES_ENABLED]FAQ
What are the recommended system requirements for video editing on Windows?
The recommended system requirements for video editing on Windows include a powerful processor (such as Intel Core i7 or AMD Ryzen 7), ample RAM (at least 16GB), a dedicated graphics card, and plenty of storage space (preferably SSD).
How can I optimize my Windows settings for video editing?
To optimize your Windows settings for video editing, you can disable unnecessary startup programs, adjust your power plan settings for high performance, update your graphics card drivers, and configure your storage settings for optimal performance.
What software options are available for video editing on Windows?
There are several software options available for video editing on Windows, including Adobe Premiere Pro, Final Cut Pro, Davinci Resolve, and Sony Vegas Pro.
Is it necessary to partition my hard drive for video editing?
Partitioning your hard drive is not necessary for video editing, but it can be beneficial if you want to separate your operating system and applications from your media files for better organization and performance.
Are there any specific settings I should configure in video editing software on Windows?
Yes, there are various settings you can configure in video editing software on Windows, such as project resolution, frame rate, codec options, and audio settings. These settings can be adjusted based on your specific needs and the requirements of your project.
What are the minimum system requirements for video editing on Windows?
The minimum system requirements for video editing on Windows include a dual-core processor, at least 8GB of RAM, a dedicated graphics card with at least 2GB VRAM, and a high-speed SSD for storage. However, for more demanding video editing tasks, it is recommended to have a more powerful processor, 16GB or more of RAM, a higher-end graphics card, and ample storage space.
How can I optimize Windows for video editing?
To optimize Windows for video editing, you can perform several steps such as disabling unnecessary startup programs, updating graphics card drivers, configuring power settings to prioritize performance over power saving, optimizing storage by using a high-speed SSD, regularly cleaning temporary files, and ensuring your system is free from malware and viruses by using a reliable antivirus software.


