When it comes to enhancing your digital audio experience, the ability to seamlessly connect and utilize headphones with a built-in microphone can make a significant difference. Whether you're a gamer, a remote worker, or simply someone who enjoys crystal-clear audio for multimedia purposes, setting up and configuring your headphone microphone on your desktop or laptop is essential.
Having the correct audio input and output setup ensures that you can communicate clearly during online meetings or gaming sessions, while also preserving the integrity of sound for an immersive audio experience. This step-by-step guide will walk you through the process of connecting and configuring your headphones' microphone to your personal computer, avoiding any potential frustration or audio mishaps along the way.
Within this comprehensive article, you will find helpful tips and troubleshooting techniques to overcome any potential obstacles. You will learn about the necessary hardware connections, identify the various audio settings on your computer, and delve into the software configurations required for a seamless headphone microphone setup. By the end of this guide, you will have the knowledge and confidence to effortlessly connect and use your headphones' microphone on your computer for optimum performance.
Setting Up Your Sound Recording Device
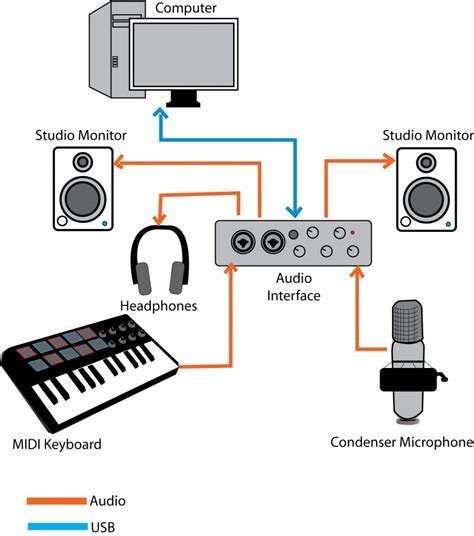
Discovering the perfect way to configure and connect your audio recording equipment is an essential step for obtaining high-quality sound feedback. In this article, we will guide you through the process of establishing a microphone specifically designed for use with headphones on your personal computer. By following these simple steps, you will be able to effortlessly enjoy clear and professional audio capture.
Check if Your Device Supports Headset Microphone
Before attempting to connect a headset microphone to your device, it is important to ensure that your device has the necessary hardware and software capabilities to support this functionality. By following the steps outlined below, you can quickly determine if your device is compatible with a headset microphone:
- Check the specifications of your device: Review the technical specifications of your device, which may include information about audio input and output capabilities. Look for any references to a microphone jack or an input for audio devices.
- Inspect your device's physical ports: Examine the physical ports on your device to identify if it has a dedicated microphone jack. This port is typically labeled with an icon resembling a microphone or includes a pink color coding.
- Refer to your device's manual: Consult the user manual or documentation provided with your device to determine if it supports headset microphones. Look for any instructions or mentions related to connecting audio peripherals.
- Check the device's operating system settings: Access the audio settings on your device by navigating to the system preferences or control panel. Look for options related to input devices or audio settings and see if there are any references to a headset microphone.
- Test with a compatible headset microphone: If you have access to a headset microphone, connect it to your device and attempt to use it for audio recording or communication purposes. If your device recognizes and properly utilizes the microphone, it is likely that it supports headset microphones.
By following these steps, you can determine if your device is equipped to handle a headset microphone, allowing you to make an informed decision when selecting and connecting audio peripherals to enhance your computing experience.
Locating the Suitable Port for Your Audio Device
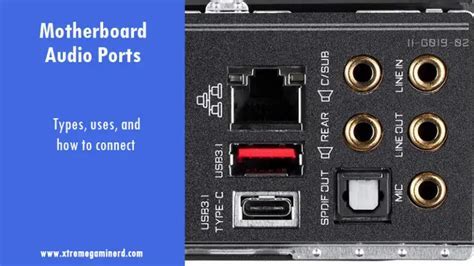
When setting up your audio equipment, it is important to identify the appropriate port on your computer that will allow your headphones and microphone to connect and function seamlessly. By determining the correct port, you can ensure optimal audio quality and compatibility.
Begin by examining your computer's ports, which are typically located on its sides or back panel. Look for ports labeled with symbols that represent audio input and output. These symbols may include a headphone icon or a microphone icon.
Once you have located the potential ports, take note of their colors as they often indicate the type of port. Common audio ports include green, pink, and blue. The color-coding system assists in distinguishing between the different types of audio connections, such as headphone, microphone, or line-in ports.
After identifying the potential audio ports, refer to your computer's documentation or the manufacturer's website for precise information on the port functions and their locations. The documentation may provide detailed illustrations or descriptions of the ports, ensuring accurate identification.
If you are unable to find the appropriate port based on the provided information, consult with a technical specialist or the customer support service of your computer manufacturer. They can offer expert guidance to help you locate and set up the headphone and microphone connections on your specific computer model.
Remember, finding the suitable audio port is essential for enjoying clear sound and ensuring effective communication. Take the time to identify the correct port to enhance your audio experience and promote seamless functionality for your headphone and microphone setup.
Connecting Your Headset Mic to Your PC
In this section, we will discuss the process of linking your headset microphone to your personal computer. This information is aimed at assisting you in setting up an efficient audio input method for your computer, without the use of any professional technical jargon or complex terminology.
Firstly, ensure that you have the appropriate hardware to connect your headset microphone to your PC. Check if your computer is equipped with the necessary audio ports, such as a headphone jack or a combined audio jack. If your computer lacks these ports, you might need to consider purchasing an external audio adapter for proper connectivity.
Next, identify the correct audio input jack on your computer. Depending on your computer model or brand, the audio port might be color-coded or have corresponding symbols. Carefully inspect your computer's user manual or examine the audio ports to determine the appropriate input for your headset microphone.
Once you have identified the correct audio port, insert the connector of your headset microphone into the corresponding jack. Ensure that the connection is secure and snugly fit to avoid any sound distortion or disruption during usage.
After the physical connection is established, it is essential to adjust the audio settings on your computer. Access the system preferences or control panel and navigate to the audio settings section. Locate the input or recording tab and select the audio input device as your headset microphone.
Finally, test the functionality of your headset microphone by making a test recording or engaging in a voice call. Adjust the volume settings accordingly to achieve the desired sound quality. If you encounter any issues or experience low audio levels, consider troubleshooting by updating your audio drivers or consulting the manufacturer's website for further assistance.
By following these simple steps, you can successfully connect your headset microphone to your computer and start utilizing it for various audio-related activities, such as voice chatting, online gaming, or recording audio samples.
Adjusting the Sound Settings on Your Device
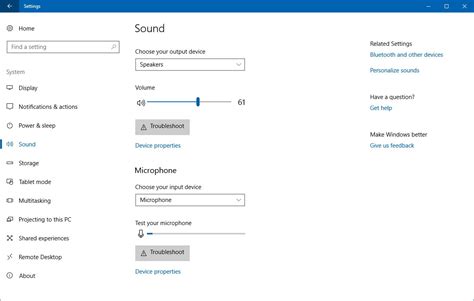
When it comes to optimizing the audio experience on your device, it's important to familiarize yourself with the various sound settings that are available. By adjusting these settings, you can enhance the clarity and quality of the sound produced by your headphones and microphone.
One of the key sound settings to consider is the volume level. Adjusting the volume allows you to control the loudness of the audio output, ensuring it is comfortable and suitable for your needs. It's important to find a balance that allows you to hear clearly without any distortion or discomfort.
Another important setting is the equalizer. The equalizer allows you to adjust the frequency levels of the audio output, enabling you to customize the sound to your personal preference. By adjusting the bass, treble, and midrange frequencies, you can achieve a more balanced and immersive audio experience.
Furthermore, you may want to consider the audio balance settings. These settings allow you to adjust the distribution of sound between the left and right channels, ensuring that the audio is evenly balanced. This can be particularly useful if you find that the sound is stronger in one ear than the other.
- Experiment with the different sound settings on your device to find the configuration that suits your listening preferences.
- Consider using audio enhancement features, such as virtual surround sound or noise reduction, if they are available on your device.
- Remember to regularly check for software updates for your device, as these updates may include improvements to the audio settings.
By familiarizing yourself with the range of sound settings on your device, you can ensure that you are getting the best possible audio experience when using your headphones and microphone. Whether you are listening to music, watching movies, or engaging in voice calls, optimizing these settings can greatly enhance the overall audio quality.
Testing the Audio Input Device
Ensuring the functionality of your microphone is an important step in setting up your audio input device. Proper testing allows you to confirm if the microphone is functioning correctly and optimize its performance for a seamless audio experience.
There are several methods to test the microphone and determine its working status. One common approach is to utilize audio recording software or applications that are readily available on your computer system. By recording a short sample, you can assess the microphone's sensitivity, clarity, and overall audio quality.
Another option for testing the microphone involves using the built-in audio settings on your computer. These settings allow you to access the microphone properties, adjust input levels, and enable additional features like noise cancellation or echo reduction. By exploring these settings and making necessary adjustments, you can enhance the microphone's performance and troubleshoot any potential issues.
In addition to software-based testing, physical inspection of the microphone is also crucial. Ensure that the microphone's physical connections are secure and properly inserted into the designated audio input port on your computer. Inspect the cables for any damage or fraying that may affect the microphone's functionality.
Once you have conducted the necessary tests and adjustments, it is recommended to perform a test call or voice recording to further validate the microphone's working status. This real-time evaluation allows you to verify the audio input's functionality in practical scenarios.
Remember, regular maintenance and periodic testing of your microphone can help identify and resolve any issues proactively, ensuring seamless audio communication during important tasks such as online meetings, voice recordings, or gaming sessions.
Troubleshoot Common Issues with Headset Microphone Configuration
When setting up your audio equipment for optimal performance, it is important to be aware of potential issues that may arise. This section aims to provide troubleshooting tips to help you resolve common problems encountered when configuring your headset microphone.
- Ensure proper connection: Check that your headset microphone is securely connected to the appropriate audio port on your device. Loose connections can result in poor audio quality or no sound at all.
- Check device compatibility: Verify that your headset microphone is compatible with your computer's operating system and audio settings. Incompatible devices may not function correctly or may require additional configuration.
- Adjust microphone settings: Access your computer's audio settings and make sure that the headset microphone is selected as the default recording device. Additionally, check that the microphone volume is not muted or set too low.
- Update audio drivers: Outdated audio drivers can cause issues with your headset microphone. Visit the manufacturer's website or use a reliable driver update tool to ensure your drivers are up to date.
- Test with different applications: If you encounter issues with a specific application, test your headset microphone with other software. This can help determine if the problem lies with the application or the microphone configuration.
- Check for background noise: Background noise can interfere with the clarity of your recorded audio. Ensure that you are in a quiet environment and consider using noise-canceling software or a separate microphone to minimize unwanted sound.
- Inspect hardware defects: If all else fails, visually inspect your headset microphone for any physical damage or defects. This includes checking the microphone boom, cables, and connectors for any visible issues.
By following these troubleshooting steps, you can address common issues that may arise when setting up your headset microphone. Remember to consult your device's user manual or the manufacturer's website for specific instructions related to your headset model and computer setup.+
Installing Required Drivers for Your Headset Mic
To ensure proper functionality of your headset microphone, it is crucial to install the necessary drivers on your system. These drivers serve as the intermediaries between your computer's operating system and the microphone hardware, enabling smooth communication and optimal performance.
Recognizing the Importance
Recognizing the significance of installing the required drivers for your headset microphone is vital in order to fully utilize its capabilities. Without the appropriate drivers, your computer may not recognize or properly communicate with the microphone, resulting in distorted or low-quality audio recordings.
Locating the Correct Drivers
Before proceeding with the installation process, you need to locate the correct drivers for your headset microphone. Manufacturers typically provide these drivers on their official websites. Make sure to identify the exact model of your headset microphone before downloading the corresponding drivers, as using incorrect drivers can lead to compatibility issues and system errors.
Installing the Drivers
Once you have downloaded the correct drivers for your headset microphone, follow the installation instructions provided by the manufacturer. These instructions usually involve running an executable file and following the on-screen prompts. It is advisable to close all other applications during the installation to prevent any interruptions or conflicts.
Restarting Your System
After the driver installation process is complete, it is recommended to restart your computer. This step allows the newly installed drivers to integrate with your operating system effectively. Once your system has rebooted, your headset microphone should be ready for use, offering clear sound quality during your audio recordings or communication sessions.
Verifying Driver Installation
To ensure the successful installation of the drivers, you can check the device manager on your computer. Access the device manager, locate the headset microphone under the audio devices section, and verify that it is listed without any warning signs or error messages. If everything appears to be in order, you can proceed with testing your headset microphone to ensure it is functioning correctly.
Optimize Mic Settings for Enhanced Performance
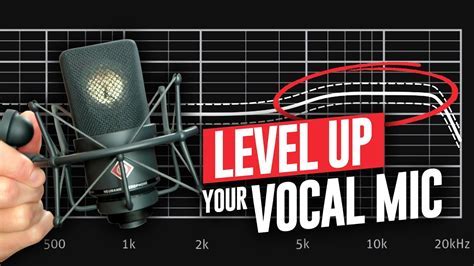
In order to maximize the capabilities of your microphone and ensure optimal performance, it is essential to customize its settings. By adjusting various parameters, you can enhance the clarity, sensitivity, and overall quality of your microphone recordings.
1. Sensitivity: Adjusting the sensitivity or gain of your microphone allows you to amplify or reduce the volume of the recorded audio. Experiment with different sensitivity levels to find the right balance that avoids distortion while capturing clear and crisp sound.
2. Noise cancellation: Many microphones come with built-in noise cancellation features. Activate this setting to reduce background noise and eliminate any unwanted disturbances that could potentially affect the quality of your recordings.
3. EQ settings: Use the equalizer settings to fine-tune the frequency response of your microphone. Boost or attenuate specific frequency ranges to suit your recording needs and enhance the overall tonal quality.
4. Sound activation: Some microphones offer sound activation features, also known as voice activation detection (VAD). This setting enables the microphone to start recording only when it detects sound above a certain threshold, eliminating any unnecessary background noise.
5. Sample rate and bit depth: Adjusting the sample rate and bit depth settings can enhance the audio quality and ensure compatibility with different recording software. Consider higher sample rates and bit depths for professional-quality recordings.
Exploring and customizing these microphone settings will allow you to tailor the recording experience according to your specific requirements. Remember to consider the environment, intended use, and personal preferences when making adjustments for optimum performance.
Ensuring Recognition of Your Microphone by Software Applications
To successfully utilize your microphone with software applications, it is essential to ensure that the microphone is properly recognized by the applications you intend to use. Recognition of the microphone by software is crucial for seamless communication and recording experiences.
- 1. Check for microphone compatibility: Before using your microphone with a software application, verify that it is compatible with the specific application. Different software may have varying requirements or limitations when it comes to microphone compatibility.
- 2. Update audio drivers: Outdated or incompatible audio drivers can prevent your microphone from being recognized by software applications. It is recommended to check for updates for your audio drivers and install them to ensure optimal functionality.
- 3. Adjust microphone settings: Access your computer's sound settings and verify that the microphone is selected as the default recording device. This step is essential in ensuring that software applications recognize and utilize the correct microphone for input.
- 4. Grant necessary permissions: Some software applications may require specific permissions to access your microphone. Review the application's settings or preferences to ensure that it has the necessary permissions to utilize your microphone.
- 5. Test with a different application: If a specific software application does not recognize your microphone, try using it with a different application. This will help determine if the issue lies with the microphone or the software itself. Additionally, testing with multiple applications can help identify any compatibility issues.
- 6. Troubleshoot software-specific issues: If a particular software application consistently fails to recognize your microphone, consult the application's support documentation or contact their customer support for further assistance. They may have specific troubleshooting steps tailored to their software.
By following these steps, you can ensure that software applications effectively recognize your microphone, allowing you to use it seamlessly for various communication and recording purposes.
Follow Best Practices for Utilizing Your Headset's Integrated Microphone
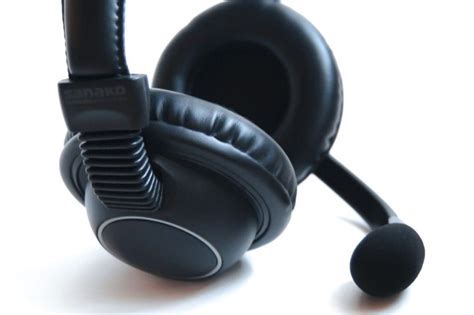
In this section, we will explore essential principles and techniques to optimize the performance of your headset's microphone, ensuring clear and crisp audio capture during various tasks.
- Positioning and Adjusting: Proper placement of your headset microphone greatly impacts the audio quality. Experiment with different positions to find the one that suits you best, whether it's closer to your mouth or slightly away. Maintaining an optimal distance and aligning it with your speech pattern enhances the sound capturing capabilities.
- Background Noise Reduction: Minimizing background noises significantly improves the clarity of your voice during recordings or calls. Select a quiet environment and reduce any potential sources of disturbance, such as fans or loud electronics. Additionally, consider using noise-canceling features or software options available to attenuate external sounds.
- Microphone Sensitivity Settings: Familiarize yourself with the settings options provided by your operating system or audio control software. Adjusting the microphone sensitivity levels can help optimize the microphone's response to different sound levels and minimize unwanted distortions or feedback.
- Proper Maintenance: Regularly clean your headset microphone to ensure optimal performance. Use a soft, lint-free cloth or a small brush to remove dust or debris. Avoid applying excessive force while cleaning to prevent any damage to the microphone or other components.
- Test and Calibration: Before engaging in important voice communications or recording sessions, it is advisable to conduct a quick test to ensure the microphone is functioning correctly. Utilize built-in tools, such as voice recording applications or online microphone test websites, to verify the audio quality before the actual task.
By adhering to these best practices and fine-tuning your headset microphone setup, you can maximize the performance and quality of your audio recordings, voice calls, and other activities that rely on clear and accurate sound capture.
FAQ
Can I use my headphone microphone on my computer?
Yes, you can definitely use your headphone microphone on your computer. Most computers have a dedicated audio jack or a combined audio/microphone jack that allows you to connect your headphone microphone and use it for various purposes such as voice calls, video conferencing, gaming, and recording.


