With the ever-increasing popularity of tablets, the need for seamless integration between different devices has become a necessity more than ever. If you are a proud owner of an iPad and a Windows 10 computer, you may find yourself wondering how to establish a smooth connection between the two. Fear not, as this article will guide you through the process step by step, making the syncing of your iPad with your Windows 10 PC a breeze.
Bringing together the power of your iPad and the versatility of your Windows 10 computer will open up a world of possibilities. From data sharing and content management to seamless file transfers and device synchronization, the benefits are numerous. The process may seem daunting at first, but with the right tools and knowledge, you can make it a seamless experience without the need for complicated technical jargon or expensive software.
By following the simple yet effective methods outlined in this guide, you can ensure that your iPad and Windows 10 computer work harmoniously together. Whether you are a tech-savvy individual looking to maximize productivity or simply seeking greater convenience in your digital life, the information within this article will provide you with the necessary know-how to successfully connect and sync your iPad and Windows 10 PC.
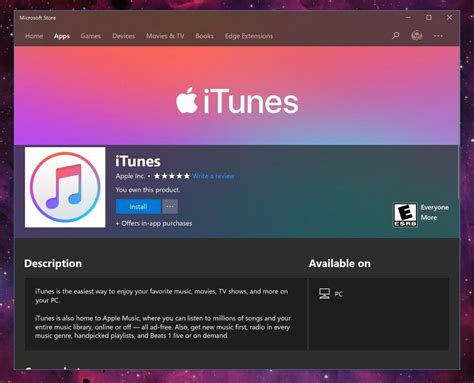
Installing iTunes on your Windows 10 PC

In this section, we will discuss the process of setting up iTunes on your Windows 10 computer, enabling you to synchronize your Apple devices effortlessly.
Step 1: Begin by opening your web browser and navigating to the official Apple website.
Step 2: Look for the "Downloads" section on the Apple website and click on it.
Step 3: Locate the iTunes download page and click on the download button.
Step 4: Once the download is complete, locate the downloaded file on your computer and double-click on it to begin the installation process.
Step 5: Follow the on-screen instructions provided by the iTunes installer.
Step 6: During the installation process, you might be prompted to agree to the End User License Agreement. Read through the terms and conditions, and if you agree, click on the "Agree" button to proceed.
Step 7: Choose the location where you want iTunes to be installed on your Windows 10 PC.
Step 8: Once the installation is complete, launch iTunes by clicking on the desktop shortcut or searching for it in the Start menu.
Step 9: Connect your iPad or other Apple devices to your Windows 10 computer using the appropriate USB cable.
Step 10: Wait for your Windows 10 computer to recognize the connected device and follow any on-screen prompts to allow access.
Step 11: In iTunes, click on the device icon that appears in the top-left corner to access its settings.
Step 12: From here, you can customize synchronization options, including transferring music, videos, photos, and apps between your iPad and Windows 10 computer.
By following these simple steps, you can successfully install iTunes on your Windows 10 PC and begin syncing your iPad or other Apple devices with ease.
Connecting your iPad to your Windows 10 personal computer
Discover the seamless integration between your iPad and Windows 10 personal computer and learn how to establish a connection without any hassle. This section will provide you with step-by-step instructions to effortlessly link your iPad to your Windows 10 system, allowing for smooth data transfer and enhanced device compatibility.
- Step 1: Verify the compatibility of your iPad and Windows 10 system
- Step 2: Ensure your iPad and Windows 10 computer are connected to the same Wi-Fi network
- Step 3: Enable AirPlay on your iPad
- Step 4: Access the 'Connect' feature on your Windows 10 computer
- Step 5: Detect and select your iPad from the list of available devices
- Step 6: Confirm the connection on both devices
- Step 7: Enjoy seamless connectivity and experience the power of iPad and Windows 10 integration
By following these simple steps, you will establish a strong and reliable connection between your iPad and Windows 10 personal computer. Harness the potential of both devices by effortlessly sharing files, syncing data, and leveraging the features offered by this seamless integration. Embrace the convenience and productivity that comes with connecting your iPad to your Windows 10 system.
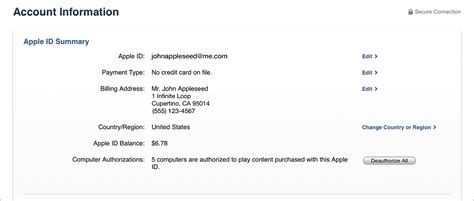
Authorizing your computer using your Apple ID

Granting authorization to your Windows 10 computer with your Apple ID allows you to seamlessly access and sync your iPad with your computer. By completing this process, you establish a secure connection between your devices, ensuring that your data is transferred smoothly and efficiently.
- Step 1: Accessing Apple ID settings
- Step 2: Navigating to the Authorized Computers section
- Step 3: Managing authorized computers
- Step 4: Authorizing your Windows 10 computer
- Step 5: Verifying successful authorization
Begin by opening the Apple ID settings on your iPad. This can be done by selecting the "Settings" app from your device's home screen and then tapping on your Apple ID profile located at the top of the screen.
Once you are in the Apple ID settings, scroll down and select the "iTunes & App Store" option. From there, locate and tap on the "View Apple ID" button. You may be prompted to enter your Apple ID password or use Touch ID/Face ID to authenticate.
Within the Apple ID settings, navigate to the "Authorized Computers" section. Here, you will find a list of all the previously authorized computers. To manage and authorize your Windows 10 computer, tap on the "Manage Devices" option.
On the Manage Devices screen, you will see an option to authorize your Windows 10 computer. Click on it to proceed with the authorization process. You may be required to enter your Apple ID password or use Touch ID/Face ID for confirmation.
Once the authorization is complete, you will see your Windows 10 computer listed under the Authorized Computers section. This signifies that your computer is now authorized to sync and access your iPad.
Choosing the synchronization settings for your portable Apple device
Customizing the synchronization preferences on your portable Apple device and your personal computer can enable seamless data transfer and ensure a smooth user experience. By selecting the appropriate options, you can optimize the synchronization process, allowing your device and computer to work harmoniously together. This section provides insights into the various synchronization settings available, empowering you to make informed decisions that suit your specific needs.
| Setting | Description |
|---|---|
| Data Sync | Specify which types of data you want to synchronize between your device and computer. Choices may include contacts, calendars, photos, videos, music, and more. Selecting the data types you frequently use will ensure you have the most up-to-date information accessible on both devices. |
| Automatic Sync | Decide whether you want your device to sync automatically when connected to your computer. This feature can streamline the process by automatically transferring any new data or changes without manual intervention. However, if you prefer manual control over the synchronization, you can opt for a manual sync option instead. |
| Sync Direction | Determine the direction in which data is synchronized. You can choose to sync data from your computer to your device, from your device to your computer, or both. This versatility allows you to manage and manipulate your data effectively, ensuring it is available where you need it the most. |
| Sync Frequency | Select how often you want the synchronization process to occur. Options may include manual sync, daily, weekly, or even real-time sync. Consider the frequency at which your data changes and your device usage patterns to choose the most suitable sync frequency. |
| Additional Options | Explore additional synchronization options such as selective sync, excluding certain files or folders, merging data, or creating backups. These advanced settings allow you to tailor the synchronization process to your exact requirements, resulting in a more personalized and efficient data management experience. |
By carefully selecting the synchronization settings for your portable Apple device and Windows 10 computer, you can establish a seamless connection that ensures your data remains consistent and readily available. Understanding and customizing these settings empowers you to maximize the utility of your device, creating a streamlined workflow and enhancing your overall digital experience.
Transferring files between your iPad and Windows 10 device

In today's interconnected world, it is crucial to have a seamless method for transferring files between your portable iPad device and your Windows 10 computer. This section will provide you with a comprehensive guide on how to efficiently move files between these two devices, ensuring that you can access your important documents, photos, videos, and more, regardless of the platform you are using.
| Method | Description |
|---|---|
| iCloud | Utilize Apple's cloud-based storage system, iCloud, to effortlessly sync and access your files across your iPad and Windows 10 computer. |
| File-sharing apps | Explore various file-sharing apps available for both iOS and Windows 10, allowing you to transfer files wirelessly between your devices. |
| USB connection | Establish a direct and secure connection between your iPad and Windows 10 computer using a USB cable to transfer files directly. |
| Email attachments | Utilize the convenience of email attachments to send files from your iPad to your Windows 10 computer or vice versa. |
| Cloud storage services | Make use of popular cloud storage services such as Dropbox, Google Drive, or OneDrive to store and share files seamlessly between your iPad and Windows 10 computer. |
By following the instructions provided in this section, you will empower yourself with the knowledge and tools necessary to effortlessly transfer files between your iPad and Windows 10 computer, enabling a seamless workflow and ensuring that your important files are always accessible, regardless of the device you are using.
Troubleshooting common synchronization issues
When attempting to establish a connection between your iPad and Windows 10 computer, you might encounter various synchronization issues. This section will guide you through some common problems that users face during this process and provide suggestions on how to resolve them.
1. Connectivity problems: One of the most frequent issues is connectivity, where your devices fail to establish a stable connection. This might be due to network disruptions, incompatible software, or faulty hardware. To address this, ensure that both devices are connected to a stable and reliable network, update software on both the iPad and Windows 10 computer, and check for any damaged cables or ports.
2. Device recognition: Sometimes, your Windows 10 computer might not recognize your iPad, leading to synchronization issues. This can occur if the drivers for your iPad are not properly installed or if there is a compatibility problem between the two devices. To solve this, try reinstalling the relevant drivers and updating the operating system on both the iPad and the computer.
3. Syncing errors: Another common problem is encountering errors while syncing data between the iPad and Windows 10. These errors can prevent certain files or applications from being synchronized correctly. To overcome this, ensure that you have the latest versions of iTunes and iCloud installed on your computer, check for any conflicting settings, and attempt to sync smaller batches of data at a time.
4. Slow synchronization: If the synchronization process takes an unusually long time, it can be frustrating. Slow syncing can be caused by a variety of factors, such as a large amount of data to sync, insufficient storage space on the devices, or outdated software. To speed up the process, consider deleting unnecessary files or applications, freeing up storage space, updating software, and connecting to a high-speed internet connection.
5. Data discrepancies: Occasionally, you may notice discrepancies between the data on your iPad and the data on your Windows 10 computer after synchronization. This can be a result of conflicting or outdated backups, settings, or file versions. To resolve this, ensure that you are using the same Apple ID and iCloud account on both devices, check for any conflicting settings, and manually compare and update any missing or outdated files.
By addressing these common synchronization issues, you can ensure a smooth and efficient connection between your iPad and Windows 10 computer, allowing you to seamlessly transfer and manage your data.
[MOVIES] [/MOVIES] [/MOVIES_ENABLED]FAQ
How can I sync my iPad with a Windows 10 computer?
To sync your iPad with a Windows 10 computer, you can use iTunes. Connect your iPad to the computer using a USB cable, open iTunes, and select your device. Then, go to the "Summary" tab and choose the option to sync your iPad. You can select what content you want to sync, such as music, photos, and apps. Click on the "Apply" button to start the sync process.
Is there another way to sync my iPad with a Windows 10 computer?
Yes, besides using iTunes, you can also use iCloud to sync your iPad with a Windows 10 computer. Ensure that you have the iCloud app installed on your computer and signed in with the same Apple ID as your iPad. On your iPad, go to "Settings" and tap on your name, then select "iCloud" and turn on the options for the content you want to sync. On your computer, open the iCloud app and enable the syncing options you desire. Your iPad will then be synced with your Windows 10 computer via iCloud.
Can I sync my iPad wirelessly with a Windows 10 computer?
Yes, you can sync your iPad wirelessly with a Windows 10 computer. To do this, both your iPad and computer need to be connected to the same Wi-Fi network. Open iTunes on your computer, connect your iPad to iTunes via USB cable, select your device, and go to the "Summary" tab. Check the box that says "Sync with this iPad over Wi-Fi" and click on "Apply". After this initial setup, you can disconnect the USB cable and your iPad will automatically sync with your Windows 10 computer whenever it is connected to the same Wi-Fi network.
What should I do if my iPad is not syncing with my Windows 10 computer?
If your iPad is not syncing with your Windows 10 computer, there are a few troubleshooting steps you can try. First, make sure you have the latest version of iTunes installed on your computer. If not, update iTunes to the newest version and try again. Also, check that your iPad is unlocked and trust the computer you are connecting to. Restart both your iPad and computer, and try connecting them again. If the issue persists, you can try using a different USB cable or port. If none of these steps work, you may need to contact Apple Support for further assistance.
Can I sync multiple iPads with the same Windows 10 computer?
Yes, you can sync multiple iPads with the same Windows 10 computer. Simply connect each iPad to the computer using a separate USB cable, open iTunes, and select each device individually to sync. You can choose what content to sync for each iPad, allowing you to personalize the syncing process for each device. By following these steps, you can easily manage and sync multiple iPads with the same Windows 10 computer.
How can I sync my iPad with my Windows 10 computer?
To sync your iPad with your Windows 10 computer, you can use iTunes. Make sure you have the latest version of iTunes installed on your computer. Connect your iPad to your computer using the USB cable. iTunes should automatically detect your device. Click on the device icon in the top left corner of the iTunes window. From there, you can choose to sync your entire iPad or select specific content like music, photos, or apps to sync. Once you have selected the content you want to sync, click on the "Apply" or "Sync" button to begin the synchronization process.


