Are you constantly on the go, reliant on your iPhone for both personal and professional communication? Look no further – this comprehensive guide is tailored specifically to help you effortlessly set up your email account on your iOS device. Whether you're a seasoned iOS user or just getting started, we've got you covered.
In this guide, we will walk you through the step-by-step process of configuring your email on your iPhone, all the while ensuring your correspondence remains secure and seamless. From selecting the most suitable email provider for your needs to encountering potential troubleshooting issues, we'll address it all.
Get ready to take control of your inbox with just a few taps! You'll learn how to effortlessly sync your emails, organize your folders, and customize your preferences to maximize efficiency, all while keeping your personal information protected. By the end of this guide, you'll wonder how you ever managed without these essential tips and tricks!
Setup Email on Your Apple Device: An In-Depth Walkthrough

When it comes to integrating your email account with your Apple device, utilizing the built-in functionality can save you time and effort. This comprehensive guide is designed to help you seamlessly set up your email on your iOS device, ensuring that you can access and manage your messages conveniently.
Before diving into the step-by-step process, it's important to have the necessary information readily available. You will need to gather details such as your email address, password, incoming and outgoing mail server details, and additional authentication settings if required. Once armed with these prerequisites, you can embark on the following journey of setting up email on your iOS device.
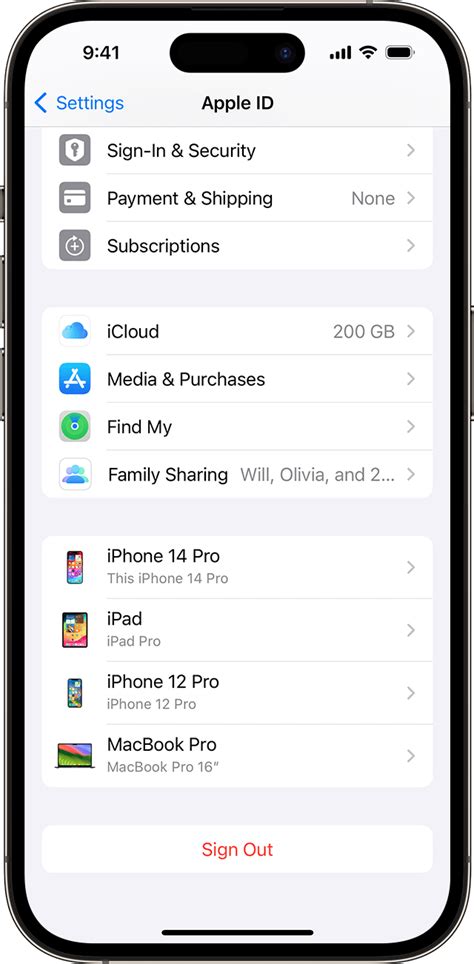
- Navigate to the Settings: Begin by locating the Settings icon on your device's home screen. It resembles a gear-shaped symbol and can typically be found towards the top-right corner of the screen.
- Access the Mail Settings: Within the Settings menu, scroll down and select the "Mail" option. This will open a new menu dedicated to email-related settings and configurations.
- Select "Accounts": From the Mail menu, tap on the "Accounts" option. This will display the list of email accounts already set up on your device, as well as provide the option to add a new account.
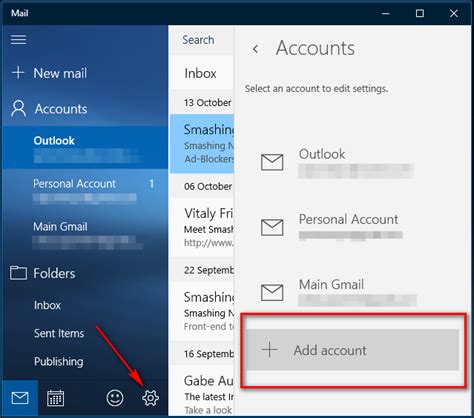
- Add a New Account: To add a new email account, tap on the "Add Account" button. This will initiate the setup process and present you with a list of popular email services, including options for manually adding other types of accounts.
- Choose Your Email Provider: Depending on the email service you use, select the appropriate provider from the provided list. If your email service is not listed, you can still add it manually by selecting the "Other" option at the bottom of the list.
- Enter Your Account Details: In this step, enter your email address and password. Ensure that the information you provide is accurate to successfully establish a connection with your email provider's servers.
- Configure Additional Settings: Depending on your email provider, you may be prompted to configure additional settings such as server information, port numbers, authentication methods, and SSL/TLS encryption. Consult your email provider's documentation or support resources for the specific details to accurately set up these settings.
- Complete the Setup: Once you have entered all the necessary account details and configured any additional settings, tap on the "Next" or "Sign In" button to verify and save your settings. Your device will attempt to validate the provided details and establish a connection with the email server.
- Enjoy Your Email Experience!: Congratulations! You have successfully set up your email on your iOS device. Now, you can enjoy the convenience of accessing and managing your emails directly from your Apple device, streamlining your communication and productivity.
By following this comprehensive guide, you can effortlessly set up your email on your Apple device, enabling you to stay connected and organized while on the go. Remember to double-check your account settings and consult your email provider's documentation for any specific requirements or troubleshooting tips. Enjoy a seamless email experience right at your fingertips!
Choosing the Right Email Provider
When it comes to setting up email on your iOS device, one of the most crucial decisions you need to make is choosing the right email provider. This decision determines the functionality, security, and overall user experience of your email account.
A reliable email provider is essential for seamless communication and efficient management of your emails. It ensures that your messages are delivered promptly, offers advanced features for organizing your inbox, and provides robust security measures to protect your sensitive information.
There are numerous email providers available, each offering their own set of features and benefits. Before choosing a provider, it is important to consider your specific needs and preferences. Factors like storage capacity, ease of use, integration with other apps and services, spam filtering capabilities, and customer support should all be taken into account.
It is also advisable to research and compare different email providers to determine their reputation and reliability. Check online reviews and ratings to get insights from other users about their experiences with different providers.
Furthermore, consider the longevity and stability of the email provider. Opting for a well-established and reputable provider can ensure that your email account will remain functional and supported for years to come.
Lastly, take into consideration any additional features or services that may be important to you. Some email providers offer advanced security options, integrated calendars and task managers, customizable user interfaces, and compatibility with third-party email clients.
| Factors to Consider: | Benefits of a Good Email Provider: |
|---|---|
| Storage capacity | Efficient message organization |
| Ease of use | Prompt message delivery |
| Integration with other apps and services | Robust security measures |
| Spam filtering capabilities | Reliable customer support |
By carefully considering these factors and doing thorough research, you can choose the right email provider that meets your specific needs and ensures a smooth email experience on your iOS device.
Configuring Your Email Account

When it comes to setting up your email account on your iOS device, there are a few key steps you need to follow to ensure a smooth and hassle-free process. This section will guide you through the necessary configurations and settings required to access your email account right on your phone.
The first step in configuring your email account is to navigate to the Settings menu on your iOS device. Within the Settings menu, you will find the option to add a new email account. By selecting this option, you will be prompted to enter your email address and password.
Once you have entered your email credentials, the next step involves selecting the type of email account you have, such as POP or IMAP. This selection depends on the email service provider you use, so it's important to check with your provider to determine the correct email account type.
After selecting the account type, you will need to input the incoming and outgoing mail server settings. These settings typically include the server address, port number, and security settings. Again, it's crucial to consult your email service provider or IT department for the accurate server settings.
Additionally, you may have the option to enable advanced settings, such as SSL/TLS encryption or authentication requirements. These settings enhance the security of your email account and protect your sensitive information from unauthorized access.
Once you have completed these configurations, the last step is to verify the account settings and save the changes. This will initiate the process of syncing your email account with your iOS device, allowing you to access and manage your emails conveniently on your phone.
By following these steps and configuring your email account correctly, you can enjoy the convenience and efficiency of having your emails readily available on your iOS device. The provided guidelines ensure a seamless setup process while prioritizing the security of your email account.
Configuring Incoming and Outgoing Mail Servers: Key Steps for iOS Devices
In order to start sending and receiving emails on your iOS device, it is crucial to properly configure the incoming and outgoing mail servers. These settings establish the communication between your device and the mail servers, allowing for seamless email management. This section will guide you through the essential steps to set up the incoming and outgoing mail servers and ensure a smooth email experience on your iOS device.
1. Setting up the Incoming Mail Server:
First and foremost, you need to accurately enter the settings for the incoming mail server on your iOS device. This includes specifying the server address, port number, and type of encryption. The server address usually takes the form of "mail.yourdomain.com". Depending on the provider, the server may use the commonly used protocols like IMAP or POP, each with its own port number and encryption options. Verify these details with your email service provider to ensure compatibility.
2. Configuring the Outgoing Mail Server:
Equally important is the configuration of the outgoing mail server, which enables your device to send emails. Similar to the incoming mail server, you'll be required to enter the server address, port number, and encryption type. The outgoing mail server address often follows the format of "smtp.yourdomain.com". It is crucial to ensure that the outgoing mail server settings match those of your email service provider to avoid any issues with sending emails.
3. Authentication and Account Credentials:
Authentication plays a vital role in securely accessing your email account. When setting up the mail servers on your iOS device, you'll need to provide your account credentials, such as your username and password, for both incoming and outgoing servers. This information helps verify your identity and permits the necessary access to your email account. Make sure to double-check and accurately enter these credentials to avoid any login failures.
4. Additional Security and Advanced Settings:
For enhanced security and additional customization, iOS devices offer advanced settings for mail server configuration. These settings may include options like SSL or TLS encryption, server timeouts, and mail retrieval frequency. Depending on your preferences and requirements, you can adjust these settings accordingly to optimize your email experience.
By following the above steps, you will be able to properly configure the incoming and outgoing mail servers on your iOS device. Remember to reference the settings provided by your email service provider and double-check all the entered information for a seamless email setup. Now, you can effortlessly manage and stay connected with your emails on your iOS device.
Setting up Office 365 email on iPhone, Apple Mail, iOS, iPad
Setting up Office 365 email on iPhone, Apple Mail, iOS, iPad by IT Support Service 63,098 views 3 years ago 7 minutes, 6 seconds
Email Tutorial | How To Send an Email For Beginners | Email How To
Email Tutorial | How To Send an Email For Beginners | Email How To by Supreme Guru Tech 652,721 views 6 years ago 3 minutes, 12 seconds
FAQ
How do I set up mail on my iOS phone?
To set up mail on your iOS phone, follow these step-by-step instructions:
Can I set up multiple email accounts on my iOS phone?
Yes, you can set up multiple email accounts on your iOS phone. Follow these steps to add additional accounts:
What should I do if I'm having trouble setting up my email on iOS?
If you're encountering issues when setting up your email on iOS, here are some troubleshooting tips to try:


