

Intertwining the powerful advantages of cutting-edge technology with utter convenience and seamless connectivity, this comprehensive guide will walk you through the simple yet effective steps to effortlessly transfer files from your beloved iPad to your dependable Mac. Say goodbye to the unyielding barriers that hinder your productivity and revel in the smooth synchronization between these two cutting-edge devices.
Unlocking endless possibilities for creativity and productivity, the art of seamlessly moving files between your cherished tablet and venerable computer is an essential skill in today's fast-paced digital world. Whether you're a tech-savvy professional striving for peak efficiency or a creative aficionado in pursuit of expressing your imaginative endeavors, this tutorial is tailored to meet your unique needs.
Delve into the enchanting realm of connectivity with your cherished iPad and beloved Mac, as we explore the intricate mechanisms that underpin the effortless transfer of your precious files. Harnessing the power of emerging technologies and the synergy between devices, we will equip you with the knowledge to seamlessly move, sync, and access your data, empowering you to reach new heights of productivity and creativity.
Effortlessly Transferring Files: a Step-by-Step Guide

Discover the seamless process of effortlessly moving your valuable data from your cutting-edge tablet device to your reliable desktop computer. In this section, we will provide you with a comprehensive step-by-step guide on efficiently transferring files between your iPad and Mac, ensuring that your data remains secure and easily accessible.
1. Prepare Your Devices
Before commencing the transferring process, it is crucial to ensure that your iPad and Mac are ready. Connect both devices using a reliable cable or establish a stable wireless connection. Ensure that both devices are powered on and have sufficient battery life to complete the transfer without interruptions.
2. Select the Files
Identify the files you wish to export from your iPad to your Mac. Whether it's memorable photos, important documents, or entertaining videos, organize your files and create a designated folder on your iPad for easy access during the transfer process. This will streamline the procedure and save valuable time.
3. Choose the Transfer Method
Consider the various methods available to transfer your selected files from your iPad to your Mac. You can opt for cloud-based services, such as iCloud or Dropbox, to sync your files seamlessly. Alternatively, you can utilize third-party applications specifically designed for file transfer between iOS and macOS devices.
4. Execute the Transfer
Once you have determined the transfer method, follow the specific instructions provided by the chosen method. Generally, this involves selecting the files you wish to transfer from your iPad, choosing the destination folder on your Mac, and initiating the transfer process. Ensure that both devices remain connected throughout the transfer.
5. Verify and Organize
Double-check the transferred files on your Mac to ensure a successful transfer. Open the destination folder and review each file to confirm that it has been transferred accurately. Take this opportunity to organize your newly imported files on your Mac, creating appropriate folders and naming conventions for easy future access.
6. Safely Disconnect the Devices
Once the transfer is complete and you have verified the accuracy and organization of your files, safely disconnect your iPad from your Mac. Follow the recommended device-specific steps to safely eject the iPad, ensuring that no data is lost or corrupted. Disconnect the cable or close the wireless connection.
By following these step-by-step instructions, exporting files from your iPad to your Mac becomes a hassle-free process. Enjoy the convenience and efficiency of seamlessly transferring your data, allowing you to access and utilize your files across multiple devices effortlessly.
Connecting your iPad and Apple computer
Ensuring seamless communication between your Apple devices is crucial for a smooth and efficient workflow. In this section, we will explore the various methods and steps required to establish a reliable connection between your iPad and Mac. By establishing this connection, you will be able to transfer files, sync data, and access your iPad's content directly from your computer.
There are several ways to connect your iPad and Mac, depending on your preferences and the available resources. Here are a few methods you can consider:
- Using a physical cable: The most straightforward method is to connect your iPad to your Mac using a USB cable. This allows for a direct and secure connection between the two devices, enabling seamless data transfer.
- Using AirDrop: If your iPad and Mac support AirDrop, you can take advantage of this wireless file sharing feature. With AirDrop, you can easily transfer files, photos, and documents between your devices without the need for cables.
- Using iCloud: By utilizing iCloud services, you can sync your data across all your Apple devices. This means that any changes made on your iPad will automatically reflect on your Mac, and vice versa. iCloud provides a convenient and effortless way to ensure that your files are always up to date.
- Using third-party apps: There are various third-party apps available that can facilitate the connection between your iPad and Mac, offering additional features and functionality. These apps often provide specialized solutions for specific purposes such as transferring media files, managing documents, or accessing iPad apps on your Mac.
Before you proceed to connect your iPad and Mac, make sure that both devices are running the latest software updates and are connected to the same Wi-Fi network. This will ensure compatibility and a stable connection between the two devices.
Now that you have an overview of the different methods available, you can choose the one that best suits your needs and follow the step-by-step instructions to establish a seamless connection between your iPad and Mac.
Enabling iCloud on both devices

In order to seamlessly transfer and sync data between your handheld device and computer, it is essential to enable iCloud on both your tablet and desktop or laptop. By activating iCloud, you can effortlessly share files, documents, and other information across devices, eliminating the need for manual transfers or the use of external storage.
Step 1: Apple ID
Ensure that both your iPad and Mac are signed in with the same Apple ID. This unique identifier allows for seamless integration between devices and serves as the foundation for iCloud synchronization.
Step 2: iCloud Settings
On your iPad, navigate to the Settings app and locate the iCloud section. Tap on iCloud and toggle the switch to enable it. You may be prompted to enter your Apple ID password for verification purposes.
Similarly, on your Mac, access the System Preferences panel and click on the iCloud icon. Sign in with your Apple ID if you haven't already done so, and enable the iCloud features you wish to use.
Step 3: Select Data for Syncing
After enabling iCloud on both devices, you can choose the specific types of data you want to synchronize. This includes contacts, calendars, photos, documents, and more. Customize these settings based on your preferences and needs.
Step 4: Verify Syncing
Once you have configured iCloud settings and selected the desired data for syncing, verify that both devices are connected to the internet. iCloud requires an active internet connection to ensure seamless synchronization. Additionally, ensure that your iPad and Mac are connected to the same Wi-Fi network for efficient data transfer.
Finally, check each device to confirm that the selected data is being synced across devices. You can do this by opening the respective apps or exploring the iCloud Drive on your Mac to confirm the presence of shared files and documents.
Remember to regularly update your devices' software and backups to ensure a smooth and hassle-free experience when transferring data between your iPad and Mac using iCloud.
Using AirDrop for seamless file transfers
Effortlessly share your files between your Apple devices with the help of AirDrop
When it comes to quickly and conveniently transferring files between your Apple devices, there is one feature that stands out - AirDrop. With AirDrop, you can easily share files such as photos, videos, documents, and more between your iPad and Mac without the need for any additional apps or cables.
With just a few simple steps, you can initiate an AirDrop transfer and have your files seamlessly transferred from one device to another. Whether you want to share a presentation from your iPad to your Mac for a meeting or send vacation photos to your Mac for editing, AirDrop simplifies the process and ensures a hassle-free experience.
The beauty of AirDrop lies in its convenience and efficiency. Rather than relying on cloud storage or email attachments, AirDrop allows for direct device-to-device transfers, eliminating the need for an internet connection and saving you valuable time.
To get started with AirDrop, simply enable the feature on both your iPad and Mac, ensure they are within range of each other, and follow the intuitive steps to initiate the transfer. AirDrop uses Wi-Fi and Bluetooth technologies to establish a secure connection between the devices, ensuring the privacy and integrity of your files.
Furthermore, AirDrop provides the option to customize your sharing preferences, allowing you to control who can send you files and discoverability settings. This feature enhances the security of your transfers and ensures that only trusted devices have access to initiate file transfers.
Experience the seamless convenience of AirDrop for yourself and discover the joy of effortless file transfers between your iPad and Mac. Say goodbye to the complexities of traditional transfer methods and embrace the simplicity and speed that AirDrop offers.
Syncing your iPad with iTunes

Keeping your iPad and iTunes in sync is essential for seamless data transfer and ensuring that your digital content is up to date. By syncing your iPad with iTunes, you can conveniently manage and organize your files, apps, media, and more.
Follow the steps below to sync your iPad with iTunes:
- Launch iTunes on your Mac computer. Ensure that you have the latest version of iTunes installed.
- Connect your iPad to your Mac using a USB cable. Wait for iTunes to detect your device.
- In iTunes, click on the device icon that appears in the upper-left corner of the iTunes window. This will open the summary page for your iPad.
- Navigate to the various tabs in the sidebar to select the content categories you want to sync with your iPad. These categories include Music, Movies, TV Shows, Books, Photos, Podcasts, and more.
- Within each category, you can further customize your sync preferences by choosing specific playlists, albums, or individual items to sync. Alternatively, you can choose to sync your entire library for a particular category.
- Once you have selected the desired content to sync, click the "Apply" or "Sync" button in the bottom-right corner of the iTunes window. iTunes will begin syncing the selected content to your iPad.
- Wait for the sync process to complete. You can monitor the progress in the iTunes status bar.
- Once the sync is finished, safely disconnect your iPad from your Mac by clicking the eject button next to your device's name in the sidebar or by unplugging the USB cable.
By regularly syncing your iPad with iTunes, you can ensure that your device reflects the most recent updates, changes, and additions made on your Mac. This seamless synchronization process allows you to enjoy your favorite content on the go without any hassle.
Transferring Images and Videos using the Photos Application
The Photos app provides a convenient and efficient way to export your cherished memories captured in the form of photos and videos from your iPad or Mac. This section discusses the simple and intuitive steps to transfer your multimedia files seamlessly.
| Step | Description |
|---|---|
| 1 | Launch the Photos app |
| 2 | Select the desired album or folder |
| 3 | Choose the photos and videos you want to export |
| 4 | Tap the Share button |
| 5 | Select the export destination |
| 6 | Confirm the export action |
| 7 | Wait for the transfer to complete |
By following these straightforward instructions, you can effortlessly move your photos and videos from your iPad or Mac using the versatile functionality of the Photos app. Whether you wish to share them with friends, backup your precious memories, or utilize them for creative projects, the Photos app provides a user-friendly interface to streamline the exporting process.
Exploring Alternative Solutions for Transferring Files

In the realm of file transfer between Apple devices, various third-party apps are gaining popularity as alternative solutions. These innovative applications offer unique features and enhanced functionality, offering users a more seamless and efficient way to transfer files.
One option worth considering is utilizing specialized file transfer apps that are not limited to specific devices like the iPad and Mac. These apps provide a flexible solution, enabling effortless file sharing and synchronization across a wide range of devices and platforms.
These third-party apps often offer convenient features such as wireless connectivity, allowing users to transfer files without the need for cables or physical connections. Additionally, some apps utilize cloud storage services, allowing for seamless file synchronization between devices and easy access from anywhere.
Furthermore, these apps frequently offer advanced file management capabilities, enabling users to organize, sort, and edit their files directly from within the app. This eliminates the need for additional software and streamlines the workflow.
When selecting a third-party app for file transfer, it is essential to consider factors such as user-friendliness, security features, and compatibility with both the iPad and Mac operating systems. By researching and exploring the various options available, users can find the most suitable application that addresses their specific file transfer needs.
| Benefits of Third-Party Apps for File Transfer: |
|---|
| 1. Enhanced functionality and features |
| 2. Wireless connectivity for cable-free file transfer |
| 3. Cloud storage integration for seamless synchronization |
| 4. Advanced file management capabilities |
| 5. User-friendly interface |
| 6. Robust security features |
| 7. Compatibility with iPad and Mac operating systems |
In conclusion, exploring third-party apps for file transfer offers a range of benefits, from enhanced functionality and wireless connectivity to advanced file management capabilities and easy synchronization. By incorporating these apps into their workflow, users can streamline the process of transferring files between devices and platforms.
Troubleshooting common issues
When it comes to transferring data between your tablet device and computer, certain problems might arise. This section will guide you through some common issues that could occur during the exporting process. By understanding these problems and their potential solutions, you will be better equipped to troubleshoot any challenges you might encounter.
Here are a few typical scenarios that individuals may face while attempting to export data from their tablet to their computer:
- Connection issues: If you are experiencing difficulties establishing a stable connection between your tablet and computer, it might have implications on the exporting process. This can be caused by various factors such as outdated software, hardware compatibility problems, or network connectivity issues.
- Error messages: Occasionally, you may encounter error messages while attempting to initiate the exporting process. These messages can be vague or specific, indicating issues such as insufficient storage space, missing files, or conflicts with existing software.
- Data integrity problems: During the exporting process, it is crucial to ensure that data is transferred accurately without any corruption or loss. However, unforeseen circumstances can lead to data integrity problems, resulting in incomplete or unusable files on the receiving end.
- File compatibility issues: Different devices and operating systems may have varying file formats and compatibility requirements. If your exported files are not compatible with the software or applications on your computer, you may experience difficulties opening or using them.
- Transfer speed and efficiency: The time it takes to export files from your tablet to your computer may vary depending on factors such as file size, connection speed, and overall system performance. If the transfer process is excessively slow or frequently interrupted, it could hinder your workflow and productivity.
To address these common issues effectively, consider the following troubleshooting steps:
- Ensure that both your tablet and computer are running the latest software updates.
- Check the physical connections, such as USB cables or wireless network settings, to ensure they are properly established.
- Clean up storage space on your tablet and computer to avoid any potential storage-related problems.
- Scan your exported files for malware or viruses that could be causing software conflicts.
- Explore alternative transfer methods, such as using cloud storage services or third-party applications, to overcome compatibility limitations.
- Optimize your network settings and consider using a stable and fast Wi-Fi connection.
- Seek help from official support channels or online communities to address specific error messages or technical issues.
By following these troubleshooting steps and understanding the common issues that can arise, you can enhance your exporting experience and ensure a seamless transfer of data from your tablet to your computer.
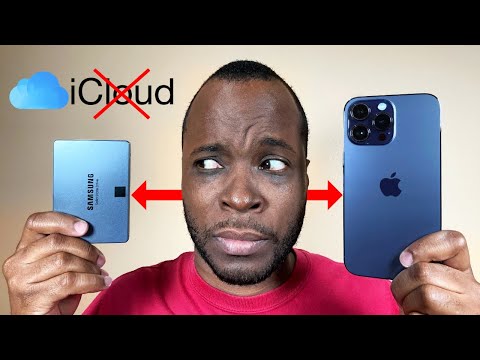
Copy Your iPhone Photos & Videos IN SECONDS (Without iCloud or iTunes)
Copy Your iPhone Photos & Videos IN SECONDS (Without iCloud or iTunes) by Kamani Brown 467,980 views 1 year ago 6 minutes, 47 seconds
FAQ
Can I export files from my iPad to my Mac?
Yes, you can export files from your iPad to your Mac. There are several methods you can use to do this.
What are the different ways to export files from iPad to Mac?
There are multiple ways to export files from iPad to Mac. You can use AirDrop, iCloud Drive, iTunes, or third-party applications like Dropbox or Google Drive.
Is it possible to export photos and videos from the iPad to a Mac?
Yes, it is possible to export photos and videos from your iPad to your Mac. You can use the Photos app to transfer them via AirDrop or the Image Capture application on your Mac.


