Have you recently acquired a state-of-the-art Apple gadget and find yourself in need of a seamless method to transfer your precious data? Look no further. In this comprehensive guide, we will walk you through the process of effortlessly migrating your information to your pristine device, sparing you the stress and hassle often associated with such tasks.
By following our step-by-step instructions, you will soon bid farewell to the days of starting anew with a blank slate. Say hello to a swift and hassle-free restoration experience! With our guidance, you will unlock the secret to seamlessly transferring your files, photographs, and contacts to your brand-new Apple device in no time.
Prepare to embark on a journey that will take you through the depths of your trusted iTunes software, unleashing its full potential as you tap into the wonders it has to offer. Through the power of synchronization, we will show you how to retrieve your previous device's cherished memories and effortlessly implant them into your shiny new companion - without even breaking a sweat.
Step-by-Step Guide for Restoring an iPhone Using an iTunes Backup

Restoring your iPhone from a previous backup can be a reliable way to transfer data, settings, and other important information to your new device without manually inputting everything. This step-by-step guide will walk you through the process of restoring your new iPhone using an iTunes backup, ensuring a smooth transition to your preferred device setup.
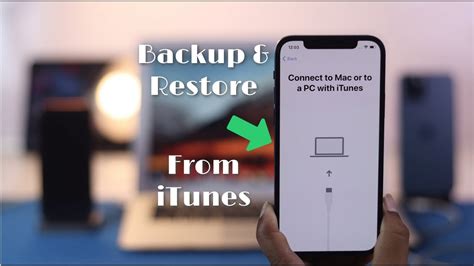
Step 1: Connect your iPhone to your computer using the appropriate cable and launch the iTunes application.
Step 2: Once your iPhone is successfully connected, navigate to the device icon, which is typically located in the upper left corner of the iTunes interface.
Step 3: Click on the device icon to access the summary page for your iPhone. Here, you will find an array of information and options related to your device.
Step 4: In the "Summary" tab, look for the "Restore Backup" button and click on it. A new window will appear, displaying a list of available backups.
Step 5: Choose the desired backup from the list based on the date, time, or any additional details, and click "Restore."
Step 6: iTunes will begin the restoration process, which may take some time depending on the size of the backup and the speed of your computer.
Step 7: Ensure that your iPhone stays connected to the computer during the entire restoration process. Avoid disconnecting or interfering with the device until the process is complete.
Step 8: Once the restoration is finished, your iPhone will restart, and you will be prompted to set up the device as if it were new or restore from a backup. Select the option to restore from the iTunes backup.
Step 9: Follow the on-screen instructions to complete the setup process, including Wi-Fi network selection, Apple ID login, and any other pertinent settings.
Step 10: After completing the setup, your iPhone will be restored from the iTunes backup and all of your previous data, apps, and settings will be transferred to your new device.
Following this step-by-step guide will allow you to seamlessly restore your new iPhone from an iTunes backup, ensuring that you can continue using your device with all of your important data intact and without the need for manual data entry.
Preparing Your Personal Computer for iPhone Restoration
Before you can begin the process of restoring your cherished iPhone from a previously saved backup file using the Apple iTunes software on your computer, it is essential to ensure that your personal computer meets the necessary requirements and is adequately prepared. Follow the instructions provided below to get your computer ready for the iPhone restoration process.
Step 1: Update Software
Make sure your computer's operating system (OS), whether it be Windows, macOS, or Linux, is up to date. Updating your OS ensures that you have the latest security patches and features required for a hassle-free restoration process.
Step 2: Install the Latest iTunes Version
To restore your iPhone from a backup file, you need to have the Apple iTunes software installed on your computer. Visit the official Apple website or the Microsoft Store (for Windows users) to download and install the latest version of iTunes.
Step 3: Connect to a Stable Internet Connection
It is crucial to have a stable internet connection while restoring your iPhone to ensure a smooth and uninterrupted process. Connect your computer to a reliable Wi-Fi network or use an Ethernet cable for a more stable connection.
Step 4: Create Sufficient Storage Space
Before commencing the restoration, ensure that you have enough free space on your computer's hard drive to accommodate the backup file as well as any temporary files generated during the process. Remove any unwanted files or applications to free up storage space if necessary.
Step 5: Disable Anti-virus and Firewall Software
To prevent any potential conflicts or interruptions during the restoration process, temporarily disable your anti-virus software and firewall programs. This will help ensure that iTunes can perform the necessary tasks without being blocked or flagged as a potential threat.
Step 6: Connect Your iPhone to the Computer
Using a certified Lightning cable, connect your iPhone to your computer's USB port. Ensure that the cable is securely plugged in on both ends to establish a stable and reliable connection.
Step 7: Backup Any Recent Data
Before proceeding with the restoration, it is always a good practice to manually backup any recent data or files on your iPhone. This ensures that you have a secondary copy of important information in case any unexpected issues arise during the restoration process.
By following these steps and adequately preparing your computer, you can minimize the risk of encountering any obstacles during the iPhone restoration process. Once your computer is fully prepared, you will be ready to proceed with restoring your iPhone using an iTunes backup.
Connecting Your New iPhone to the Computer

In this section, we will discuss the process of establishing a connection between your recently acquired Apple device and your personal computer. This essential step is crucial in order to proceed with the restoration of your iPhone using an iTunes backup stored on your computer.
Step 1: Start by locating the appropriate USB cable for your iPhone model. It should be the cable that comes packaged with your device or a certified replacement. Make sure both ends of the cable are clean and undamaged.
Step 2: Connect one end of the USB cable to the charging port on your new iPhone. This port is typically located at the bottom of the device. Ensure that the cable is securely inserted into the port to establish a stable connection.
Step 3: Take the other end of the USB cable and plug it into an available USB port on your computer. Ideally, this should be a USB 3.0 port for faster data transfer. If you are unsure which port to use, refer to the documentation provided with your computer or consult the manufacturer's website.
Step 4: Once both ends of the USB cable are connected, your computer should recognize the newly connected device. You may see a prompt asking for permission to access the iPhone's data or to trust the computer. Follow any on-screen instructions and authorize the connection if necessary.
Step 5: At this point, your new iPhone should be successfully connected to the computer. It should appear as a recognizable device in iTunes or Finder, depending on your operating system. You are now ready to proceed with the restoration process using an iTunes backup stored on your computer.
Note: If your iPhone does not appear in iTunes or Finder, try restarting both your iPhone and computer, as well as checking the USB cable for any defects. If the issue persists, consult Apple Support for further assistance.
Accessing iTunes and Choosing the Selected Copy
When you want to recover your device's data and settings, one effective method is to access the iTunes application on your desktop or laptop computer. From there, you can select and restore a specific backup that contains all the essential information you need.
- Launch iTunes on your computer and ensure that you have the latest version installed.
- Connect your iPhone to your computer using a compatible USB cable.
- Authorize the connection by entering your device passcode or using Touch ID or Face ID, if applicable.
- In iTunes, click on the device icon located in the upper left corner of the window.
- Navigate to the "Summary" tab to access the overview of your device's information.
- Under the "Backups" section, you'll find the "Restore Backup" option.
- Next, choose the appropriate backup from the list by considering the date and description associated with each backup.
- To proceed with the restoration process, click on the "Restore" button.
- It's crucial to note that the restoration process may take some time, depending on the size of the backup and the speed of your computer.
By accessing iTunes on your computer and carefully selecting the desired backup, you can efficiently restore your iPhone's previous data and settings. Remember to regularly back up your device to ensure you have the latest copy available for restoration in case of any unforeseen circumstances or when getting a new device.
How to Restore iPhone from iCloud Backup in 2 Ways (2024)
How to Restore iPhone from iCloud Backup in 2 Ways (2024) by TenorshareOfficial 1,054,560 views 3 years ago 5 minutes, 13 seconds
How to Backup & Restore iPhone Using iTunes! [Step-By-Step]
How to Backup & Restore iPhone Using iTunes! [Step-By-Step] by Fix369 440,823 views 3 years ago 7 minutes, 38 seconds
FAQ
What is an iTunes backup?
An iTunes backup is a snapshot of your iPhone's data, including settings, app data, contacts, and more, that is stored on your computer.
How can I restore a new iPhone from an iTunes backup on my computer?
To restore a new iPhone from an iTunes backup on your computer, you need to connect your iPhone to your computer, open iTunes, select your device, and then choose the option to restore from backup. You can then select the specific iTunes backup you want to restore from.
Is it necessary to have a computer to restore a new iPhone from an iTunes backup?
Yes, a computer is necessary to restore a new iPhone from an iTunes backup. You need to have the iTunes application installed on your computer to be able to restore the backup.
Can I choose which data to restore from the iTunes backup?
Yes, when you restore a new iPhone from an iTunes backup, you can choose whether to restore all of your data or only specific data. iTunes gives you the option to select which apps, photos, contacts, and other data you want to restore.
Are there any risks involved in restoring a new iPhone from an iTunes backup?
There are minimal risks involved in restoring a new iPhone from an iTunes backup. However, it is important to note that any data or changes made on your iPhone after the backup was created will be overwritten by the data in the backup, so make sure to backup any recent data before restoring.
Is it possible to restore an iPhone from an iTunes backup if I don't have a computer?
No, it is not possible to restore an iPhone from an iTunes backup without a computer. iTunes is a desktop application that is required to manage and restore iPhone backups. If you don't have a computer, you can use iCloud backup to restore your iPhone. Simply go to the "Apps & Data" screen during the setup process on your new iPhone and choose "Restore from iCloud Backup". You will need to have an iCloud backup previously created and stored on your iCloud account.


