When it comes to optimizing the audio output of your personal audio recording setup, there are various factors that contribute to achieving optimum sound quality. One crucial element that plays a significant role in the clarity and volume of your recordings is the microphone on your headphones. By enhancing the microphone's capabilities, you can elevate the overall audio quality for your audience.
Amplifying the Captured Sound
One effective method to amplify the volume and clarity of your microphone on headphones is by implementing simple yet efficient techniques. By adjusting the microphone's sensitivity and output levels, you can optimize the capturing of your voice or other audio input. With the right settings, you can achieve a louder and crisper sound without compromising on the quality.
Enhancing the Sensitivity
To enhance the sensitivity of your microphone, consider adjusting the input gain levels. Higher gain levels capture softer sounds more effectively, making your recordings clearer and more audible. However, be mindful of not setting the gain levels too high, as this may result in distortion or unwanted background noise.
Utilizing Noise-Canceling Technologies
In addition to adjusting the microphone settings, utilizing noise-canceling technologies can significantly improve the sound quality of your audio recordings. These technologies filter out unwanted ambient noise, allowing your voice or audio input to stand out more prominently. This makes it easier for your listeners to focus on the main content without being distracted by external interferences.
9 Effective Methods to Enhance the Amplification of Your Headset's Microphone
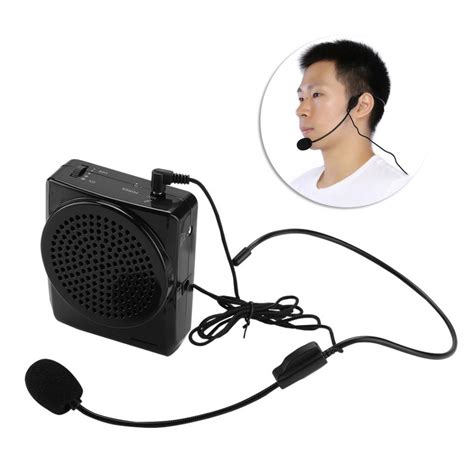
When it comes to improving the sound projection of the mic on your headphones, there are numerous simple and reliable techniques available. By implementing these hassle-free solutions, you can effortlessly amplify the audio input of your headset's microphone without any specialized tools or technical expertise.
1. Adjust the input levels: Fine-tuning the input levels of your microphone through the audio settings on your device can significantly increase its volume. Experiment with different levels until you find the optimal setting that produces clear and amplified sound.
2. Utilize microphone boost: Many devices offer a built-in microphone boost feature that enhances the microphone's sensitivity and volume output. Enable this option in your audio settings to amplify the microphone input.
3. Position the microphone closer: By positioning the microphone closer to your mouth, you can naturally amplify the sound captured by the microphone. Ensure that it is positioned at an ideal and comfortable distance to maximize volume.
4. Use a microphone extension cable: Sometimes, the length of the headset's microphone cable can limit its volume potential. By connecting a microphone extension cable, you can create more flexibility in positioning the mic closer to your mouth.
5. Invest in a pop filter: Pop filters are effective in reducing background noise and capturing clear, focused audio. By eliminating unwanted noise, the microphone can be more easily distinguished, leading to a perceived increase in volume.
6. Check for hardware issues: Ensure that there are no physical obstructions or damages to your headset's microphone. Dust, debris, or loose components can hinder the microphone's volume capabilities. Clean or repair the microphone if necessary.
7. Enable noise cancellation: If your device offers noise cancellation features, enabling them can help eliminate background noise, allowing the microphone to capture your voice more distinctly and prominently.
8. Adjust microphone placement: Experiment with different microphone placements on your headset. Slight adjustments in positioning and angles can impact the volume and clarity of the microphone's output.
9. Consider using an external microphone: If all else fails, using an external microphone specifically designed for enhanced volume may be a viable solution. These microphones are engineered to deliver superior amplification and clarity, providing a significant boost to your audio recording.
By implementing these straightforward methods, you can effortlessly increase the volume of your headphone microphone and enjoy a more amplified and immersive audio experience during your conversations, recordings, or online gaming sessions.
Optimizing Sound Capture with System Adjustments
Enhancing the audio input quality of your communication device is crucial for a seamless and effective user experience. To achieve optimal microphone levels, it is essential to make proper adjustments to your system settings. By customizing the settings and controls specific to your device's operating system, you can significantly improve the microphone's performance without relying on external tools or hardware.
One of the key aspects of adjusting system settings lies in fine-tuning the microphone sensitivity or gain. By finding the right balance between sensitivity and background noise reduction, you can ensure that your voice is clear and prominent without capturing unwanted sounds. Tweaking these settings can be done through the system's sound control panel or audio settings, allowing you to optimize your microphone's performance for different scenarios, such as voice calls, video conferences, or recording sessions.
Additionally, exploring advanced microphone settings can provide further opportunities for customization. Some operating systems offer options for adjusting the microphone's frequency response, equalization, and noise cancellation. These settings enable you to tailor the microphone's output according to your specific preferences and environment. Experimenting with these features can result in a richer and more accurate sound capture, enhancing overall audio quality during your communication or recording activities.
Another crucial aspect to consider when adjusting system settings is ensuring that the microphone input volume is appropriately adjusted. By controlling the input volume, you can prevent audio distortion and clipping while maintaining a strong and clear signal. Most operating systems provide simple controls or sliders to adjust the microphone input volume, allowing you to find the optimal level based on your needs and the sound source's characteristics.
By leveraging the available system settings and controls tailored to your communication device's operating system, you can significantly enhance the microphone performance and achieve optimal audio capture. Taking the time to explore and fine-tune these settings can lead to improved voice clarity, reduced background noise, and an overall pleasant audio experience, maximizing the utility of your device's built-in microphone.
Boosting Microphone Volume with Third-Party Applications
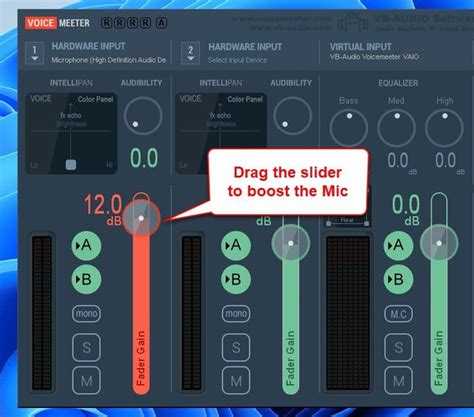
In this section, we will explore various third-party applications that can help enhance the audio quality and amplification of your microphone on headphones. These applications offer advanced features and settings to increase the volume of your microphone, providing you with a better recording or communication experience.
- 1. Volume Booster: This application allows you to amplify the microphone volume on your headphones, giving you a louder and clearer audio output. It offers customizable settings to adjust the gain level according to your preference, ensuring optimal sound quality during voice calls, recordings, or online gaming sessions.
- 2. Audio Equalizer: An audio equalizer application enables you to fine-tune the microphone's frequency response, allowing you to boost specific ranges that may be lacking in volume. By adjusting the equalization settings, you can enhance the overall sound quality of your microphone on headphones and make it louder without compromising on clarity.
- 3. Noise Reduction Software: If your microphone picks up unwanted background noise or static, a noise reduction software can be used to eliminate these disturbances and emphasize your voice. By reducing ambient noise, your microphone's volume will appear louder and more prominent, resulting in improved audio quality for your recordings or online communication.
- 4. Recording Software with Gain Control: Some third-party recording software comes with built-in gain control features that allow you to adjust the microphone's input level. By increasing the gain, you can make your microphone on headphones louder without the need for additional applications. This feature is particularly useful for content creators, musicians, and podcasters.
- 5. Virtual Audio Cable: Virtual audio cable applications provide a virtual audio interface that allows you to route and control audio streams between different software applications. By utilizing this software, you can route your microphone audio through a volume boosting application before it reaches your recording or communication software, effectively amplifying the microphone's volume on your headphones.
Remember, when using third-party applications to boost microphone volume on headphones, ensure compatibility, and choose reputable software from trusted sources. Always follow the instructions provided by the developers to optimize the performance of your microphone and achieve the desired audio amplification.
Checking and Cleaning the Microphone Hardware for Enhanced Performance
Ensuring optimal performance of your microphone hardware can greatly contribute to improving the sound quality and overall effectiveness of your audio experience. In this section, we will explore the importance of checking and cleaning the microphone hardware regularly to enhance its performance without resorting to volume adjustments.
Regular maintenance and evaluation of the microphone hardware can ensure that it functions optimally, capturing sound with clarity and precision. By inspecting the physical components of the microphone, identifying any potential issues, and performing routine cleaning procedures, you can enhance its performance without the need for amplification, thus avoiding compromising the audio quality.
| Step | Description |
|---|---|
| 1 | Inspect the microphone exterior |
| 2 | Check the microphone connector |
| 3 | Examine the microphone capsule |
| 4 | Clean the microphone components |
To begin, start by inspecting the exterior of the microphone. This involves checking for any physical damages, loose connections, or debris that may be obstructing the sound input. By ensuring that the microphone housing is intact and free from any obstructions, you can prevent potential issues that may hinder its performance.
Next, examine the microphone connector, which is responsible for establishing a secure connection between the microphone and the device it is plugged into. Look for any signs of corrosion or damage that could affect the quality of the audio signal. If necessary, clean the connector gently using a soft cloth or a small brush to remove any dirt or debris.
Additionally, it is crucial to inspect the microphone capsule, which is the component responsible for capturing sound waves. Check for any signs of damage, such as dents or tears in the diaphragm, as these can impact the microphone's sensitivity and overall performance. If any issues are identified, consider consulting a professional for repair or replacement.
Lastly, regular cleaning of the microphone components is essential to maintain optimal performance. Use a non-abrasive cleaning solution or isopropyl alcohol and a soft cloth to gently wipe the exterior and interior parts, removing any dirt, dust, or grime that may have accumulated over time. Be cautious not to apply excessive force or liquid, as this may cause damage to the microphone.
By following these steps and incorporating regular maintenance into your microphone care routine, you can ensure that the hardware operates at its best, providing clearer and more accurate sound without the need to rely solely on increasing the volume.
Selecting a Quality Headphone Set with a More Sensitive Microphone
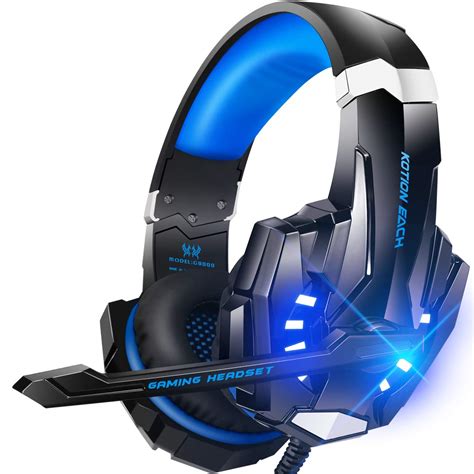
A key factor in achieving optimal audio performance during communication and recording is choosing a headphone set with a microphone that possesses enhanced sensitivity. The sensitivity of a microphone determines its ability to capture clear and accurate audio signals. This section provides valuable insights and considerations to help you select a high-quality headphone set with a microphone that has superior sensitivity without compromising on other crucial aspects.
1. Acoustic Excellence:
When seeking a headphone set with a more sensitive microphone, it is important to prioritize acoustic excellence. Look for headphones that are designed with advanced audio technology, such as premium-grade drivers, to ensure precise sound reproduction and capture. This will ultimately enhance the clarity and quality of your recorded or transmitted audio, allowing you to communicate or engage in podcasting or streaming activities more effectively.
2. Noise Isolation:
To ensure optimal microphone sensitivity, it is essential to choose headphones that offer efficient noise isolation. By reducing unwanted ambient sounds and external interference, the microphone can focus solely on capturing your voice or desired audio source, resulting in enhanced sensitivity and improved overall sound quality. High-quality headphones often feature comfortable ear cups that provide a secure fit, effectively sealing off external noise for an uninterrupted recording or communication experience.
3. Durability and Comfort:
A headphone set with a sensitive microphone should also exhibit durability and comfort. Look for headphones that are built with premium materials and robust construction, ensuring long-lasting performance. Additionally, ergonomic design features, such as adjustable headbands and cushioned ear pads, contribute to a comfortable fit even during extended use. By selecting headphones that offer both durability and comfort, you can focus on your audio tasks without any discomfort or distractions.
4. Connectivity Options:
Considering your connectivity options is crucial when choosing a quality headphone set with a more sensitive microphone. Look for headphones that offer versatile connectivity options, such as compatibility with various devices and multiple connection types. This will provide you with the flexibility to use the headphones with different devices, including computers, smartphones, gaming consoles, and studio equipment, ensuring seamless compatibility and ease of use.
5. User Reviews and Recommendations:
Lastly, it is valuable to consider user reviews and recommendations when selecting headphones with a sensitive microphone. Reading feedback from other users who have already tested the product can provide insights into the microphone's sensitivity, audio quality, comfort, and overall performance. By considering the experiences and opinions of others, you can make a more informed decision and increase the likelihood of finding a headphone set that meets your specific needs.
By taking into account the aforementioned factors, you can confidently choose a high-quality headphone set with a microphone that possesses enhanced sensitivity. Remember to prioritize acoustic excellence, noise isolation, durability, comfort, connectivity options, and user feedback to ensure an exceptional audio experience for your communications or recording endeavors.
Using a Microphone Preamp to Enhance the Signal
In order to boost the strength and quality of the audio captured by your recording device, utilizing a microphone preamp can be an effective solution. This specialized device increases the amplitude of the microphone's signal before it reaches your headphones, resulting in improved sound clarity and enhanced volume levels. By employing a microphone preamp, you can optimize your audio recording experience and ensure that your voice or instrument is heard with more power and presence.
Advantages of a Microphone Preamp
One of the primary advantages of using a microphone preamp is its ability to amplify weak signals, effectively increasing the volume without compromising the overall sound quality. This device boosts the input signal, allowing for a cleaner and stronger output that can be easily heard through your headphones. Additionally, a microphone preamp often provides better control over the audio signal, allowing you to adjust the gain and ensure the appropriate levels for your specific recording needs.
Improved Signal-to-Noise Ratio
Another benefit of utilizing a microphone preamp is the improved signal-to-noise ratio it offers. As the preamp amplifies the microphone's signal, it also elevates the desired audio while minimizing unwanted background noise. By reducing the level of noise interference, you can achieve a clearer and more professional sound recording, making it ideal for various applications such as podcasting, music production, or live performances.
Flexible Connectivity Options
Microphone preamps come in a variety of models, offering different connectivity options to suit your specific setup. Whether you're using a condenser microphone, dynamic microphone, or even a ribbon microphone, many preamps provide the necessary connections and adjustments to accommodate a wide range of microphones. This flexibility ensures compatibility with your existing equipment and allows you to take full advantage of the preamp's amplification capabilities.
Conclusion
A microphone preamp can significantly enhance the signal of your microphone, leading to a louder and more detailed audio output through your headphones. With the ability to amplify weak signals, improve the signal-to-noise ratio, and provide flexible connectivity options, a microphone preamp becomes an invaluable tool for achieving professional and high-quality sound recordings.
Positioning the Microphone Correctly for Clearer and Amplified Sound
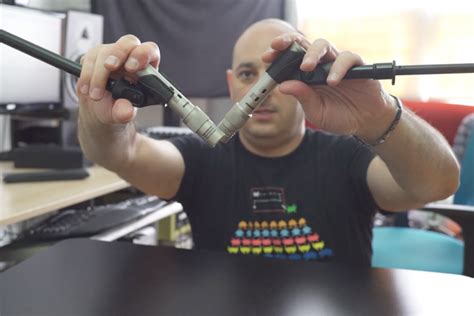
In order to optimize the audio quality and amplify the sound produced by your headset's microphone, it is essential to pay attention to its positioning. By placing the microphone correctly, you can ensure clearer communication and achieve a louder output.
Firstly, it is important to find the optimal distance for your microphone. Position the microphone neither too close nor too far from your mouth. Placing it too close may result in muffled and distorted sound, while keeping it too far might result in a low volume level. Experiment with different distances to find the sweet spot that allows for clear and amplified audio.
Furthermore, taking note of the microphone's angle is crucial. Aim to position the microphone in a way that it directly faces your mouth. Avoid pointing it towards other directions, as this can lead to an uneven sound quality or capture unwanted background noise. Adjust the angle of the microphone to focus on capturing your voice effectively.
Additionally, consider the noise cancellation feature offered by your headphones. Many headsets come equipped with noise-canceling capabilities, which can significantly enhance the sound clarity and help increase the overall volume. Activate this feature if available, as it can assist in isolating your voice and reducing background noise interference.
Lastly, take into account any specific recommendations provided by the manufacturer regarding the microphone's positioning. Some headphones come with user guides that offer tips on how to optimize audio quality. Consulting these guidelines can provide valuable insights and further improve the loudness and clarity of your microphone's output.
In conclusion, positioning your headset's microphone correctly is a fundamental step towards achieving clearer and louder sound. By finding the optimal distance, adjusting the microphone's angle, utilizing noise cancellation features, and considering manufacturer recommendations, you can maximize the audio quality and ensure effective communication through your headphones.
Enhancing Microphone Volume and Adjusting Noise Reduction Settings
In order to optimize the performance of your headset's built-in microphone, it is important to enable microphone boost and fine-tune the noise suppression settings. By implementing these adjustments, you can enhance the overall volume and clarity of your microphone recordings, ensuring a better communication experience.
To begin, activating the microphone boost feature enables an increased amplification of your voice, resulting in a louder input signal. This can be particularly beneficial when you are in a noisy environment or have a naturally softer speaking voice. By effectively boosting the microphone, your audio output will be stronger and more easily audible to others.
- Start by accessing your computer's sound settings or audio control panel
- Navigate to the microphone settings or input devices section
- Locate the microphone boost option and adjust the level to a desired setting
- Test the microphone input to ensure the volume is now louder and clearer
Additionally, adjusting the noise suppression settings can help minimize background noise and improve the overall audio quality. This feature works by analyzing the audio input and filtering out any unwanted sounds, such as ambient noise or echoes. By reducing these distractions, the clarity and intelligibility of your voice will be significantly enhanced.
- Access your audio control panel or sound settings on your device
- Find the microphone settings or input devices section
- Locate the noise reduction or noise suppression option
- Adjust the level of noise reduction to reduce unwanted background noise
- Test the microphone to ensure the noise suppression settings are effectively reducing unwanted sounds
By enabling microphone boost and adjusting the noise suppression settings on your headphones, you can optimize your microphone's volume and clarity. This will greatly enhance your communication experience and ensure that your voice is heard clearly by others, even in challenging environments.
Updating Drivers to Ensure Compatibility and Improved Performance
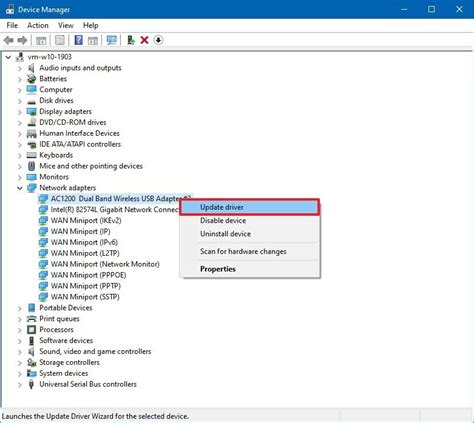
In order to optimize the functionality and enhance the overall performance of your audio equipment, it is essential to regularly update the drivers. By keeping your drivers up to date, you can ensure compatibility with the latest software updates and fix any potential bugs or issues that may arise.
Updating drivers for your headphones or microphone can provide numerous benefits, such as improved audio quality, enhanced features, and better device compatibility. It allows you to take full advantage of the advancements made by manufacturers and ensures that your equipment operates at its optimal level.
It is important to note that drivers act as a bridge between the hardware and software components of your audio devices. They facilitate communication and enable your computer to recognize and utilize the features of your headphones or microphone effectively. Therefore, outdated drivers can result in performance issues, such as low volume, distorted sound, or even a complete failure of the device to function correctly.
To update your drivers, you can follow several methods. One of the simplest ways is to use the manufacturer's official website and download the latest driver version specifically designed for your model. Alternatively, you can use driver updater software that automatically scans your system, identifies outdated drivers, and installs the most suitable updates.
Before proceeding with driver updates, it is recommended to create a system restore point or backup your important files to prevent any potential data loss. This precautionary measure ensures that you can revert back to the previous driver version if any compatibility issues or unexpected problems arise after the update.
Once you have updated the drivers successfully, you may need to restart your computer for the changes to take effect. After the restart, you can test your microphone or headphones to verify the improved performance and compatibility.
Regularly updating your drivers not only resolves compatibility issues but also helps to optimize your audio experience. By ensuring that your equipment is running on the latest driver versions, you can enjoy clearer, louder, and more immersive sound quality while using your headphones or microphone.
Testing the Sound Capture Settings in Different Applications for Enhanced Output
When it comes to optimizing the audio levels of the microphone integrated into your headphones, it's crucial to evaluate and fine-tune the sound capture settings in various applications. By experimenting with these settings, you can achieve an optimal output that enhances the overall quality and clarity of your microphone's performance, without resorting to physical modifications or amplification techniques.
1. Assessing Recording Applications:
Different applications offer varying options and configurations for adjusting microphone settings. Begin by exploring the settings provided in commonly used communication platforms such as video conferencing applications, voice communication software, or even multimedia recording tools. These applications often have dedicated settings sections where you can access and modify microphone-related options to suit your preferences.
2. Fine-tuning Input Levels:
Most applications include input level controls that allow you to adjust the sensitivity of your microphone. Experiment with these settings to find the ideal balance between capturing clear audio and avoiding distortion. Raising the input level too high can result in clipping and unwanted noise, while setting it too low may lead to quiet or muffled recordings. Make incremental adjustments and test your microphone's output to find the optimal input level for your desired use.
3. Sampling Rate and Bit Depth:
Sampling rate and bit depth are crucial parameters that determine the clarity and accuracy of audio recordings. Higher sampling rates and bit depths allow for more detailed sound capture, especially in capturing higher frequencies. However, these settings may vary among applications. Experiment with different sampling rate and bit depth combinations to discover settings that yield the best audio quality with minimal distortion. Consider selecting a balance between high quality and compatibility to ensure optimal performance in various applications.
4. Noise Suppression and Enhancement Filters:
Some applications offer built-in noise suppression and audio enhancement filters that can significantly improve the output of your microphone, especially in environments with background noise. Explore the available options within these applications and experiment with different settings to reduce unwanted noise without sacrificing the clarity and naturalness of your voice.
5. Test and Optimize:
Testing and optimizing the microphone settings across different applications is an iterative process. Once you have made adjustments, it is important to test the output in real-time scenarios, such as video calls or voice recordings, to ensure that the changes have the desired effect. Continuously fine-tune the settings based on your needs and the feedback received until you achieve the desired optimal output that maximizes the performance of your microphone on headphones.
By systematically exploring and adjusting the microphone settings within various applications, you can enhance the output and overall performance of your headphones' integrated microphone. Remember to regularly revisit these settings as your usage scenarios and requirements may change over time.
Make Any Headset Mic Sound Pro | OBS & SLOBS Filters
Make Any Headset Mic Sound Pro | OBS & SLOBS Filters by Swol Joe 62,022 views 2 years ago 5 minutes, 21 seconds
FAQ
How can I increase the microphone volume on my headphones?
There are a few ways to make the microphone on your headphones louder. One option is to adjust the microphone volume settings on your device. You can typically do this by going into your device's audio settings and increasing the microphone volume slider. Another option is to use a third-party software or application that allows you to adjust the microphone volume. Additionally, you can try positioning the microphone closer to your mouth for better sound pick-up. If none of these methods work, you may need to consider purchasing a separate microphone or upgrading your headphones with a built-in amplifier.
Why is the microphone on my headphones too quiet?
If the microphone on your headphones is too quiet, there could be a few reasons for this issue. Firstly, check if the microphone volume settings on your device are set low. Adjusting the microphone volume slider in your device's audio settings should help increase the volume. Another possibility is that there might be dust or debris clogging the microphone hole, so make sure to clean it using a soft brush or cloth. If the problem persists, the issue might be with the hardware itself, and you may need to consider purchasing a new microphone or headphones with a better microphone quality.
Are there any software programs that can boost the microphone volume on headphones?
Yes, there are several software programs available that can boost the microphone volume on headphones. One popular option is "Voicemeeter", which is a virtual audio mixer that allows you to control the microphone volume and other audio settings. Another software program is "Audacity", which is an audio editing software that also has the capability to increase the microphone volume. Additionally, some gaming software, such as "Razer Synapse" or "SteelSeries Engine", have built-in features to adjust the microphone volume on gaming headphones. It is recommended to research and choose a software program that is compatible with your device and meets your specific requirements.


