In a world where music has become an inseparable part of our daily lives, finding the perfect headphones to match our unique sound preferences is of utmost importance. But what if you could do more than just purchase a pair? What if you could create your very own set of headphones, tailored to your individual style and sonic desires?
Discover the mesmerizing journey of crafting headphones from scratch, as we guide you through the intricate process step by step. Experience the joy of hand-picking each component, the satisfaction of assembling them with precision, and the exhilaration of finally plugging in your self-made creation to immerse yourself in a world of incredible audio quality. Brace yourself for a riveting adventure into the realm of sound engineering!
Embark on this DIY odyssey and unleash your inner audio artist. With our comprehensive guide, you'll delve into the vast universe of headphone construction, from choosing the ideal drivers to crafting the perfect fit. Whether you're a seasoned DIY enthusiast or a curious beginner, we'll provide you with the knowledge and skills needed to transform your passion for music into a tangible masterpiece. Get ready to embark on a sonic voyage like no other!
Choosing the Right Materials

In order to create high-quality headphones, it is essential to carefully select the materials used during the manufacturing process. The choice of materials can significantly impact the overall sound quality, durability, and comfort of the headphones. Therefore, it is crucial to consider various factors when choosing the right materials for each component.
| Component | Material | Properties |
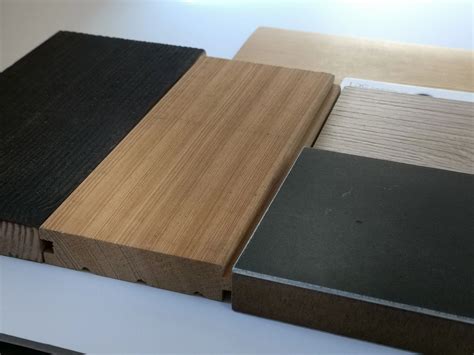
| Housing | Plastic, metal, or wood | The housing material affects the sound resonance and external noise isolation. Plastic offers affordability, while metal provides durability and a sleek look. Wood can enhance audio quality with its natural tone. |
| Headband | Leather, fabric, or silicone | The headband material contributes to comfort and adjustability. Leather is known for its durability and luxurious feel, while fabric offers breathability. Silicone headbands provide flexibility and lightweight design. |
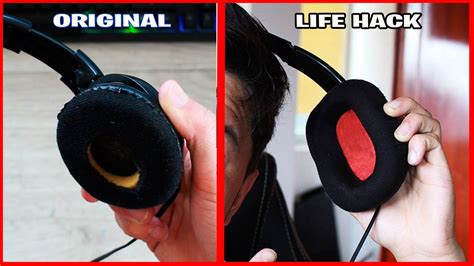
| Ear Cushions | Memory foam, leatherette, or velour | The ear cushion material affects noise isolation and comfort. Memory foam molds to the shape of the user's ears for a personalized fit. Leatherette provides a soft touch, and velour offers breathability for extended listening sessions. |
| Drivers | Neodymium, ferrite, or planar magnetic | The driver material determines the sound accuracy and power. Neodymium magnets offer high efficiency and compact size, ferrite magnets provide a balanced sound, while planar magnetic drivers deliver precise and detailed audio reproduction. |
| Cables | Copper, silver, or braided | The cable material affects durability, signal transmission, and audio quality. Copper is commonly used for its conductivity, while silver can enhance audio clarity. Braided cables provide extra strength and minimize tangling. |
By carefully considering the desired sound characteristics, comfort, and durability, selecting the right materials for each component of the headphones can result in a superior audio experience. Keep in mind that the materials chosen should align with the target market, budget constraints, and design aesthetics.
Preparing the Headphone Frame
In this section, we will explore the initial steps involved in getting the headphone frame ready for assembly. This crucial stage of the headphone-making process focuses on the preparation of the foundational structure that holds the electronic components and ensures comfort during use. Let's dive into the detailed steps involved in this stage.
The first step in preparing the headphone frame is selecting the appropriate materials that provide durability and flexibility. Choosing strong yet lightweight materials is key to achieving a comfortable and long-lasting headphone design. Additionally, considering the aesthetic appeal of the frame is important if you desire a stylish and visually appealing final product.
Once the materials have been chosen, the next step involves measuring and cutting the frame components according to the desired dimensions and design specifications. Precision in these measurements is crucial to ensuring proper fit and functionality of the headphones.
After the components have been cut, they are then carefully shaped and molded to create the desired form of the headphone frame. This step requires attention to detail and skilled craftsmanship to achieve the desired ergonomic design and ensure a comfortable fit for the user.
Furthermore, the headphone frame may require additional modifications, such as the integration of adjustable sliders and hinges, to enhance comfort and convenience. These adjustments allow users to customize the fit of the headphones to their specific head shapes and sizes.
Finally, before proceeding to the next stage of assembling the headphones, it is essential to thoroughly inspect and refine the headphone frame. This involves checking for any imperfections, ensuring structural integrity, and making any necessary adjustments to guarantee a high-quality finished product.
By following these steps in preparing the headphone frame, you are well on your way to creating a custom-made set of headphones that not only deliver exceptional sound quality but also provide a comfortable and stylish listening experience.
Wiring and Soldering

When it comes to assembling your own headphones, one crucial step is the wiring and soldering process. This stage involves connecting the different components of the headphones using wires and solder, ensuring a secure and reliable connection. In this section, we will delve into the details of wiring and soldering, highlighting the essential tools and techniques required for successful assembly.
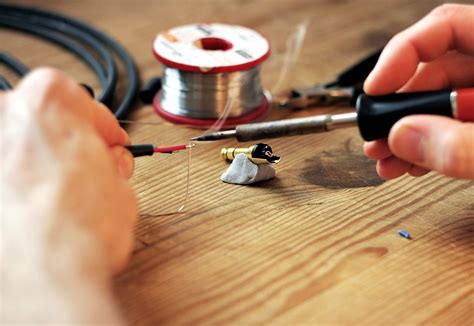
- Prepare the wires: Begin by carefully stripping the insulation off the ends of the wires using a wire stripper or a sharp knife. Ensure that you expose the necessary length of bare wire for a secure connection.
- Identify the connections: Before proceeding, it is vital to identify the correct connections for each component of the headphones. Refer to the manufacturer's guide or schematic diagram to understand the wiring layout.
- Soldering basics: Soldering is the process of joining two metal components using a heated solder. To start, heat the soldering iron until it reaches the desired temperature. Be cautious not to overheat the components or the solder, as it may cause damage.
- Secure the wires: Once the soldering iron is ready, carefully heat the exposed wire ends to melt a small dab of solder onto them. This creates a secure bond between the wires and the components. Avoid excessive soldering, as it can lead to a messy and unreliable connection.
- Heat shrink tubing: To ensure additional protection and insulation, slide heat shrink tubing over the soldered connections. Apply heat using a heat gun or a lighter, which causes the tubing to contract and provide a snug fit around the connections.
- Testing the connections: After completing the soldering process, it is recommended to test the connections using a multimeter or an audio source. This step ensures that all the components are properly connected, and there are no loose or faulty connections.
- Neat cable management: To prevent tangling and enhance the overall appearance of your headphones, consider using cable clips or ties to secure and organize the wires. This step adds a professional touch to your DIY headphones.
By mastering the wiring and soldering techniques, you are one step closer to creating your very own customized headphones. Remember to exercise caution and precision during this process to achieve optimal results. With proper wiring and soldering, you can ensure a high-quality audio experience and a durable set of DIY headphones tailored to your preferences.
Installing the Speaker Units
In this section, we will cover the process of installing the speaker units into your handmade headphones. This step is crucial as it determines the quality and performance of your headphones. A careful and precise installation will ensure optimal sound output and clarity.
- Prepare the speaker units: Start by gathering all the necessary components - the speaker units, connecting wires, and any mounting brackets or screws. Ensure that the speaker units are in good condition and free from any defects.
- Positioning the speaker units: Carefully determine the ideal placement for the speaker units within the headphone frame. Consider factors such as balance, comfort, and aesthetics. Ensure that the units are aligned properly and will fit securely into the designated areas.
- Connecting the wires: Attach the connecting wires to the speaker units, following the manufacturer's instructions. Take extra care to match the positive and negative terminals of the units with the corresponding wires. Secure the connections with solder or connectors, ensuring a reliable and durable bond.
- Securing the speaker units: Once the wires are connected, securely fasten the speaker units to the headphone frame using the provided mounting brackets or screws. Double-check the alignment and positioning before tightening everything in place.
- Testing the speaker units: Before proceeding further, it is important to test the speaker units. Connect the headphones to an audio source and play a test sound. Ensure that both speaker units produce sound and that the audio quality is satisfactory.
By following these steps, you will successfully install the speaker units into your homemade headphones. Remember to handle the components with care and ensure that all connections are secure and properly aligned. This will result in a well-functioning and enjoyable audio experience with your DIY headphones.
Building the Ear Cushions

When it comes to creating high-quality headphones, one crucial component that deserves attention is the construction of the ear cushions. These carefully designed and crafted cushions provide comfort, support, and sound isolation, allowing users to enjoy their audio experience without discomfort or distractions.
At the heart of every well-built ear cushion lies a combination of premium materials and meticulous craftsmanship. The choice of materials greatly influences the overall comfort and durability of the cushions. High-density memory foam, plush padding, and soft synthetic leather are often used to create a luxurious and cozy feel while ensuring long-lasting performance.
Creating the ear cushions involves a series of precise steps. The first step is to accurately measure and cut the foam material according to the dimensions of the headphone cups. This ensures a perfect fit and optimal sound seal. Next, the foam is carefully shaped and contoured to provide maximum comfort and ergonomic support for the ears.
Once the foam is shaped, it is then covered with a layer of synthetic leather or fabric. The choice of cover material depends on factors such as durability, breathability, and aesthetic appeal. The cover is skillfully sewn or bonded to the foam, creating a seamless and visually pleasing finish.
Additionally, some ear cushions may feature padding or extra layers strategically placed to enhance sound isolation and improve bass response. These additional elements are meticulously integrated into the design, taking into account the acoustic properties of the headphones to deliver an outstanding audio experience.
Building the ear cushions is a labor-intensive process that requires precision and attention to detail. The expert craftsmanship involved ensures that every pair of headphones provides a comfortable and immersive listening experience. By combining the right materials, thoughtful design, and skillful construction techniques, the ear cushions play a crucial role in achieving the ultimate audio quality that audiophiles and music lovers desire.
Connecting the Audio Jack
In this section, we will focus on the crucial step of connecting the audio jack in the process of creating your own headphones. By joining the audio jack to the appropriate components, you will enable the transfer of audio signals and ensure the functionality of your headphones.
First and foremost, it is important to identify the specific type of audio jack required for your headphones. Choose a jack that is compatible with your desired audio source, ensuring effective signal transmission. Once you have obtained the appropriate audio jack, carefully examine its structure and identify the different pins involved in the connection process.
Next, using a soldering iron and solder, connect the corresponding wires from your headphone drivers to the appropriate pins on the audio jack. It is crucial to ensure that each wire is securely soldered, avoiding any loose connections that may affect the audio quality or result in intermittent sound. Additionally, consider using insulating materials, such as heat shrink tubing, to protect the soldered connections and provide long-term durability.
After successfully soldering the wires to the audio jack, it is advisable to perform a thorough check to verify the correctness of the connections. Use a multimeter to test for continuity and ensure that each wire is properly connected to its intended pin. Fix any potential issues before proceeding to the final steps of assembling your headphones.
Finally, once you have confirmed the proper connectivity, you can proceed to securely attach the audio jack to the headphone housing. This step involves carefully threading the audio jack through the designated opening and securing it in place using screws or other appropriate fastening methods. Pay attention to the alignment and ensure a snug fit, as this will prevent any strain on the wires or potential damage to the connections.
Now that the audio jack is successfully connected, you are one step closer to completing your homemade headphones. The next section will guide you through the final steps of assembling your headphones and testing their functionality. Stay tuned!
Testing and Final Touches

Once the construction of the headphones is complete, it is crucial to test their functionality and add finishing touches to ensure optimal performance and aesthetics.
Testing the headphones involves evaluating various aspects such as sound quality, volume control, and compatibility with different devices. This can be done by connecting the headphones to a range of audio sources and checking for any distortions or inconsistencies. Additionally, checking the wire connections and ensuring proper insulation will help avoid any potential issues.
Next, the final touches can be added to enhance the overall appearance and comfort of the headphones. This may include attaching cushioned ear pads to provide a comfortable fit, selecting a suitable headband material and design, and ensuring all external components are securely fastened. Paying attention to details such as cable management and adding branding elements can also contribute to the overall aesthetic appeal.
- Perform a thorough sound test on different audio sources to ensure high-quality output.
- Check the wire connections and insulation to prevent any audio interruptions or electrical hazards.
- Attach cushioned ear pads and select a suitable headband material for added comfort.
- Securely fasten all external components and pay attention to cable management.
- Add branding elements or personalize the headphones to reflect individual style.
Only after successfully completing these testing and final touch steps can the headphones be considered ready for use. Taking the time to ensure the functionality and aesthetics of the headphones will result in a superior audio experience and satisfaction for the users.
How to Pair Your Beats Studio Pro Headphones: Step-by-Step Guide
How to Pair Your Beats Studio Pro Headphones: Step-by-Step Guide by Featured Tech 942 views 3 months ago 1 minute, 19 seconds
Connect MULTIPLE Bluetooth headphones to LG OLED TVs EASY, Step by step guide
Connect MULTIPLE Bluetooth headphones to LG OLED TVs EASY, Step by step guide by The Tech Giant 80,854 views 1 year ago 4 minutes, 31 seconds
FAQ
What materials do I need to make headphones?
To make headphones, you will need the following materials: a pair of speaker drivers, a headband, ear pads, a connector jack, wire, solder, and a soldering iron.
Can I use any type of speaker drivers to make headphones?
No, it is recommended to use speaker drivers specifically designed for headphones. These drivers are smaller in size and optimized for close listening, providing better sound quality.
Is soldering necessary to make headphones?
Yes, soldering is an essential step in making headphones as it helps to connect the wires to the speaker drivers and the connector jack securely. It ensures a proper electrical connection for sound transmission.
Can I customize the design of my homemade headphones?
Yes, you can definitely customize the design of your homemade headphones. You can choose different colors for the headband and the ear pads, or even add decorative elements such as stickers or patterns to make them unique and personalized.
Are homemade headphones as good as the ones bought from stores?
The quality of homemade headphones can vary depending on the skills and materials used. While they may not match the high-end performance of expensive branded headphones, with careful construction and quality components, homemade headphones can provide decent sound quality and a satisfying listening experience.
What materials do I need to make headphones?
To make headphones, you will need the following materials: a pair of headphone drivers, a headband, ear cushions, a connector plug, wire, and soldering tools.


