As tablet devices become increasingly integrated into our daily lives, it's essential to explore the myriad of features and functionalities available to enhance their performance. One such feature that can revolutionize your iPad experience is iCloud Drive.
The iCloud Drive service serves as a virtual storage space that enables seamless access to your files and documents across all your Apple devices. It eliminates the need for physical storage solutions and ensures that your data is readily available whenever and wherever you need it.
With iCloud Drive, you can effortlessly back up your essential documents, photos, and media files, safeguarding them from unforeseen events such as device loss or damage. Furthermore, it provides a convenient platform for collaborating with others, allowing you to share files, folders, and projects effortlessly.
Whether you're a student looking to access study materials on the go, a professional juggling multiple projects, or simply someone who values convenience and organization, enabling iCloud Drive on your iPad will undoubtedly elevate your digital experience to new heights.
Step 1: Ensure your iPad's software is up to date

In order to take advantage of the features and functionalities of iCloud Drive on your device, it is essential to make sure that your iPad's software is regularly updated. Keeping your device's software up to date ensures optimal performance, enhanced security, and access to the latest features and improvements.
Updating your iPad's software is a straightforward process that can be done directly on your device. Here's how you can check for and install any available software updates:
- Unlock your iPad and navigate to the Settings app.
- Scroll down and tap on "General."
- Tap on "Software Update." If a new update is available, you will see a notification indicating its availability.
- Tap on "Download and Install" to initiate the update process.
- Follow the on-screen instructions to complete the installation.
Once the software update is successfully installed and your iPad restarts, you can proceed with enabling iCloud Drive and enjoying its seamless integration with your device.
Step 2: Access your Personal Storage
Sign in to your iCloud account
Once you have completed the initial setup process on your iPad and created an Apple ID, the next step is to gain access to your personal cloud storage. This storage is specifically designed for your convenience and allows you to securely store and access your files, documents, and media from anywhere, at any time.
To begin, locate the "Settings" app on your iPad's home screen. This app is represented by a gear icon and is typically found on the first page of your apps. Tap on the "Settings" icon to open the app.
Within the "Settings" menu, navigate to the section that pertains to your Apple ID. This section is usually labeled as "Apple ID" or "iCloud" and can be easily identified by the signature Apple logo. Once you have located this section, tap on it to proceed.
Now, you will be prompted to enter your Apple ID credentials in order to sign in to your iCloud account. Your Apple ID is the email address that you used to create your account. Enter your email address correctly and then proceed to enter your associated password. Make sure to double-check that both the email address and password are accurate before proceeding.
After entering your credentials, tap on the "Sign In" button to securely log in to your iCloud account. Once signed in, you will have full access to your iCloud Drive and all its features, including the ability to store and manage your files, collaborate with others, and ensure the safety of your data through automatic backups.
Now that you have successfully signed in to your iCloud account, you are ready to explore and utilize the various functions and capabilities of iCloud Drive on your iPad.
Note: If you encounter any issues while signing in to your iCloud account, ensure that your internet connection is stable and try again. Additionally, make sure that you have activated iCloud on your device by going to the "iCloud" section in the "Settings" menu and enabling the necessary features.
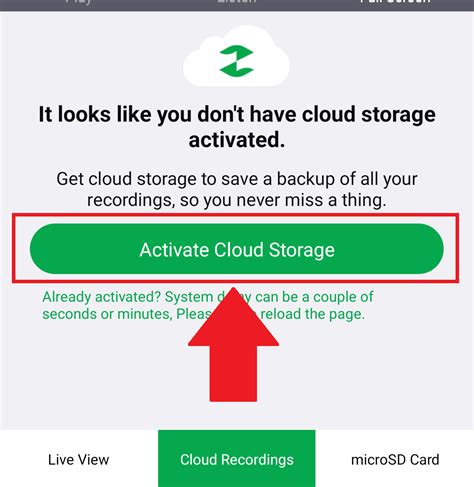
Step 3: Activate Cloud Storage

Now that you have set up your device for seamless synchronization and storage, it's time to activate the power of cloud storage. By enabling the dynamic capabilities of remote storage, you can securely store your files, documents, and important data in a centralized location accessible from any compatible device.
Activating the cloud drive functionality allows you to harness the full potential of this intelligent storage solution. With automatic syncing, your files will always be up to date across all your devices, eliminating the need for manual transfers or the risk of data loss. This secure and reliable platform ensures that your valuable information is protected and readily available whenever you need it, all without taking up precious local storage space.
By following these simple steps, you can enable the remarkable benefits of cloud storage and seamlessly integrate it into your workflow. With the ability to access your files anytime, anywhere, you can enhance your productivity and streamline your digital experience. So let's proceed to the next step and enable the iCloud Drive on your device.
Step 4: Adjust Cloud Storage Settings
In this step, we will explore the options available to customize your cloud storage settings. These settings allow you to tailor your experience by adjusting various aspects related to file storage, synchronization, and privacy.
| Setting | Description |
|---|---|
| Storage Allocation | Allocate the amount of storage space you want to dedicate to iCloud Drive. You can choose from different storage plans depending on your needs. |
| Automatic File Sync | Enable or disable automatic synchronization of files across your devices. When enabled, changes made to files on one device will be reflected on all other devices linked to your iCloud account. |
| App Integration | Manage which apps are allowed to access and store files in iCloud Drive. You can grant or revoke permissions to ensure privacy and control over your data. |
| Optimized Storage | Enable this feature to optimize storage usage on your device. iCloud Drive will automatically remove older, unused files from your device while keeping them accessible in the cloud. |
| File Sharing | Control the ability to share files stored in iCloud Drive with others. You can set permissions and choose whether to allow others to edit or only view your shared files. |
By adjusting these settings, you can customize your iCloud Drive experience to best suit your needs and preferences in terms of storage management, file accessibility, and collaboration.
FAQ
How do I enable iCloud Drive on my iPad?
To enable iCloud Drive on your iPad, go to Settings on your device. Scroll down and tap on your Apple ID at the top of the screen. Select "iCloud," then tap on "iCloud Drive" to turn it on. You can also customize the apps that can access iCloud Drive from this menu.
Can I access iCloud Drive on my iPad without an internet connection?
No, in order to access iCloud Drive on your iPad, you need an internet connection. iCloud Drive is a cloud storage service that stores your files and allows you to access them from any device connected to the internet.
How much storage does iCloud Drive provide on iPad?
The amount of storage you get with iCloud Drive on your iPad depends on the storage plan you have. By default, every Apple ID gets 5GB of free storage. However, you can upgrade to larger plans, such as 50GB, 200GB, or 2TB, if you need more space to store your files.


