Unlock the full potential of your cutting-edge smartphone with a comprehensive guide on configuring your email and ensuring rock-solid password protection. With the rise of digital communication, it is paramount to have a seamless email experience while prioritizing the security of your personal and professional data. This article walks you through the step-by-step process of setting up an email account and creating a robust password on the highly popular iPhone 11 device.
Discover the power of seamless connectivity as you delve into the intricacies of email setup and password management, all tailored specifically to your state-of-the-art iPhone. Unleash your productivity and streamline your digital presence with tips and tricks shared by experts in the field. Gain valuable insights on securing your sensitive information, ensuring that your personal and work-related data never fall into the wrong hands.
The road to a perfectly synchronized email experience begins here. From choosing the perfect email provider to setting up your account effortlessly, this article will equip you with the necessary knowledge to navigate the ever-evolving world of electronic communication. Boost your efficiency and take advantage of the myriad features offered by your iPhone 11, all while keeping your sensitive information safeguarded behind a robust password that cannot be easily compromised.
Setting up Email on Your iPhone 11

In this section, we will explore the step-by-step process of configuring your email account on your iPhone 11, allowing you to stay connected and access your emails conveniently. By following these instructions, you can effortlessly sync your email account with the Mail app on your device.
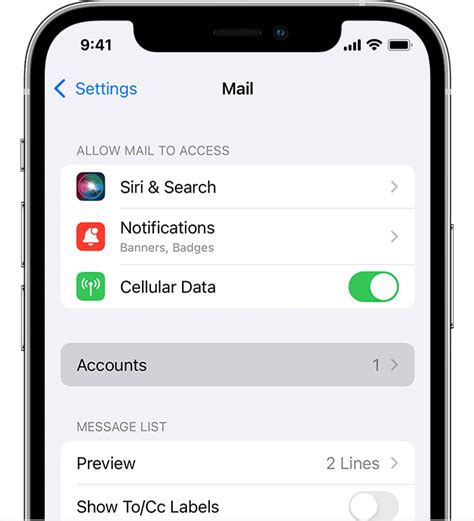
To begin, open the Settings app on your iPhone 11. Look for the Mail option, represented by an envelope icon, and tap on it. Once inside the Mail settings, locate the option for "Accounts" or "Passwords & Accounts" and tap on it.
Next, you will be presented with a list of different email providers. Choose the option that corresponds to your email service provider, such as Gmail, Yahoo, or Outlook. If your email provider is not listed, select the "Other" option instead.
Afterwards, you will need to enter your email address and password in the designated fields. Ensure that you enter the correct details to avoid any login issues. If you have multiple email accounts, tap on the "Add Account" button to set up additional accounts.
Once you have entered your credentials, the Mail app will attempt to connect to your email provider's servers to verify your account. This process may take a moment, so be patient. If the login information is correct, your email account will be successfully added.
After the account is added, you can customize the settings according to your preferences. You can choose how often the Mail app fetches new email, enable or disable notifications for specific mailboxes, and adjust other settings to optimize your email experience.
Finally, return to the home screen of your iPhone 11 and locate the Mail app. You should now see your email account listed, and you can simply tap on it to access your inbox, compose new emails, and manage your email settings.
By following these instructions, you can easily set up your email account on your iPhone 11, ensuring that you can stay connected and manage your emails on the go with ease.
| Summary |
|---|
| In this section, you will learn how to set up your email account on your iPhone 11. We will guide you through the step-by-step process of configuring your email, allowing you to access your messages conveniently. After setting up your email, you can customize various settings according to your preferences for an optimized email experience. |
Step-by-Step Guide to Set Up Your Personal Email Account
In this section, we will provide you with a detailed step-by-step guide on how to configure your personal email account on your device. By following these instructions, you will be able to seamlessly access and manage your emails without any hassle.
Step 1: Accessing Settings
To begin the process, locate and open the device settings on your smartphone. This can be done by selecting the gear icon from the home screen or swiping down and searching for the settings option.
Step 2: Adding Account
Once you have accessed the settings, scroll down and select the "Accounts & Passwords" option. Here, you will find a list of currently added accounts. Tap on the "Add Account" button to proceed with adding your personal email account.
Step 3: Selecting Email Provider
After tapping on the "Add Account" button, you will be presented with a list of popular email service providers such as Gmail, Yahoo, Outlook, etc. Choose your email provider from the list or select the "Other" option if your provider is not listed.
Step 4: Authentication
Enter your email address and password in the provided fields and tap on the "Next" button. Your device will then attempt to authenticate your login credentials and establish a connection with the email server.
Step 5: Account Settings
After successful authentication, you will be redirected to a screen where you can configure various settings related to your email account. This may include options to sync calendar, contacts, or additional customization options based on your email provider.
Step 6: Finalizing Setup
Review the account settings and make any necessary modifications according to your preferences. Once you are satisfied with the settings, tap on the "Save" or "Done" button to complete the configuration process. Your personal email account is now ready to be accessed through the native Mail app on your iPhone.
By following these simple steps, you can easily configure your personal email account on your iPhone and ensure quick and convenient access to your emails on the go.
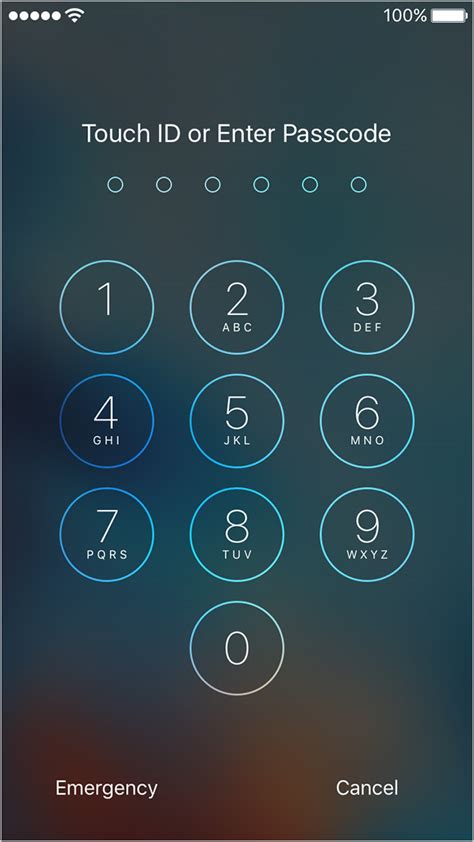
Create a Secure Passcode on Your iPhone 11

Ensuring the safety and privacy of your iPhone 11 is of utmost importance, and one way to achieve this is by creating a strong and unique passcode. In this section, we will guide you through the process of setting up a secure passcode on your device, enhancing the overall security of your personal information.
Securing Your Device with a Robust Security Key
In today's digital age, it is crucial to protect your device with a strong password to ensure the security of your personal data. Implementing easy and effective methods to secure your device will not only prevent unauthorized access but also provide peace of mind.
1. Create a Unique and Unpredictable Password
When setting up a password, it is important to choose a combination of characters that is distinct and hard to guess for potential hackers. Avoid using generic passwords or easily accessible personal information, such as birthdays or addresses. Instead, opt for a mixture of uppercase and lowercase letters, numbers, and symbols to improve the complexity of your password.
2. Enable Two-Factor Authentication
Enhance the security of your device by enabling two-factor authentication. This additional layer of protection requires users to verify their identity through a secondary method, such as a fingerprint scan or a unique code sent to a trusted device. By enabling this feature, you add an extra level of security that significantly reduces the risk of unauthorized access.
3. Regularly Update Your Security Key
It is essential to periodically update your security key to maintain the highest level of protection. This involves changing your password at regular intervals, such as every three to six months. By doing so, you minimize the risk of your password being compromised and increase the overall security of your device.
4. Avoid Using the Same Password for Multiple Accounts
Using the same password for multiple accounts can be dangerous as it allows hackers to access multiple platforms by compromising just one password. To prevent this, create unique passwords for each of your accounts, ensuring that even if one account is compromised, the rest remain secure.
5. Be Mindful of Phishing Attempts
Exercise caution when interacting with emails, messages, or websites that request your personal information. Phishing attempts often masquerade as legitimate sources and can trick users into disclosing their passwords unknowingly. To protect your device, be vigilant and verify the authenticity of any requests before sharing sensitive information.
By following these easy methods to secure your device with a strong password, you can safeguard your personal data and minimize the risk of unauthorized access. Remember, taking proactive steps towards device security is essential in today's interconnected world.
Setting Up Email Accounts on Your iPhone 11

When it comes to managing your email accounts on the iPhone 11, the process of syncing them is crucial for a seamless experience. By syncing your email accounts, you can ensure that all your messages are readily available and up to date on your device, making it convenient to stay connected and organized. In this section, we will explore how to sync your email accounts on your iPhone 11 and ensure that you never miss an important message.
- Open the Settings app: To begin, locate and tap on the Settings app on your iPhone 11's home screen. This app allows you to customize various settings on your device.
- Select "Mail": Within the Settings menu, scroll down and tap on the "Mail" option. This section contains all the settings related to your email accounts.
- Tap on "Accounts": In the Mail settings, you will find the "Accounts" section. This is where you can manage and sync your email accounts on your iPhone 11.
- Add an account: To sync a new email account, tap on the "Add Account" button. You will be presented with a list of popular email providers, such as Gmail, Yahoo, and Outlook. Alternatively, you can choose the "Other" option to add an email account from a different provider.
- Enter your account details: Depending on the email provider you select, you will be prompted to enter your email address, password, and other account details. Provide the necessary information accurately to ensure successful syncing of your email account.
- Enable syncing options: After entering your account details, you will have the option to enable or disable various syncing options, such as contacts, calendars, and notes. Toggle these options according to your preference and tap on "Save" to proceed.
- Repeat for other accounts: If you have multiple email accounts that you want to sync on your iPhone 11, repeat the previous steps for each account.
By following these simple steps, you can easily sync your email accounts on the iPhone 11 and enjoy uninterrupted access to your emails. Remember to double-check your account settings and ensure a stable internet connection to ensure smooth syncing of your email accounts.
Effortless Ways to Manage Multiple Email Accounts on Your Device
In today's interconnected world, it is common for individuals to have multiple email accounts for various purposes. Whether it is for personal use, work, or managing different online platforms, juggling numerous email accounts can be overwhelming. However, with the advancements in technology, accessing and managing multiple email accounts on your device has become effortless and convenient.
Gone are the days when you had to log in and out of different email accounts repeatedly. Modern smartphones, like the iPhone 11, provide seamless ways to streamline the management of multiple email accounts. With a few simple setup steps, you can have all your email accounts accessible in one place, allowing you to stay organized and efficient.
One of the easiest ways to access multiple email accounts on your iPhone 11 is by using the built-in Mail app. This app allows you to add accounts from various email providers, such as Gmail, Outlook, Yahoo, and more. By linking your accounts to the Mail app, you can view and respond to emails from all your accounts without the need to switch between different apps.
Another convenient method is to utilize the "Fetch" feature on your iPhone 11. This feature enables your device to automatically retrieve emails from all your linked accounts at regular intervals. By setting up Fetch, you can ensure that you are always up to date with your emails, whether it's for personal or professional purposes.
Additionally, the iPhone 11 offers the flexibility to customize your email notifications according to your preferences. You can choose to receive alerts for specific accounts, prioritize certain senders, or even set different notification sounds for each account. This level of customization allows you to distinguish between accounts easily and manage your emails efficiently.
In conclusion, managing multiple email accounts on your iPhone 11 is simplified with the advanced features and user-friendly applications available. By taking advantage of the built-in Mail app, utilizing the "Fetch" feature, and customizing your email notifications, you can effortlessly access and stay on top of all your email communication, regardless of the number of accounts you possess.
Customizing Email Notifications on Your iPhone 11

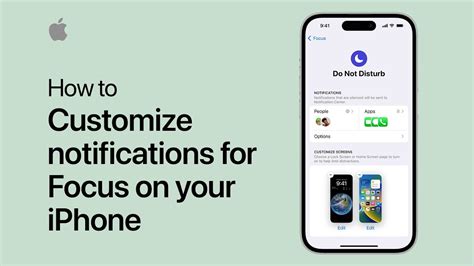
Stay in control of your inbox with the ability to personalize and manage email notifications on your iPhone 11. By customizing these settings, you can ensure that you receive important updates without being overwhelmed by constant alerts. This section will guide you through the process of tailoring your email notifications to suit your preferences.
First, let's explore how to fine-tune the notifications for each email account on your iPhone 11. Whether you have multiple email addresses or just one, you can individually customize the notification settings for each account. This way, you can prioritize emails from certain accounts, while silencing others if necessary.
Next, we will dive into the different options available for email notifications. You'll learn how to adjust sound and vibration settings, choose specific email folders to receive notifications from, and even set up a VIP list to ensure that you never miss important emails from specific contacts.
Additionally, we will discuss how to enable or disable email notifications on a per-app basis. This means that you can choose whether to receive notifications from specific email apps, such as the default Mail app or third-party email clients. By having granular control over app-specific notifications, you can minimize distractions and focus only on the apps that matter most to you.
Finally, we will cover advanced tips and tricks for managing email notifications on your iPhone 11. You'll discover how to set up custom email alerts for different senders, use Do Not Disturb mode to temporarily silence email notifications, and even utilize the new threaded notifications feature introduced in iOS 13 to effortlessly manage email conversations.
With the knowledge and techniques shared in this section, you'll be able to effectively manage your email notifications on your iPhone 11, ensuring that you stay informed without feeling overwhelmed.
How To Set Up An Email Account On iPhone
How To Set Up An Email Account On iPhone by Payette Forward 338,885 views 4 years ago 2 minutes, 32 seconds
How to set up an IMAP / POP email account on the iPhone
How to set up an IMAP / POP email account on the iPhone by Microsoft-Applications-Xpert 56,246 views 3 years ago 3 minutes, 56 seconds
FAQ
Can I use a different email provider on iPhone 11?
Yes, you can use a different email provider on your iPhone 11. The device supports a wide range of email providers, including but not limited to Gmail, Yahoo, Outlook, AOL, and iCloud. To set up a different email provider, go to the Settings app, tap on "Mail" or "Mail, Contacts, Calendars," then select "Add Account" and choose your preferred email provider from the list. Follow the prompts to enter your email address and password, and the account will be added to your device.
Is it possible to have multiple email accounts on iPhone 11?
Yes, it is possible to have multiple email accounts on your iPhone 11. The device allows you to add and manage multiple email accounts simultaneously. To add another email account, go to the Settings app, tap on "Mail" or "Mail, Contacts, Calendars," then select "Add Account." Choose your email provider from the list and enter your email address and password. Repeat these steps for each additional email account you want to add.


