In today's fast-paced digital era, staying connected has become more important than ever. And when it comes to connecting your Mac and iPad, there are numerous possibilities that can enhance your productivity and streamline your workflow. Whether you're a tech-savvy professional or a casual user, this step-by-step guide will walk you through the process, ensuring that you can effortlessly link these two devices together.
Discover the power of integration as you explore the myriad of possibilities that arise when your Mac and iPad join forces. Unleash the potential for collaboration, as these two devices harmoniously work together to create a seamless ecosystem that can revolutionize how you work and play. Harness the power of synchronization, as your files, settings, and applications seamlessly transfer between these devices, making it more convenient and efficient for you to access your data from anywhere, at any time.
Through this comprehensive guide, we will delve into the intricacies of this connection, covering everything from the initial setup process to advanced techniques that can transform the way you use your Mac and iPad. Brace yourself for a journey that will unlock the full potential of your devices and empower you with the tools necessary to navigate the digital landscape with confidence and ease.
Step 1: Make Sure Both Devices Are Connected to the Same Wi-Fi Network

Before you can establish a connection between your Mac and iPad, it is crucial to ensure that both devices are connected to the same Wi-Fi network.
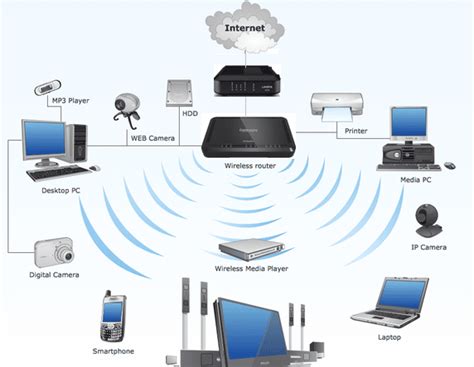
In order for your Mac and iPad to communicate with each other, they need to be on the same network, sharing the same internet connection. This means that they should be connected to the same Wi-Fi network at your home, office, or any other location where you want to connect them.
To check if your devices are on the same network and connected to the same Wi-Fi, follow these steps:
- On your Mac, click on the Wi-Fi icon in the menu bar at the top-right corner of the screen.
- A drop-down menu will appear showing the available Wi-Fi networks. Check if the network name displayed matches the network name on your iPad.
- If the network names match, it means that both devices are connected to the same Wi-Fi network.
- If the network names don't match, select the correct network on either your Mac or iPad to make sure they are connected to the same network.
Keep in mind that both devices need to be within the range of the Wi-Fi network for a stable connection. Once you have confirmed that both your Mac and iPad are on the same Wi-Fi network, you can proceed to the next step to establish the connection between them.
Step 2: Configure Handoff on Your Mac and iPad
Now that you have your Mac and iPad connected, it's time to set up the Handoff feature. Handoff allows you to seamlessly transition your tasks between your Mac and iPad, making it easier and more convenient to work across devices.
First, ensure that both your Mac and iPad are running on the latest version of their respective operating systems. This ensures compatibility and the availability of all the latest features.
Next, open the Settings app on your iPad and navigate to the "General" tab. Look for the "Handoff" option and make sure it is toggled on. This enables Handoff on your iPad and allows it to communicate with your Mac.
Now, move to your Mac and open the System Preferences. Click on the "General" icon and look for the checkbox labeled "Allow Handoff between this Mac and your iCloud devices." Make sure this box is checked to enable Handoff on your Mac.
With Handoff now set up on both your Mac and iPad, you can start taking advantage of its capabilities. For example, you can begin a task on your Mac and seamlessly continue it on your iPad, or vice versa. Simply look for the app icon on the bottom left corner of your iPad's lock screen or on the Dock of your Mac to pick up where you left off.
Remember, Handoff works with a variety of Apple apps, including Safari, Mail, Pages, Keynote, Numbers, Reminders, and more. You can also check for third-party apps that have integrated Handoff into their functionality.
Now that Handoff is set up and ready to go, you can enjoy the convenience of seamlessly switching between your Mac and iPad for a smoother and more efficient workflow. Say goodbye to the hassle of manually transferring tasks and embrace the power of Handoff!
Step 3: Activate iCloud Drive on your Mac and iPad

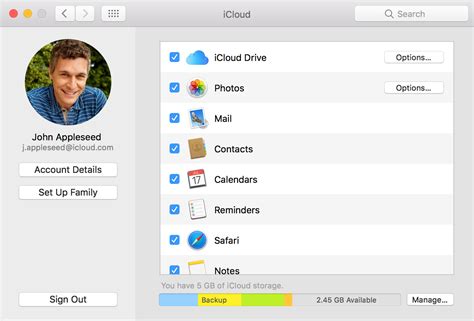
In this step, we will discuss the process of enabling iCloud Drive on both your Mac and iPad devices. By activating iCloud Drive, you can sync and access your files seamlessly across all your Apple devices, allowing for efficient and easy file sharing and collaboration.
To enable iCloud Drive on your Mac, follow these simple steps:
| Step 1 | Open the System Preferences on your Mac. |
| Step 2 | Click on the "Apple ID" icon. |
| Step 3 | Select the "iCloud" option. |
| Step 4 | Check the box next to "iCloud Drive" to activate it. |
Now that you have enabled iCloud Drive on your Mac, let's move on to activating it on your iPad:
| Step 1 | Open the "Settings" app on your iPad. |
| Step 2 | Tap on your Apple ID at the top of the menu. |
| Step 3 | Select the "iCloud" option. |
| Step 4 | Toggle the switch next to "iCloud Drive" to turn it on. |
Once you have completed these steps on both your Mac and iPad, iCloud Drive will be successfully enabled, and your files will be seamlessly synchronized between the two devices. This will allow you to access and work on your files from either device, ensuring that you have the most up-to-date information at all times.
Step 4: Synchronize Your Contacts, Calendars, and Reminders
Once you have successfully established a connection between your Mac and iPad, it is essential to sync and merge your essential information seamlessly. In this step, we will guide you through the process of synchronizing your important contacts, calendars, and reminders between your Mac and iPad devices.
Synchronized Contacts
One of the primary benefits of connecting your Mac and iPad is the ability to have consistent and up-to-date contact information across both devices. By synchronizing your contacts, you can ensure that any changes, additions, or deletions made on one device will reflect on the other device automatically.
Synchronized Calendars
Syncing your calendars between your Mac and iPad allows you to stay organized and keep track of your schedule effortlessly. By synchronizing your calendars, you can easily view and manage events, appointments, and important dates from either device, ensuring that you never miss any important engagements.
Synchronized Reminders
With the synchronization of reminders, you can have a unified system for organizing and managing your to-do lists, tasks, and deadlines. By syncing your reminders between your Mac and iPad, you can create, edit, and check off tasks seamlessly, ensuring that you stay on top of your responsibilities no matter which device you are using.
Now that you understand the importance of synchronizing your contacts, calendars, and reminders, let's move on to the next step and discover how to carry out this synchronization process efficiently.
Step 5: Utilize AirDrop to Share Files Between Your Mac and iPad

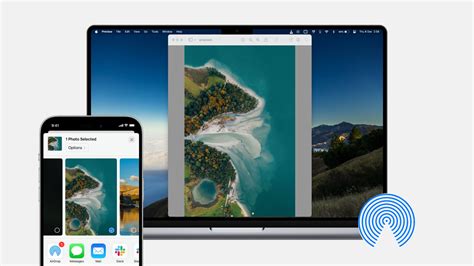
As you continue your journey of connecting and syncing your Mac and iPad, step 5 focuses on harnessing the power of AirDrop to seamlessly share files between these two devices. AirDrop is a convenient and secure feature that allows you to transfer various types of content, such as photos, videos, documents, and more, without the need for a physical connection or external software.
1. Enable AirDrop on your Mac
Before you can begin sharing files, you need to ensure that AirDrop is enabled on your Mac. To do this, navigate to the Finder and click on "Go" in the menu bar. From the dropdown menu, select "AirDrop" and a new window will open. In the AirDrop window, make sure the "Allow me to be discovered by" setting is set to "Everyone" or "Contacts Only" depending on your preferences.
2. Enable AirDrop on your iPad
Similarly, you'll need to enable AirDrop on your iPad to establish a connection with your Mac. Unlock your iPad and swipe down from the top right corner of the screen to open the Control Center. Tap on the "AirDrop" icon and select the desired visibility option - "Everyone" or "Contacts Only".
3. Share files between devices using AirDrop
Once AirDrop is enabled on both devices, you're ready to share files effortlessly. Open the file or content you wish to share on your Mac and right-click on it. From the context menu, choose "Share" and then "AirDrop". A list of available devices will appear, including your iPad. Click on your iPad's name, and the file will be sent to your iPad almost instantaneously.
Note: It is important to keep both your Mac and iPad in close proximity to ensure a stable connection during the file transfer process.
4. Access shared files on your iPad
Once the file transfer is complete, you can access the shared file on your iPad. Depending on the type of file received, it will be saved in the corresponding app (e.g., photos in the Photos app, documents in the Files app). Open the relevant app on your iPad to view and work with the transferred content.
With AirDrop, sharing files between your Mac and iPad has never been easier. Take advantage of this seamless feature to transfer data wirelessly and streamline your workflow.
Step 6: Reflect Your Mac's Display on Your iPad
In this step, we will explore the process of mirroring your Mac's screen onto your iPad. By doing this, you can effortlessly view and control your Mac's display directly from your iPad, providing a convenient and seamless experience.
Section 7: Take Control of Your Mac with Your iPad

Once you have successfully connected your iPad to your Mac, you can go beyond the basic features and take control of your Mac using your iPad. With this seamless integration, you can access and control your Mac's functions and applications directly from your iPad, enhancing your productivity and convenience.
There are several ways to control your Mac from your iPad, depending on your preferences and needs. Here are some options to consider:
- Remote Desktop Apps: You can install remote desktop apps on both your Mac and iPad, which allows you to view and control your Mac's desktop from your iPad. These apps provide a rich user experience, enabling you to use your Mac's software and perform tasks remotely.
- Bluetooth Keyboard and Mouse: If you prefer a more tactile experience, you can connect a Bluetooth keyboard and mouse to your iPad and use them to control your Mac. This setup provides a traditional input method and allows you to navigate and interact with your Mac's interface seamlessly.
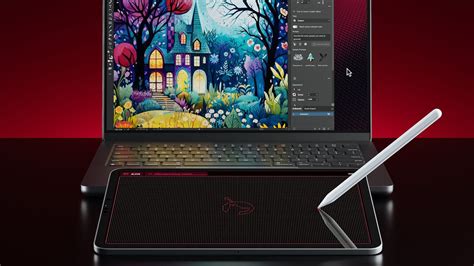
- iPad as a Trackpad: Another option is using your iPad as a trackpad for your Mac. By enabling the trackpad functionality on your iPad, you can manipulate the cursor on your Mac's screen by moving your fingers on the iPad's touch-sensitive surface.
- Gesture-Based Controls: iOS offers a range of gesture-based controls that can be used to control your Mac. You can enable these controls on your iPad and use gestures such as swiping, pinching, and tapping to perform various actions on your Mac, including switching between applications, closing windows, and accessing menus.
- Voice Control: If you prefer a hands-free experience, you can use voice control features on your iPad to operate your Mac. Voice commands can be used to launch applications, open files, adjust settings, and perform various other tasks on your Mac without the need for physical interaction.
Experiment with these different methods of controlling your Mac using your iPad to find the one that suits your preferences and workflow. By harnessing the power of this integration, you can truly make the most of your Apple ecosystem and maximize your productivity.
Step 8: Take Advantage of Continuity Camera to Capture Images on Your iPad and Directly Insert Them into Your Mac
Once your Mac and iPad are seamlessly connected, you can leverage the power of Continuity Camera to effortlessly capture photos using your iPad and instantly insert them into documents or projects on your Mac. This seamless integration eliminates the need for transferring images manually and streamlines your workflow.
Continuity Camera allows you to take photos directly from your iPad and have them appear instantly on your Mac, without any cumbersome steps in between. Whether you need to insert a photo into a presentation, a report, or any other document, this feature makes it quick and convenient.
- To utilize Continuity Camera, begin by opening a compatible application on your Mac, such as Pages, Keynote, or Numbers.
- In the application, position your cursor at the desired location where you want to insert the photo.
- Then, right-click or control-click on the location to access the contextual menu.
- From the menu, select the "Insert from your iPad" option.
- Your iPad will now display a live camera view, allowing you to capture a photo.
- Tap the on-screen capture button to take a photo.
- Once captured, the photo will automatically be inserted into the document on your Mac at the selected location.
This seamless integration provided by Continuity Camera makes it incredibly convenient to capture photos on your iPad and efficiently incorporate them into your Mac workflow. Whether you are working on a professional project or a personal document, this feature saves you time and enhances your productivity.
Troubleshooting Tips for Establishing a Connection between your Mac and iPad

While connecting your Mac and iPad can be a straightforward process, there may be instances where you encounter difficulties when attempting to establish a connection. In this section, we will discuss various troubleshooting tips to help resolve common issues and ensure a successful connection between your devices.
- Verify Wi-Fi Connectivity: Before troubleshooting any connection problems, ensure that both your Mac and iPad are properly connected to a stable Wi-Fi network. Inconsistent or weak Wi-Fi signals can often disrupt the connection between your devices.
- Restart Devices: Sometimes, a simple restart can resolve connection issues. Begin by restarting both your Mac and iPad, as this can often clear any temporary glitches that may be affecting the connection.
- Update Operating Systems: Outdated software can sometimes cause compatibility issues between devices. Check for any available updates for both your Mac and iPad, and install them if necessary.
- Reset Network Settings: If you are still experiencing connection problems, resetting network settings on both your Mac and iPad can be helpful. Go to the Network settings on each device and choose the option to reset network settings, then attempt to establish the connection again.
- Disable Firewall and Security Software: Firewalls and security software on your Mac may inadvertently block the connection with your iPad. Temporarily disable such software and check if the connection is established successfully.
- Use a Different Cable or Port: If you are connecting your Mac and iPad using a cable, try using a different cable or port. Faulty cables or ports can hinder the connection process.
- Remove and Re-pair Bluetooth Devices: If you are using Bluetooth to connect your Mac and iPad, remove the devices from each other's Bluetooth settings and re-pair them. This can often resolve Bluetooth connection issues.
- Check AirDrop Settings: If you are specifically trying to use AirDrop to connect your Mac and iPad, make sure that AirDrop is enabled on both devices and that they are within close proximity to each other.
- Consult Official Support: If you have tried all the troubleshooting steps and are still unable to establish a connection, it is advisable to seek support from the official Apple support channels or consult relevant documentation for further assistance.
By following these troubleshooting tips, you can tackle common connection issues between your Mac and iPad and enjoy a seamless and efficient experience across your Apple devices.
[MOVIES] [/MOVIES] [/MOVIES_ENABLED]FAQ
How can I connect my Mac and iPad?
You can connect your Mac and iPad using various methods such as using a USB cable, Wi-Fi, or Bluetooth.
Is it necessary to have the latest versions of macOS and iPadOS to connect them?
It is recommended to have the latest versions of macOS and iPadOS to ensure compatibility and access to all the latest features. However, older versions may still work with limited functionality.
Can I transfer files between my Mac and iPad after connecting them?
Yes, you can transfer files between your Mac and iPad by either using AirDrop, iCloud Drive, or by connecting them with a USB cable and using iTunes.
Are there any specific settings I need to change on my Mac or iPad to establish a connection?
For Wi-Fi or Bluetooth connection, you may need to enable the respective settings on both your Mac and iPad. Additionally, for USB connection, you may need to unlock your iPad and trust the connected Mac.


