Are you a web developer or an enthusiast looking to build and test Joomla websites locally on your Windows 10 machine? In this article, we will guide you through the process of configuring Docker and phpMyAdmin to create an ideal environment for accessing and managing your Joomla projects.
To begin, let's explore the concept of utilizing Docker, a popular platform for creating, deploying, and running applications using containers. By taking advantage of containerization technology, Docker allows developers to package an application along with its dependencies, libraries, and settings into a single container, eliminating the need for complex installations and configurations.
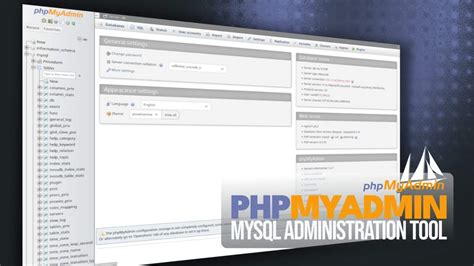
Next, let's delve into phpMyAdmin, a user-friendly web-based interface widely used for administrating MySQL and MariaDB databases. With phpMyAdmin, you can easily manage your Joomla database, execute SQL queries, import and export data, and perform various other tasks seamlessly.
Now, it's time to bring all of these components together - Docker, phpMyAdmin, and Joomla - to create a local environment on your Windows 10 machine. By properly configuring Docker and integrating phpMyAdmin into the setup, you'll have a powerful infrastructure that allows you to effortlessly access, develop, and test your Joomla projects.
Overview of Docker and its Advantages

In this section, we will explore the concept of Docker and elaborate on its numerous benefits in software development and deployment.
Software containerization has become an integral part of modern application development and deployment. Docker, a popular open-source platform, provides a flexible and efficient way to package, distribute, and run applications in isolated environments called containers.
Docker containers allow developers to package an application and all its dependencies into a single unit, ensuring that it runs consistently across different environments. By encapsulating the application, libraries, and configurations within a container, Docker enables seamless portability and eliminates the challenges of dealing with software compatibility and environmental inconsistencies.
The benefits of Docker are numerous and diverse. Firstly, Docker allows for faster and more efficient development cycles. With its lightweight and isolated containers, developers can quickly set up and tear down environments, enabling rapid testing and deployment. This accelerates the development process, promotes collaboration, and reduces the time required for debugging and troubleshooting.
Docker also enables scalability and resource optimization. The ability to scale applications across multiple containers ensures efficient utilization of system resources, allowing for high availability and improved performance. Docker's container-based architecture ensures that the resources allocated to each application can be easily adjusted, offering flexibility and cost savings.
Security and isolation are paramount in modern software systems, and Docker addresses these concerns adeptly. With its containerization approach, Docker isolates applications from the underlying infrastructure, reducing the risk of dependency conflicts and unauthorized access. Additionally, Docker provides control over resource allocation and utilization, minimizing the impact of potential security breaches.
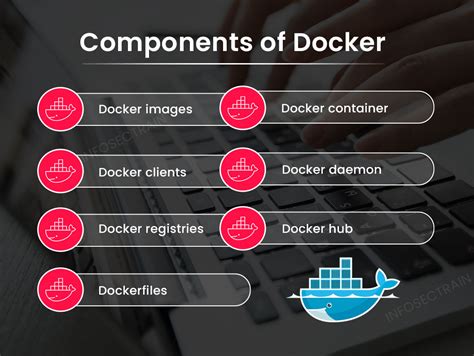
Finally, Docker facilitates a consistent and reproducible development and deployment environment. By defining the application's environment using Dockerfiles and container images, developers can ensure that the software runs consistently across different stages of the development lifecycle and on various platforms. This results in fewer deployment issues and easier collaboration between teams.
In summary, Docker revolutionizes the development and deployment process by providing a consistent, flexible, and efficient platform for software containerization. Its advantages range from accelerated development cycles and scalability to enhanced security and reproducibility. By utilizing Docker, organizations can streamline their software development practices and deliver applications more reliably.
Setting up Docker Environment on Windows 10
In this section, we will discuss the process of configuring a Docker environment on a Windows 10 operating system. Docker is a widely used platform that allows you to create, deploy, and run applications using containerization.
Firstly, it is important to ensure that your Windows 10 system meets the necessary requirements for running Docker. This includes having a compatible version of Windows 10, enabling virtualization in BIOS settings, and having sufficient disk space.
Once the requirements are met, the next step is to download and install Docker for Windows. Docker provides a straightforward installation package that includes all the necessary components for running Docker containers on Windows 10.
After the installation, Docker can be accessed through the Docker Desktop application. This application provides a user-friendly interface for managing Docker containers, images, and networks. It also allows you to configure various settings, such as resource allocation and network preferences.
Configuring Docker on Windows 10 involves setting up networking, specifying storage options, and managing container resources. Docker provides extensive documentation and guides on these topics, making it easier to tailor the Docker environment to your specific needs.
Once Docker is successfully configured on your Windows 10 machine, you can start creating and running Docker containers. These containers can be used to run various applications and services, providing a lightweight and scalable solution for development and deployment.
Overall, setting up Docker on Windows 10 allows you to leverage the benefits of containerization, enabling efficient and isolated application deployment. With Docker, you can easily manage multiple environments, isolate dependencies, and streamline your development workflow.
| Advantages of Docker on Windows 10: |
|---|
| Flexibility in deploying applications |
| Isolation of dependencies |
| Scalability and resource efficiency |
| Improved development workflow |
A Step-by-Step Guide to Install Docker on Windows 10

Are you looking to set up Docker on your Windows 10 system? This step-by-step guide will walk you through the process, providing detailed instructions and tips to ensure a successful installation.
- Check system requirements: Before diving into the installation process, make sure your Windows 10 system meets the necessary requirements. Ensure that you have a compatible version of Windows 10 and sufficient system resources, including disk space and memory.
- Download Docker: Head over to the official Docker website and locate the Windows version of Docker. Click on the download link and save the installer file to your preferred location on your computer.
- Run the installer: Once the download is complete, navigate to the location where you saved the installer file. Double-click on the file to launch the Docker installation wizard. Follow the on-screen instructions, accepting the default settings unless you have specific preferences or requirements.
- Configure Docker settings: After the installation is complete, you may need to configure some settings to optimize Docker's performance and functionality. Access the Docker settings menu and explore various options such as resource allocation, network settings, and access controls. Customize these settings based on your needs and preferences.
- Test Docker installation: To ensure that Docker has been successfully installed on your Windows 10 system, you can perform a quick test. Open a command prompt or PowerShell window and enter the command
docker --version. If Docker is correctly installed, the command should display the version number of Docker installed on your system. - Start using Docker: Now that Docker is set up on your Windows 10 machine, you can start utilizing its powerful features and benefits. Explore Docker's vast library of pre-built images and containers, or create your own customized containers for various applications and projects.
By following these step-by-step instructions, you can easily install Docker on your Windows 10 system and begin leveraging the benefits of containerization technology. Enjoy the flexibility, scalability, and efficiency that Docker brings to your development environment.
Configuration of phpMyAdmin for Docker
In this section, we will explore the steps involved in setting up and optimizing the configuration of phpMyAdmin within a Docker environment. By configuring phpMyAdmin, users can enhance their experience by managing MySQL databases efficiently and securely.
Optimizing phpMyAdmin Configuration
Before diving into the configuration process, it is important to understand the different options and settings available in phpMyAdmin. By optimizing the configuration, users can customize phpMyAdmin to meet their specific needs, enhance performance, and improve security.
Authentication and Security:
One crucial aspect of phpMyAdmin configuration is ensuring proper authentication and security measures. By enabling authentication plugins, users can authenticate themselves using various methods such as passwords, cookie-based authentication, or OAuth. Setting up SSL/TLS encryption can further enhance security by encrypting data transmitted between the client and the phpMyAdmin server.
Managing Server Connections:
Configuring server connections in phpMyAdmin allows users to connect to multiple MySQL servers and manage them simultaneously. By specifying the host, port, and authentication details for each server, phpMyAdmin makes it easier to switch between different databases and perform tasks seamlessly.
Customizing Interface and Features:
PhpMyAdmin offers a range of configuration options to customize the interface and enable or disable features. Users can personalize the appearance by selecting a theme, changing language settings, or modifying the layout. Additionally, phpMyAdmin provides options to enable or disable certain features like importing or exporting databases, executing SQL queries, or browsing server variables.
Conclusion
Optimizing the configuration of phpMyAdmin for Docker can greatly enhance the user experience and improve efficiency in managing MySQL databases. By implementing proper authentication and security measures, managing server connections, and customizing the interface and features, users can tailor phpMyAdmin to their specific requirements, making it a powerful tool for database management.
Instructions to Set Up phpMyAdmin Container for Local Access

In this section, we will go over the step-by-step process of configuring phpMyAdmin as a container for accessing a locally hosted website. By following these instructions, you will be able to easily manage your website's database using the user-friendly interface of phpMyAdmin, without the need for complex setups or installations.
Step 1: Downloading and Installing Docker
Before getting started with configuring phpMyAdmin, ensure that you have Docker installed on your Windows 10 machine. Docker provides a platform for developers to package, distribute, and run applications in a consistent manner across different environments. Download Docker from the official website, and follow the instructions provided for Windows installation.
Step 2: Creating a Docker Container for phpMyAdmin
Once Docker is installed, you can proceed to create a container for phpMyAdmin. Using Docker's command-line interface, execute the appropriate commands to pull the phpMyAdmin image from the official Docker Hub repository and create a new container instance. Customize the container settings as per your requirements, such as specifying the container name, port mappings, and environment variables.
Step 3: Configuring phpMyAdmin Container for Local Access
After the container is created, you need to configure it to allow local access to phpMyAdmin. This involves binding the container's port to a port on your Windows 10 machine, allowing you to access phpMyAdmin through your preferred web browser. Additionally, you may need to set up authentication credentials and adjust other phpMyAdmin settings to suit your needs.
Step 4: Testing Local Access to phpMyAdmin
To verify that the configuration is successful, open your web browser and enter the appropriate URL to access phpMyAdmin. If everything is set up correctly, you should be able to log in to phpMyAdmin and view the databases associated with your locally hosted website. Ensure that you perform any necessary tests and checks to ensure smooth access and functionality.
Step 5: Managing the Local Joomla Website's Database
With phpMyAdmin configured as a container for local access, you now have the ability to manage the database of your Joomla website effortlessly. Use the intuitive interface of phpMyAdmin to perform tasks such as creating, modifying, and deleting databases, tables, and records. Make sure to follow best practices for database management to ensure the smooth operation of your Joomla site.
Connecting Joomla to Docker phpMyAdmin
In this section, we will discuss the process of establishing a connection between the Joomla CMS and the phpMyAdmin tool running in a Docker environment. By utilizing this connection, users will be able to conveniently manage the Joomla database by accessing it through the phpMyAdmin interface.
Step 1: First, ensure that the Joomla CMS and phpMyAdmin Docker containers are running successfully on your Windows 10 operating system. Step 2: Next, identify the IP address assigned to the phpMyAdmin Docker container. This IP address will be used to establish the connection between Joomla and phpMyAdmin. Step 3: Open the Joomla administration panel and navigate to the database configuration settings. | Step 4: In the database configuration settings, locate the section where the database server/host is specified. Instead of using the default localhost or 127.0.0.1, enter the IP address of the phpMyAdmin Docker container. Step 5: Provide the appropriate username and password for accessing the Joomla database. Step 6: Save the changes and perform a database connectivity test to ensure that the connection between Joomla and phpMyAdmin is successfully established. |
By following these steps, you can seamlessly connect and manage the Joomla database using the phpMyAdmin tool in the Docker environment. This connection allows for efficient and convenient database management, enhancing the overall Joomla CMS experience.
[MOVIES] [/MOVIES] [/MOVIES_ENABLED]FAQ
What is Docker?
Docker is an open-source platform that allows you to automate the deployment, scaling, and management of applications using containerization.
Why would I need to use Docker for phpMyAdmin and Joomla?
Docker allows you to create isolated environments for your applications, making it easier to manage dependencies and configurations. By using Docker for phpMyAdmin and Joomla, you can ensure that your local development environment matches the production environment without any conflicts.
Can I use Docker for accessing Joomla remotely?
Yes, you can use Docker to access Joomla remotely by configuring the container ports and network settings accordingly. However, it is important to ensure proper security measures are in place to prevent unauthorized access.
Are there any alternative tools to Docker for managing phpMyAdmin and Joomla?
Yes, there are alternative tools such as Vagrant, XAMPP, and WampServer that can be used for managing phpMyAdmin and Joomla on Windows 10. These tools provide similar functionality but may have different setups and configurations.
What is Docker?
Docker is an open-source platform that allows developers to automate the deployment of applications inside lightweight, portable containers. These containers consist of all the necessary software, libraries, and configurations required to run the application. Docker provides a standardized way to package and distribute applications, making it easier to deploy and scale them across different environments.
Why would I need to configure Docker phpmyadmin for accessing Joomla on Windows 10?
When working with Joomla, which is a popular content management system, it is often necessary to manage the underlying database. Docker provides an easy way to deploy and manage the infrastructure required for running Joomla, including the database server. By configuring Docker phpmyadmin, you can conveniently access and manage the Joomla database locally on your Windows 10 machine.


